started on my doors this week
Re: started on my doors this week
no they have been out of production for a while now. I have an old set that some of the black-chrome has worn off of from not cleaning after handling.
what else can I say I am a grumpy asshole most of the time.

started on my doors this week
Nice. I also like the terminals.
Re: started on my doors this week
I liked them soo much I had to modify the batter terminals on the small battery to be able to use them. It didn't come with the screw-in terminals it just had a bolt that you can slap a ring terminal on with. I got a 2nd set of screw-in terminals and cut the larger bolt off. Drilled a hole through them and then tapped them for the smaller bolt about half way up. I tightened the bolt up as much as I could with a nut on it as well so that the bolt is driven up into the untapped section so that it will make a good solid contact as well as lock it into place. Then I cut off the bolt head and then took the nut off to make sure the threads were still good.
Its kinda funny lookin because those terminals are HUGE and teh battery is tiny so they almost cover half of the top of the battery. Still worth it....
Its kinda funny lookin because those terminals are HUGE and teh battery is tiny so they almost cover half of the top of the battery. Still worth it....
what else can I say I am a grumpy asshole most of the time.
Re: started on my doors this week
starter battery mounting - finished up the starter battery mount today. I thought it would be the easy part but it had its own challenges I had to get around. I wanted to show as much of the battery as I could and needed to work around the tank-fill on the pass side. I finally decided to put it on its side and then made a tray for the bottom like I did on the big one. With the bottom mounted down then I just needed to figure out how to get all the sides of the top mounted down. With the small size of the battery and the big terminals I didn't want a strap across the front like on the bigger one. I got around that by monting the bracket to the negative battery terminal and using that as a mounting point. It will act as a ground for the battery so I kept the back and the area of the front that touches the terminal raw, but painted the rest black. It gives SUPER solid mounting point while not sticking much at all, and will help the ground as well so win/win/win.

The larger/fancier battery terminals I insisted on using were so big that the positive terminal was close to grounding out on the tray, as well as just rubbing the floor. I got around this by cutting two pieces of 1/2" mdf the same size as the tray, glued them together and then mounted the tray through the wood to the floor. To keep it from grounding out to the tray I used some door-edge-guard strips to insulate the edges of the tray. I also had to trim a little of the body support that the back-side is mounted too in order to get it back a little further. I put some of the left-over door trim on it to give the battery a soft area to lean aginst and it keep the battery from moving forward

The majority of this mount was carpeted. With one bolt up front, one in the back, and mounted to the negative terminal it makes for a super solid mount.

Finally the big/fancy terminals are mounted with all the wiring again covered and labeled.

Comments and critisism is welcomed.
The larger/fancier battery terminals I insisted on using were so big that the positive terminal was close to grounding out on the tray, as well as just rubbing the floor. I got around this by cutting two pieces of 1/2" mdf the same size as the tray, glued them together and then mounted the tray through the wood to the floor. To keep it from grounding out to the tray I used some door-edge-guard strips to insulate the edges of the tray. I also had to trim a little of the body support that the back-side is mounted too in order to get it back a little further. I put some of the left-over door trim on it to give the battery a soft area to lean aginst and it keep the battery from moving forward
The majority of this mount was carpeted. With one bolt up front, one in the back, and mounted to the negative terminal it makes for a super solid mount.
Finally the big/fancy terminals are mounted with all the wiring again covered and labeled.
Comments and critisism is welcomed.
what else can I say I am a grumpy asshole most of the time.

Re: started on my doors this week
looking good i might not have used carpet to hide the metal but it will work
most of my gear is gone :liar:
2020 honda accord sport
2020 honda accord sport
Re: started on my doors this week
screw car audio, I'd rather go fast....errr, wait a minute.
Re: started on my doors this week
its not there for cosmetics and will not bee seen in the end. Originally I used it on the big battery to keep from shorting out the battery terminals while putting the upper mount in place. After I did that though I realized how much better of a fit it had and carried it over to the smaller battery for the snug fit. I thought about using a rubberized under-coating spray or possibly that crap you can coat the handles of your tools with to insulate them but all of that would have just eventually wore off onto the battery with the tight fit.
The front of the big battery and the front of the terminals will be visable through the plexi window that will be infront of it but anything further back from taht will be hard to see. The small batter only the front will be shown which is why I painted the part of the mount that shows black so that it would not be seen.
The front of the big battery and the front of the terminals will be visable through the plexi window that will be infront of it but anything further back from taht will be hard to see. The small batter only the front will be shown which is why I painted the part of the mount that shows black so that it would not be seen.
what else can I say I am a grumpy asshole most of the time.
Re: started on my doors this week
now that the batteries are mounted it was time to work a little more on the power-side display. The drivers side of where the back seat use to be is where I am mounting the dist blocks and power accesories to make a nice display of them all. Its getting pretty busy there because I am basically trying to put 10lbs in a 5 lb sack but I think it will all still fit by layering them.
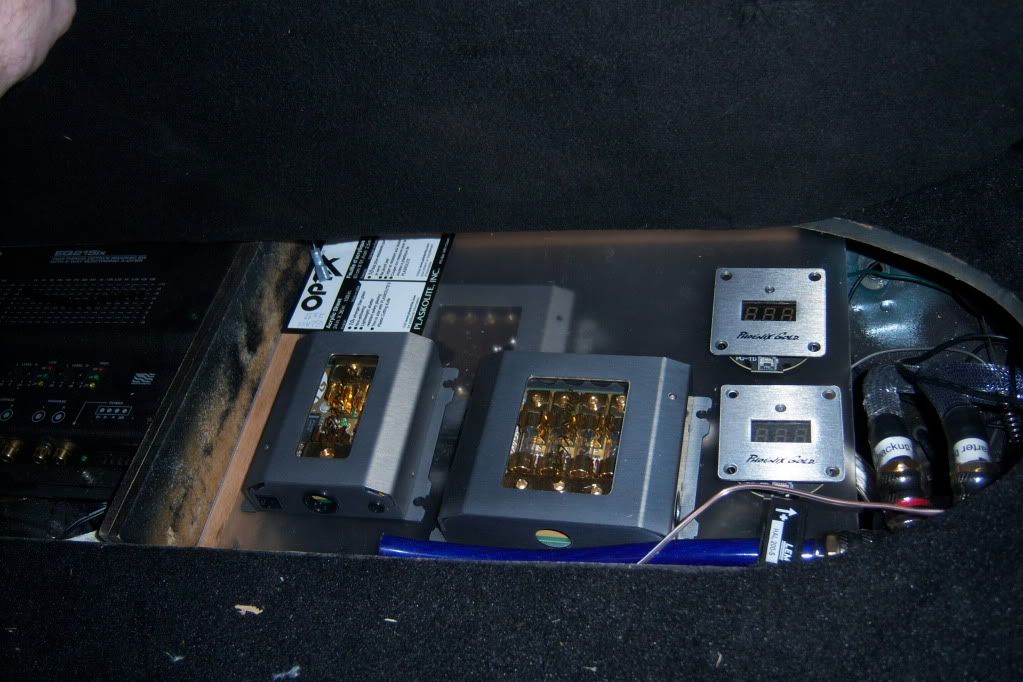
Forgive the hazy-ness of the plexi but I am not ready to pull the protective plastic off while still in mach-up. On the bottom is the ground dist block. IT will not need to be accessed after everything is done unless I add some gear later so I put it on the bottom. I am going to try to put 4 R-links next to it later on that will be stacked at a 30-45 degree angle so that you can see the top of them and the leds. Above all that is the fused dist blocks and the RMD's that will show each batteries voltage. The idea is that they will hopefully look like they are floating on top of the ground blocks as well as to maximize the space. I am going to modify the led in the rmds to show when the battery isolating relay is on and they are both connected. One led will be on all the time and when charging the other led will light up as well. Just trying to get the dist blocks done for now so that I can wire up the compressor for the air ride off of it and get that installed.

Also been working on this but would love some opinions. The original ieea was to polish it to a mirrored finish but the more I look at the satin finish the more I seem to like it. What do you guys think polish or satin?
Forgive the hazy-ness of the plexi but I am not ready to pull the protective plastic off while still in mach-up. On the bottom is the ground dist block. IT will not need to be accessed after everything is done unless I add some gear later so I put it on the bottom. I am going to try to put 4 R-links next to it later on that will be stacked at a 30-45 degree angle so that you can see the top of them and the leds. Above all that is the fused dist blocks and the RMD's that will show each batteries voltage. The idea is that they will hopefully look like they are floating on top of the ground blocks as well as to maximize the space. I am going to modify the led in the rmds to show when the battery isolating relay is on and they are both connected. One led will be on all the time and when charging the other led will light up as well. Just trying to get the dist blocks done for now so that I can wire up the compressor for the air ride off of it and get that installed.
Also been working on this but would love some opinions. The original ieea was to polish it to a mirrored finish but the more I look at the satin finish the more I seem to like it. What do you guys think polish or satin?
what else can I say I am a grumpy asshole most of the time.
Re: started on my doors this week
very nice whyt the rmd mounted there? also i would have used a battery strapor something
most of my gear is gone :liar:
2020 honda accord sport
2020 honda accord sport
Re: started on my doors this week
whats a battery strap? The rmd's are going to be showing the voltage of both batteries. The leds in the rmd will show if the relays is activated or not and if they are both connected or just one running
what else can I say I am a grumpy asshole most of the time.
-
Starunit10

- Posts: 308
- Joined: Thu Mar 29, 2012 3:33 pm
- Location: Ont. Canada
Re: started on my doors this week
A battery strap is what holds down some batteries (strap it down) in place, many other forms too, rubber block is the most common other one to hold a battery down. Unless he means a ground strap. Cant wait for the finish pic's to see how it look's. I see you are missing a grommet on your input tab too ! 

Collection Growing..........
Re: started on my doors this week
Made my own strap them outta the 1" aluminum. With the space I had to work in the corners it was going to be hard to find something pre-made that would have worked. The back of the big battery is aginst the tail-light shroud and the front of it is aginst the fender support. The little battery is flanked by the same fender support and on the other side the gas filler neck.
not really missing they are just in a different spot in my room but I still have them all. I clear all my Ti gear to prevent rusting and because I like gloss-clear better so I remove them while spraying.
Also mike the only reason I mounted them there is to make a nice power-side display to show the status of everthing easily. I am not worried about the battery voltage as my gauges can show that and the 5 sdt displays I plan on using will show all the amplifiers voltage/thermal status. I am going to be mounting them and the display for my air-ride in an overhead display that is made to originally go in an explorer the same way I did in my ranger. I am also going to hack the temp sensor in it(already have one in my radar detector for outside temp) so that it will show the 1200.1's temp.
Last edited by ttocs on Tue Jun 26, 2012 2:53 pm, edited 1 time in total.
what else can I say I am a grumpy asshole most of the time.
-
Starunit10
- Posts: 308
- Joined: Thu Mar 29, 2012 3:33 pm
- Location: Ont. Canada
Re: started on my doors this week
I see, that is pretty smart ! hide the easy to lose/ break parts  . You would'nt happen to have any spare 0 grommets 4 sale would you ? I need one and they are proving hard to find ! The hard plastic ones.
Collection Growing..........
Re: started on my doors this week
I am not the kind of dude that collects extra parts - just enough to get by 
ya mean like deeeeeeeeeeeeeeeeeeeeeeeeeeeeeeeeeeees?! Just enough to get by
ya mean like deeeeeeeeeeeeeeeeeeeeeeeeeeeeeeeeeeees?! Just enough to get by
what else can I say I am a grumpy asshole most of the time.
-
Starunit10
- Posts: 308
- Joined: Thu Mar 29, 2012 3:33 pm
- Location: Ont. Canada
Re: started on my doors this week
lol, I hope that can falls over and when you bend down to pick it up, you accidentally kick it to the far end of the room spreading your parts everywhere! Then we'll see about ....gettn by!
Collection Growing..........
Re: started on my doors this week
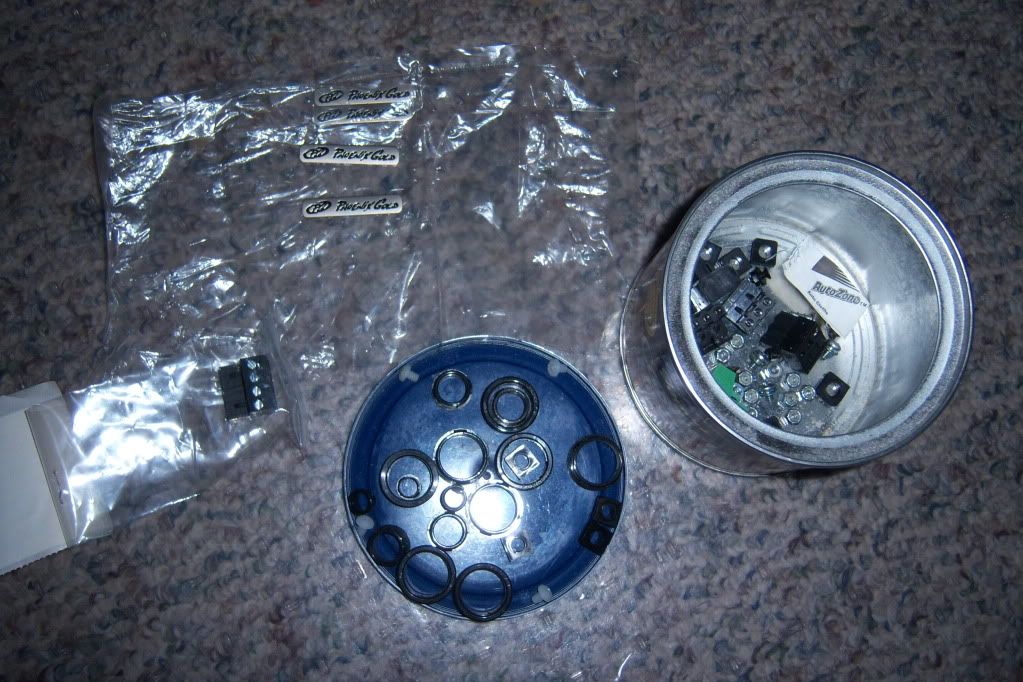
yea I thought you would hate me when I read that comment and looked over at my pile  . Sorry couldn't resist .... I am a little suprised to have 8 of em personally.... I mean I have 6 blocks I am using in the stang but not sure why so many as more then a few of them already have the grommets in them. They are not a huge deal to me and I can probably go with out one er two with out worry as long as you are not needing half a dozen of them.
what else can I say I am a grumpy asshole most of the time.
-
Starunit10
- Posts: 308
- Joined: Thu Mar 29, 2012 3:33 pm
- Location: Ont. Canada
Re: started on my doors this week
Had to double check, Need a 4 ga. not 0, looks like you have 4 in the can, if willing to part with one teenie weenie plastic circle that Sir would be just awsome of you!  . Now, as far as that in take of yours.......you've gone this far to remove all the old covering (belive I saw a pic of it being red), from the picks the "satin" as it looks is not very......I'm gonna say uniform, looks to home made. Polish the hell out of it!!
I run a fleet of trucks and they are all polished top to bottom. and there is no other way to have it, Shinny !
lmk about groumet
I run a fleet of trucks and they are all polished top to bottom. and there is no other way to have it, Shinny !
lmk about groumet
Collection Growing..........
Re: started on my doors this week
progress is slow as I have not felt so great the past few days but..... I am hoping to finish up the air-ride this comming week and then get back on to the stereo but in the mean time I do have this to show. This is the power-side display I made to show off the wires and dist blocks and the isolator relay so it will power the air-ride but was planned for the stereo already. I etched an 1/8" line around each of the componants so that when I edge light the plexi those areas will light up what ever color is lit up. Still need to finish wiring the fused blocks but this gives an idea of what I am doing. The dual RMD's will show each individual batteries voltage if anyone is confused by them.

what else can I say I am a grumpy asshole most of the time.