The speakers themselves are bigger than the stock locations, so it took a bit of "coaxing" with a framing hammer to get the hole to be big enough for them. It was a very ghetto way to do it, but the only way I could think of, given the highly limited space between the speaker mount and my back window.
I bought a couple kits of cheapy Dynamat, and put it around the speaker holes, along the wires, and backside of the amplifier. Also put some extra dynamat chunks in the inside of the subwoofer "enclosures", and did my best to seal them off.


They also use different mounting screw locations. To drill the new ones, I had to get a special flexible drill piece, which lets you drill in the small space. Once pre-drilled, I had to tap the screws in by hand using a 1/4" ratchet driver (screwdriver didn't fit). I tried using the flexible drill piece, but it couldn't handle the torque, so it wrapped around my hand, put a small hole in a speaker, and slashed up the tint on the back window. Oops. Luckily it juuuust missed the antenna, so I can have it retinted later without any more extensive damage.
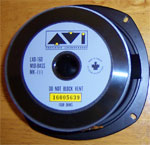
With everything properly dynamatted, the shelf put back together, and the seats up.. Holy fuck, these things are just about as loud as the RSD (louder on higher notes, a bit quieter down low). Keep in mind they are a 4 ohm load rather than the 2 ohm RSD. They don't sound quite as good, and are more stressed to play low notes, but all around an awesome compromise, especially considering they take up zero space. I installed a beefy DPDT switch on the speaker wire, so that if I remove the RSD, I can switch it over to the 6x9's easily.


I recommend these woofers if you have stock rear 6x9 locations, and are willing to cope with the install. It took me about two days to do a proper job (also including running Mastiff's Knuconceptz RCAs and making it all pretty), where I installed a typical subwoofer box in about 15 minutes (route the wire, connect it, done!)

I added a bunch of other pictures to my directory.