Page 5 of 18
Re: momstang rebuild begins.
Posted: Wed Jul 23, 2014 7:17 am
by dwnrodeo
The hood latches looks great! I didn't want to put hood pins in my carbon fiber hood because I thought they'd look too "ricer", but ended up doing it for fear my hood would come unlatched and smash the windshield. Mine are the standard posts with pins and it looks gaudy, but your flush mount latches look awesome!
Re: momstang rebuild begins.
Posted: Wed Jul 23, 2014 1:49 pm
by ttocs
if I had my way and lived in a perfect world there would be no need for them as while the flush mount are smooth I would rather not have/need them. But after seeing enough cars that have had it pop up and with as much as I have into it and the carbon fiber cowl(someday soon I hope) I could not risk it. Today I took off the hoods prop-rod and installed hood struts. Carefully watched it as I closed it all the way to be sure it didn't hit anything or bind up, and then let go of it and it slowly raised itself up and then came to a nice slow stop at the top. GAVE ME A SEMI it was so nice, not sure why I waited to do this.
Trying to figure out a good epoxy to mount the latches with to keep the fasteners from showing. Seems like with the hood being resin and the latch being plastic there should be something that could get a good enough grip to hold it in place. There is an additional removable flange that I could also epoxy on to give it more surface to grip. I would also be able to put the area I had to cut off the back fo the hood in place and smooth out to keep the finished underside looking perfect. All that would show is the two holes for the pins to slide through. Pretty sure it would be as strong as the 6 little screws it recommends to mount it with and the only down side is that it would not be removable, ever.........
Re: momstang rebuild begins.
Posted: Wed Jul 23, 2014 6:14 pm
by ttocs
when I started looking at the aerocatches the only thing I didn't like was that they are plastic. Obviously it should not be an issue but for some reason I just wanted to try and reinforce it a little bit when I found these metal reinforcing cages on ebay. Not sure how good they are but I can't help but think that every little bit helps. When I got them they were bent just a little bit sloppy and the back stood about 1/8" off of the plastic and where I am putting it the space is tight. So I straightened them out, then re-bent them and then modified the mounting flange so that it would go over the reinforcement cage. It leaves a small gap between the removable flange and the mounted one which I like as it will give a little more surface area for the epoxy to hold too and hopefully between all of them it will be solid.

Here is what the bottom of the hood looks like now with the latch in place if anyone was curious about the flush latches. You need to cut a larger hole in the bottom then you do the top to get them in so if you don't like cutting, don't get the flush latches...

Can't leave an unfinished hole on the bottom of the hood but it will not be hard at all to put the plug I cut out back in place and smooth it all in so it looks natural. The hole in the center, after its cleaned up, will be the only difference that will be seen from the bottom.

That is except for the hood struts I added but who is going to miss that prop rod? For some reason I didn't think much of these prior to installing them but watching the hood move up to its open position on its own nice and smooth gave my just as much of a semi as my plan for cutting the holes for the latches working.

I know that pic above still looked a bit sloppy because of the tape that was torn on the edges so I cleaned it up with a knife and got a better pic.

I still need to sand the bottom of the hood around the latch just a little to get it so that it will be perfectly flush with the top but after that it should be nearly perfectly flat. There is a slight curve there that is had to mount a flat piece too but it should be pretty cool imo.
Re: momstang rebuild begins.
Posted: Thu Jul 24, 2014 12:47 pm
by ttocs
did the trimming needed to the backside of the hood and the mounting flange to get them to be completely flush. I could not help but peel the tape off and think to myself "OH HELL YEA!". Love it when a plan comes together and the router worked even better then I could have hoped. Took 10 mins to make the pattern, 10 mins to get it mounted to the hood. If I had cut that by hand it would have probably taken hours of trimming/fitting to get a fit not even this tight. At this point the front/back of the latch is JUST above the hood and the center is even with it so with a little sanding on the latch now it will have the curve of the hood

Also contacted the manf and asked about epoxy and they said that the flush series were designed to be mounted with epoxy and its even a little better because of vibrations. Just spend 30 mins in my hardware store reading all the little writing on the epoxy bottles in the store. You get a great reaction when they come and ask if you need help and you reply, " which one of these give the best buzz and are least likely to leave me glued to something?"
Re: momstang rebuild begins.
Posted: Sat Jul 26, 2014 12:15 pm
by ttocs
filled/finished the back of the hole. The latch fit in the void perfectly and could not have come out any better.

Re: momstang rebuild begins.
Posted: Thu Jul 31, 2014 1:12 pm
by ttocs
I had some requests on another website to show how to cut the holes for the latches so I gave a short instructional on my drive page.
https://driiive.com/ttocs/1994FordMusta ... eline/2989
And so happy to start masking stuff off. I wanted to get the cowl masked off to match the hood even though I hope to replace the cowl with a CF version to match the hood. Still waiting for it to become available but I am told its not too far away. I have to say that putting the lines down was a little fun, almost calming with some good background music and the great weather we have been having. 77 degrees today......... I am going to fade into the green on the center section so its solid a few inches before the first louver and just barely showing at the beginning of the bump. Not looking forward to cleaning out the garage as that will be a mess.

Re: momstang rebuild begins.
Posted: Sun Aug 03, 2014 5:31 pm
by ttocs
after days of cleaning the garage and masking everything off its nice to watch the paint dry now. Started off with some rustproofing and got inside the frame rails with this handy can/cap from eastwood.

Then I went and got the inside of the aprons with por 15 glosscoat. Nice stuff.


Re: momstang rebuild begins.
Posted: Tue Aug 05, 2014 6:59 pm
by ttocs
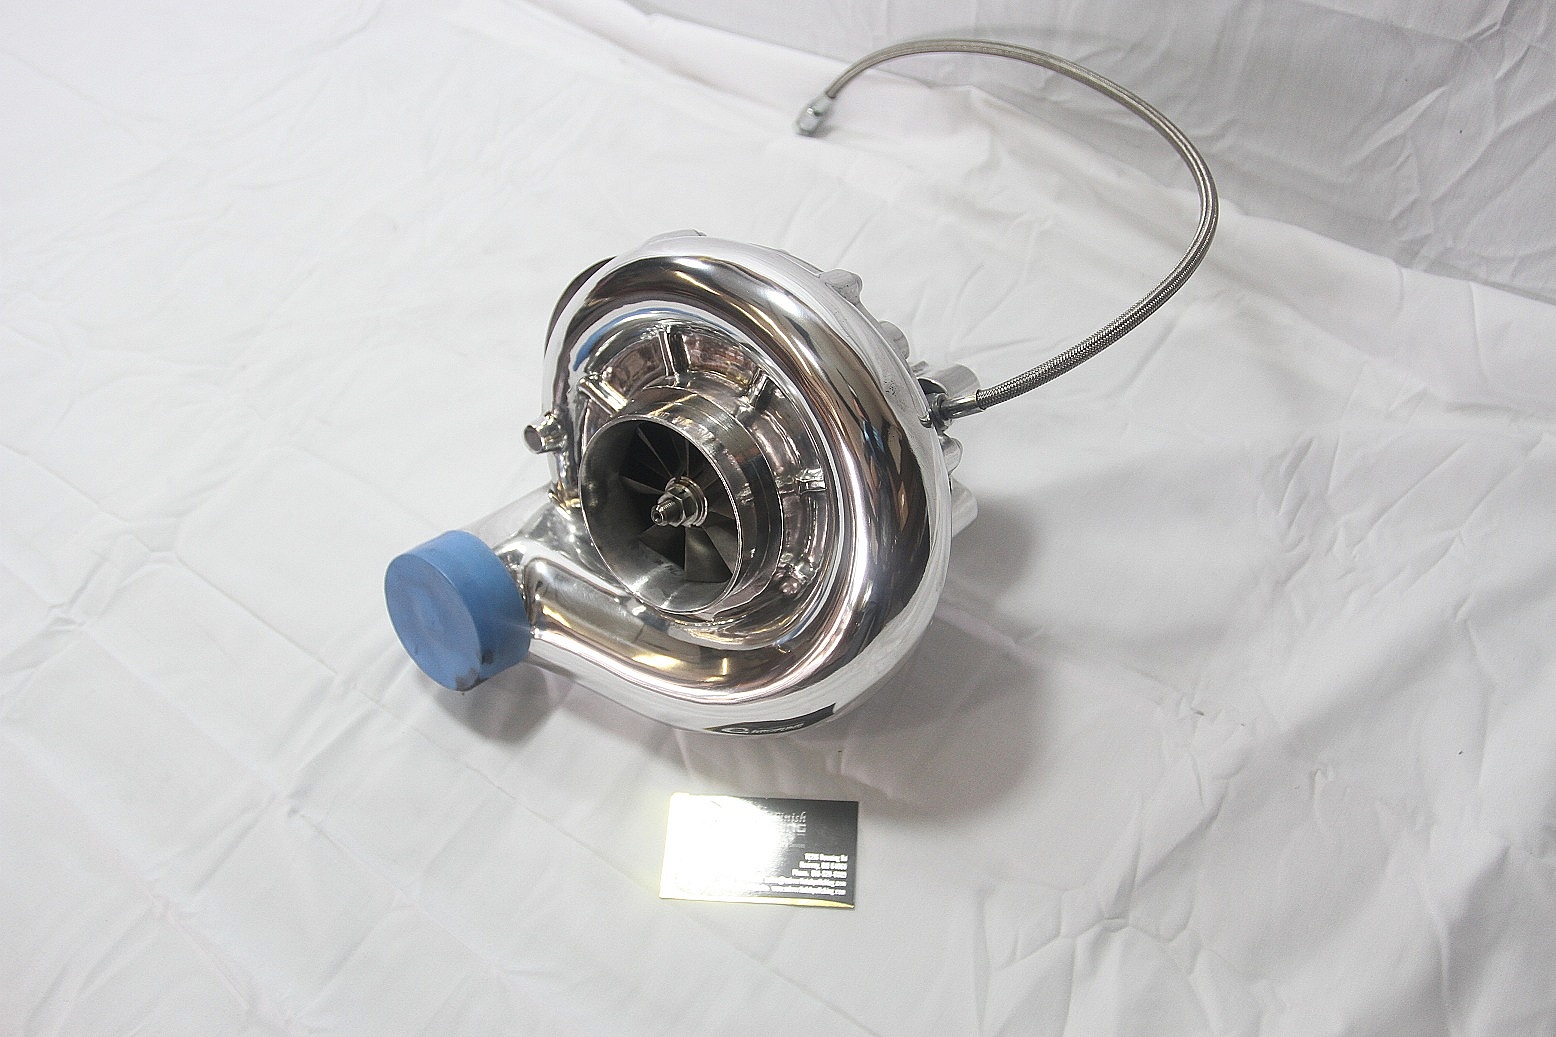
supercharger is on its way back now. Not much of a difference though huh?
Before
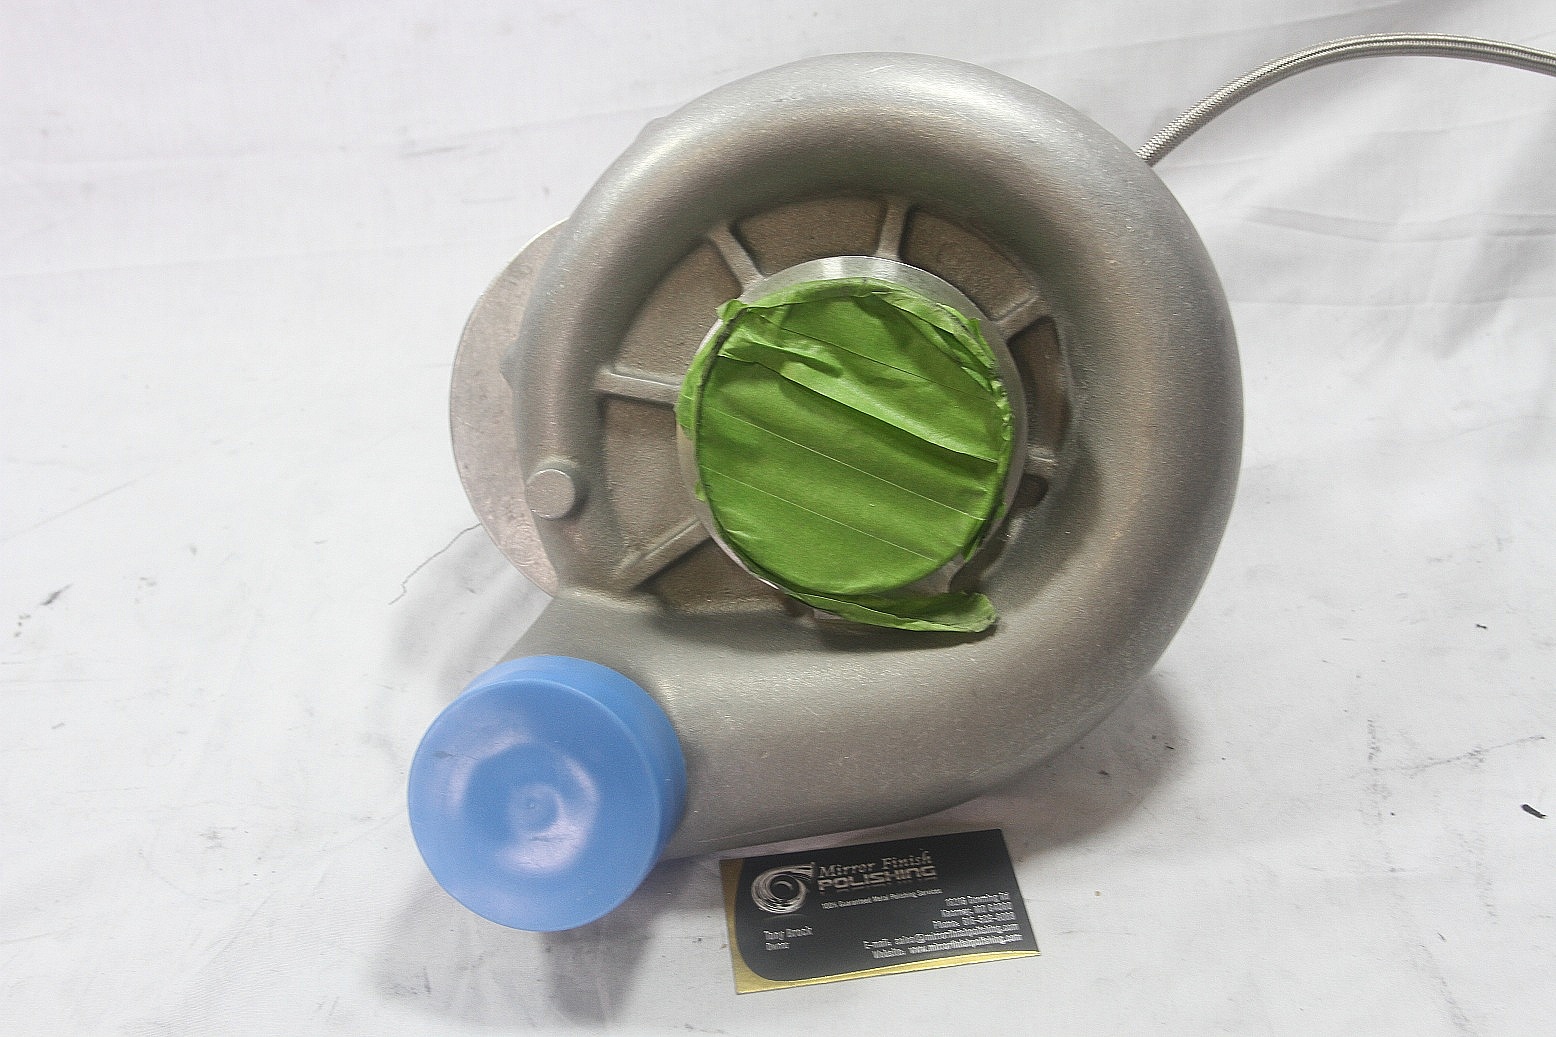
After
And now with the rest of the car going black its really starting to take shape. The por15 glosscoat is really nice stuff.

Got the brake booster, trans mount and the hood latch and master valve as well.


I also got started on the bumper cover with the primer. Last time we saw this I had sent it out for media blasting after a really bad/thick previous paint job and then smoothed in a shinoda chin spoiler. I hit the still textured areas from the blasting with some 150 grit and then a good coat of primer. Was sanding on it today and now to see everything the same color and smooth its nice.

Now with the paint coming up I have started to think about small details for it so I can be ahead of it. I wanted to do some kind of pin stripping but wasn't sure what color would go with the deep forest green and black/carbon fiber.

I wanted something that was close in color and yet also had a little bit of a contrast/difference and was considering a lime green color. After some thought though and reading that it was now easier to get mysticchrome paint I thought that could be a good color.

As you can see its a colorshifting paint but the green is close to the stock color and the purple I think will be a nice difference. Again its just pin striping so between the green/cf areas and maybe on the body line as well.
The areas of CF you see in that pic will be green and the masked areas will be a tinted CF, the stripe would be thin between them. The mystic paint use to be heavily regulated by basf for years. To get it you had to show proof of ownership of a mystic mustang, the basf rep would deliver the paint, watch the job, then take any unused paint back with him. Turns out it was because they were using it on the $20/$50 bills for a while but because they are not anymore its supposed to be easier to get.
Also if anyone like the flushmount aerocatches and was interested in how I did it, I had some requests to show how so I put a page up and the descriptions are in the pics.
 https://driiive.com/ttocs/1994FordMusta ... eline/2989
Re: momstang rebuild begins.
Posted: Sun Aug 10, 2014 7:58 pm
by ttocs
Had a bad week with my stomach but finally got some done. Its SOOOO damn nice now too see it all become one color. Fade to black.

almost have the bumper rubbed out now, nice to see it smoothed out now.


and while the primer was drying there I started prepping the hood. This hurt a bit, its just not natural to sand your new carbon fiber hood.

If you look at that you will also see that I continued to smooth the aerocatches in a little further. I leveled out the small plastic trim that was around the catch so that it will be part of the hood and now only the latch and the button will show. Can't wait to get the color spraying now.
Re: momstang rebuild begins.
Posted: Tue Aug 12, 2014 10:49 am
by ttocs
So I loved how the supercharger looked but they neglected to polish on side of it. Its mainly covered by a bracket but it also faces forward on the top of the motor so I wanted it to be clean and not look unfinished.

now THIS is flush...

Re: momstang rebuild begins.
Posted: Wed Aug 13, 2014 7:31 pm
by joerg
I´m amazed on how much work and effort you throw into this project! Good luck and keep them post coming! A real great thread to read thru all the time.
Re: momstang rebuild begins.
Posted: Thu Aug 14, 2014 7:11 am
by ttocs
Thanks I Gotta have something to do and keep me busy. Are things back to normal with your eyes now?
Re: momstang rebuild begins.
Posted: Thu Aug 14, 2014 7:18 pm
by vwdude
Your project is coming along nicely. What's the projected hp numbers once it's all done? That thing will be a beast.
Re: momstang rebuild begins.
Posted: Thu Aug 14, 2014 7:38 pm
by ttocs
with the stock bottom end and tranny I am keeping it conservative for now. I read about a similar build that put down over 500 hp but for now I am going to keep it around 400. This will be my first car with real power and until I get use to it a little it will be for the better to keep some of the power out of reach for now. I am sure after some time it will get turned up but not till both me and the car can handle it relatively safely.
Of course as I say this I just came across a good deal on an electric water pump. I know I have the electrical system to handle it and its polished to go with everything else... But at this point I NEED a new clutch, I just WANT the water pump.
Re: momstang rebuild begins.
Posted: Sun Aug 17, 2014 3:09 pm
by ttocs
[youtube]
https://www.youtube.com/watch?v=pJmHFfi4pB4[/youtube]
Not sure why the link isn't working?
Sooooo happy


Re: momstang rebuild begins.
Posted: Sun Aug 17, 2014 9:57 pm
by joerg
ttocs wrote:Thanks I Gotta have something to do and keep me busy. Are things back to normal with your eyes now?
Yes! Have had holidays the last two weeks and got loads of stuff done around the house.

Re: momstang rebuild begins.
Posted: Mon Aug 18, 2014 2:36 pm
by ttocs
good to hear.
I am amazed how much the painting wiped me out but it was a strange yoga session holding the paint gun up and over the areas I didn't want to touch and getting all the corners. Just been tired as hell all day but even with that I could not wait to go see it in natural light with the door open. It revealed a little more orange peel then I saw last night but I still can't complain, it will polish/buff out.


Can't wait to get color on the rest of the car now.
Re: momstang rebuild begins.
Posted: Wed Aug 27, 2014 1:07 pm
by ttocs
I color sanded the paint to 5000 grit and polished it and then installed a heat shield on the bottom of the trans hump. I have had an issue with the tunnel getting so hot that you can feel it radiating heat from 4-5" away after long drives. Not sure if its the X-pipe or the side exhaust as I put them both on at the same time but wanted to try and fix it while I had the motor out. It has an adhesive backing that seems pretty sticky but I followed that up with some aluminum tape on the edges, and finally some rivets with washers around the edges and center to keep it from sagging if the first two fail. I have two layers on the top, lizard skin ceramic undercoating and now this on the bottom so hopefully it will make for a cool ride.

Re: momstang rebuild begins.
Posted: Wed Sep 17, 2014 6:16 pm
by ttocs
Re: momstang rebuild begins.
Posted: Mon Sep 29, 2014 9:16 pm
by ttocs
well fenders are stripped finally and got the custom fender badges mocked up. Daytime.

And then night time.

Forgive the spacing as that will be fixed when it is all finally mounted. Its a little brighter then I want as well but that can be fixed easily as well. The only other thing that will be changed is the fake carbon fiber background. It just does not look real enough so I have a piece of real carbon fiber coming to mount behind it.
Re: momstang rebuild begins.
Posted: Wed Nov 05, 2014 3:51 pm
by ttocs
Man its been a bad fall as usual. Not sure if its my mold allergies or what but I have been looking forward to this first freeze we finally got and now hopefully I can get back on track. to add some functionality to the fender badges I got some orange leds and installed them just like the blue so it can be used as a turn signal. I have not lit them up yet to see what they look like but should be cool I think.
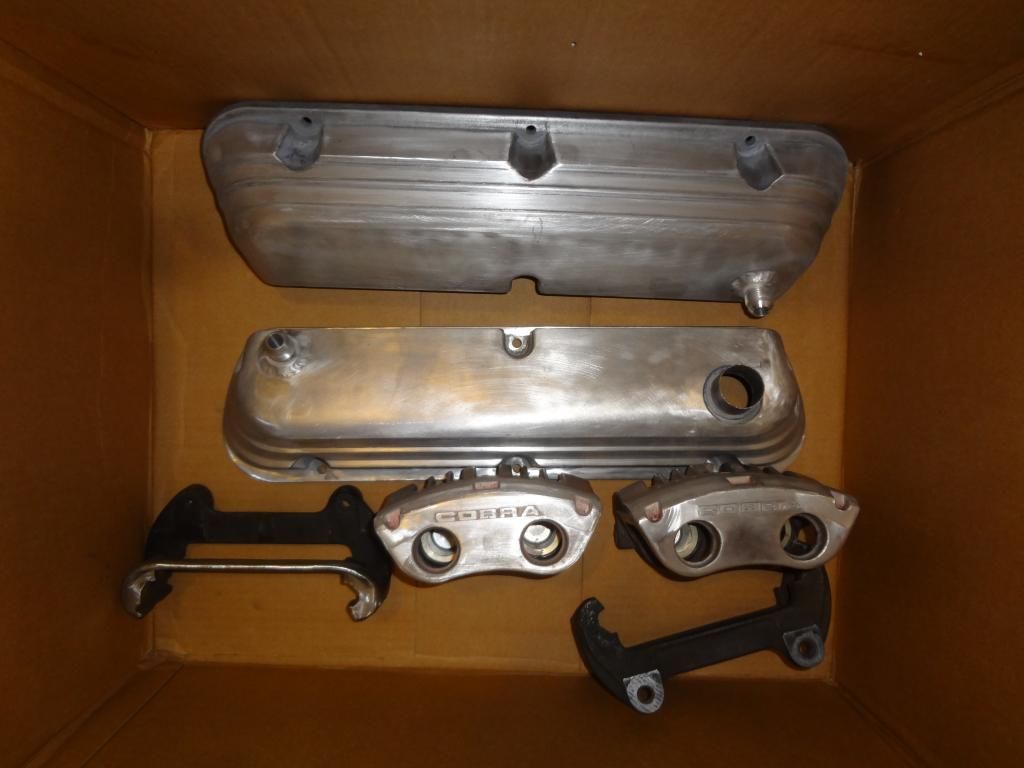
I ended up taking 3-4 steps back when I opened my drivers door and didn't notice the fender had slipped back, so the door flattened out a portion of the fender. I tried like hell to get it back into shape but its concave in one spot, convex in the other and some solid steel. After jumping on that thing every way I could think of to get it back into shape I finally ordered a new one. It fits as well as you would expect a Taiwan made ford reproduction part would fit and I am now working it into place. I was so pissed about it that I had to take a step away when I realized I was now not just an hour or so away from primer so I have been getting some other parts ready for powder. The valve covers had some welding done to add a port for the oil separator and smoothed them out for a gloss black. I also got the brake calipers ready for powder and debated what color to do them. Sure red on a green car would look good but red just seems so played out to me so after a lot of thought I went with burned copper and got enough powder to do some on my wheels later.

I smoothed out all the casting scale and casting lines and am also getting the copper pieces cleared. The cobra letters will be in black as will be the lower bracket. Not sure on what wheels yet but there will be more black then copper on them just trying to figure out how expensive they will be...
Re: momstang rebuild begins.
Posted: Wed Nov 05, 2014 7:33 pm
by knightrider358
Scott, i cant wait to see the final results will look like, this looking bad ass man!
Re: momstang rebuild begins.
Posted: Sat Nov 15, 2014 10:35 pm
by instro84
man thats alotta work just read your entire thread. good job!
Re: momstang rebuild begins.
Posted: Sat Nov 15, 2014 10:56 pm
by ttocs
Thanks fellas. Still waiting on the powder(anxiously) and got the fender in place finally, just finishing up the fender badge hole now. I think I am going to try my hand at carbon skinning a couple of small pieces for the inside(DD10 with metal badges I got from mike) and then work my way up to skinning the center portion of the roof of the car to match the hood. The A and C pillars are removable and sit just above the roof so it should make it easy to blend the CF back into the body to make it look like it belongs there. I have some time to kill with the body work till spring comes and its warm enough to set up the paint booth I have planned outside. Anyone interested in getting any other pieces skinned?
Re: momstang rebuild begins.
Posted: Sun Nov 16, 2014 1:46 am
by HoseHead
Excellent work and focus. Results show it. Keep it up, eh.
Here's a few pictures of a guy in our Thunderbird Super Coupe Club who built up this Super Coupe engine and dropped it into the same style Mustang you are making here.
This is a 3.8 litre Super Coupe engine opened up to 4.2 litres and a pile of after market and custom pulleys etc.
Super Coupes were made from 89-95. Stock they pulled about 240 BHP, but Thunderbirds weighed 4000 lbs so they couldn't compete with a V8 Mustang. Cast iron block, aluminum heads and tradtional 2 valves per cylinder. Blowers were Eaton M90 models.


