Posted: Thu Dec 11, 2008 9:09 am
I'm passing this along for Glenn:
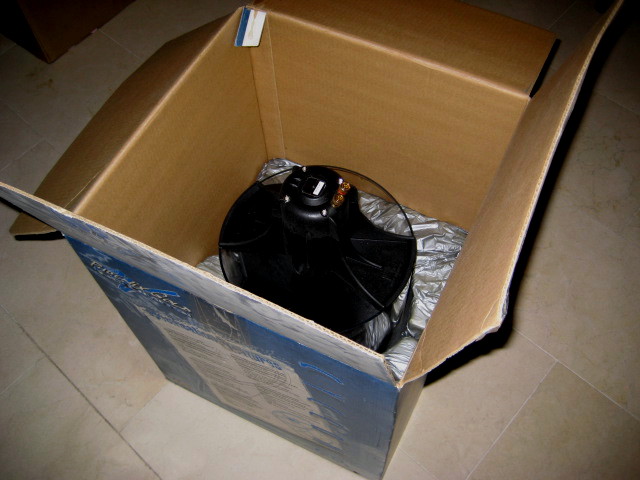
Cyclone Subwoofer Cleaning Procedure
Glenn Phillips
Acoustics Dept.
PhoenixGold, Intl.
12/03/04
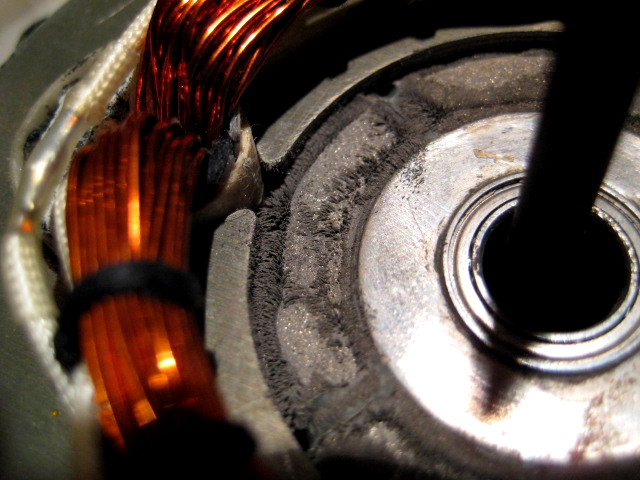
The majority of the Cyclone Low Frequency drivers, returned to PG for servicing, will exhibit grinding noise and resistance to motion with an applied signal. The high percentage of the problems stems from an outer layer breakdown of the motor magnet particle binder. This condition manifests itself as loose magnet material, which looks like dust, to create a bridge between the fixed stator and rotating magnet armature.
A simple procedure to remove the particulate nuisance is described here. Read through these directions before attempting this procedure.
Caution: The Cyclone motor system contains powerful magnets. Be alert! Slips can occur and fingers can be pinched during the disassembly and reassemble of the unit!
Tools Needed:
· 3/16 hex key
· 5/32 hex key
· Shop rag
· Sticky, automotive sealant putty (Gorilla snot)
· Compressed air
1. Check for noises and associated binding resistance to movement by rotating the blades back and forth by hand.
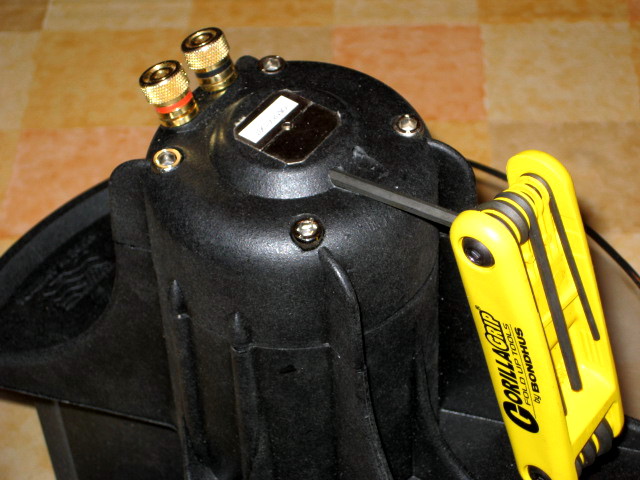
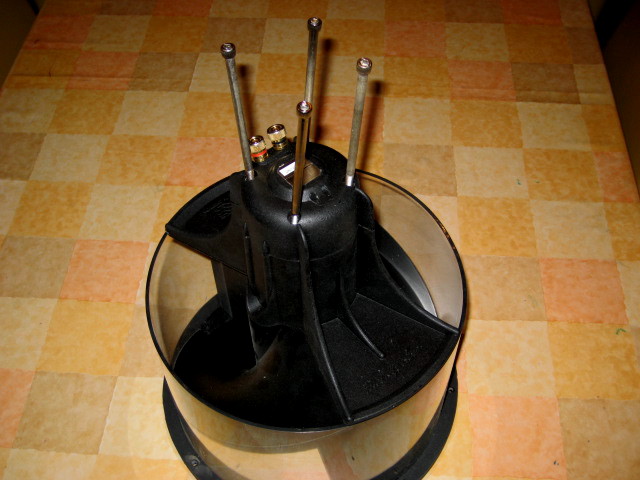
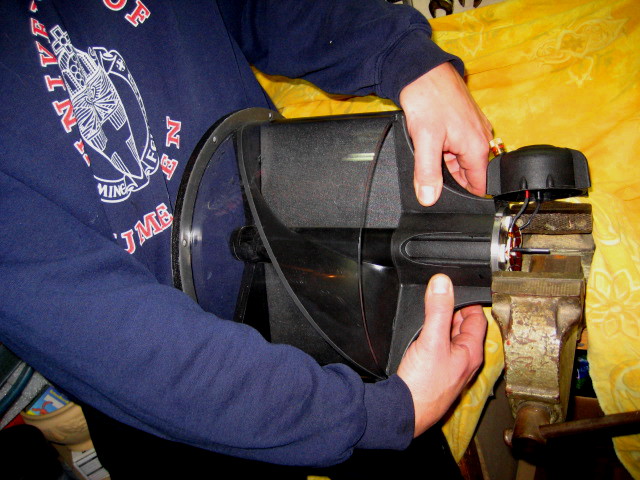
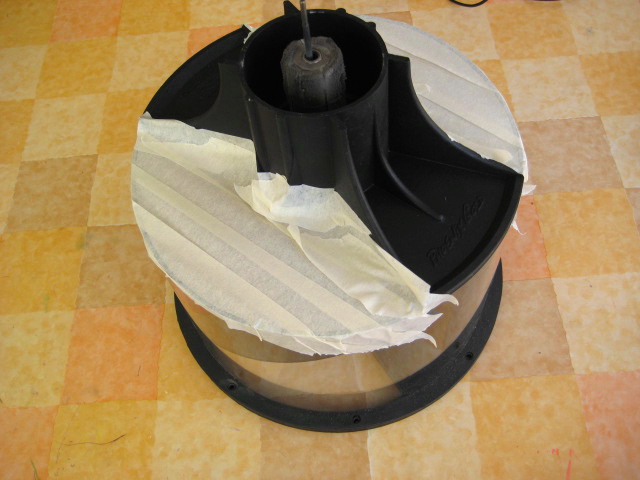
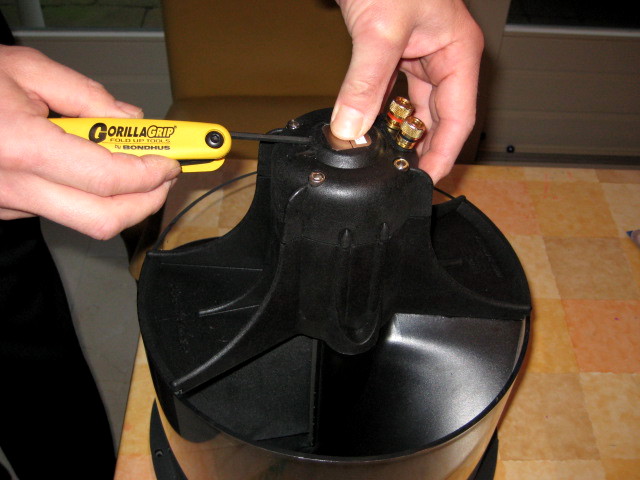
2. Place Cyclone driver on table and loosen the four long, (4) 3/16 head, plated, Allen bolts that retain the motor cap to the main housing. Set aside all 4 bolts.
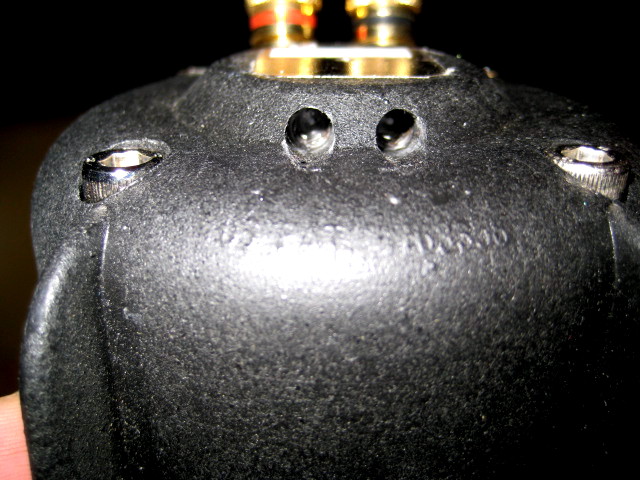
3. Loosen the two, (2) 5/32 head, hex bolts securing the torsion spring axle clamp block. (These are hidden, at an angle, at the top center of the motor cap.) Gently loosen counter clockwise until they stop, then turn clockwise 1/4 turn for clearance. Do not remove the clamp block from its seat. It is bedded in silicone and floats during use.
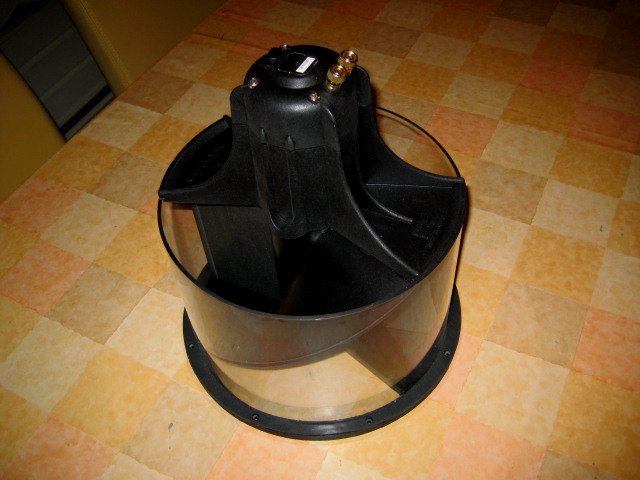
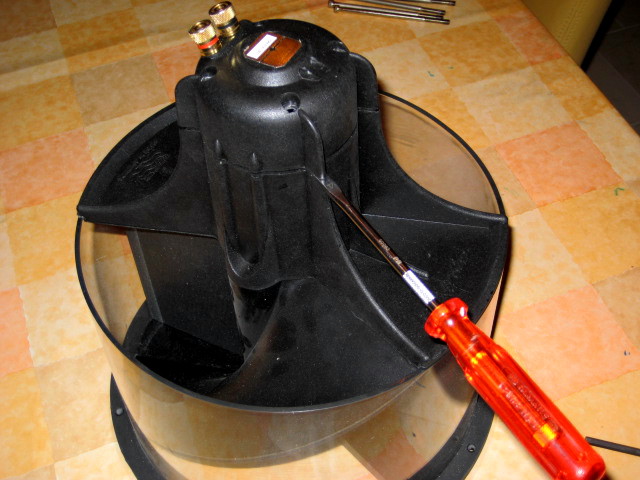
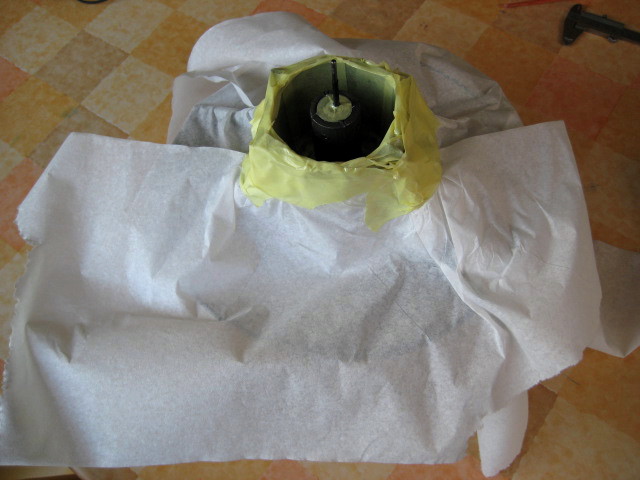
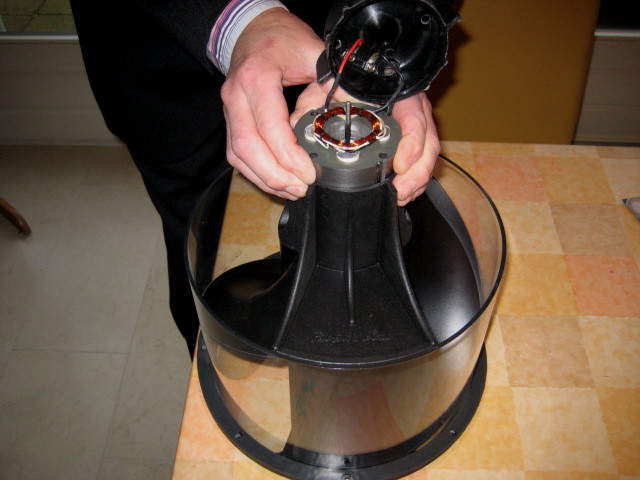
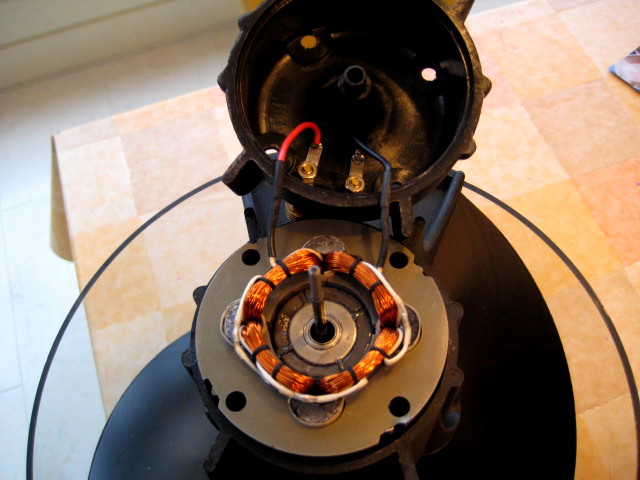
4. Gently remove the motor cap from the main housing and let it dangle, to the side, from the input leads. Be very careful here, as it is easy to break the input leads from the motor cap to the stator. Do not break the leads.
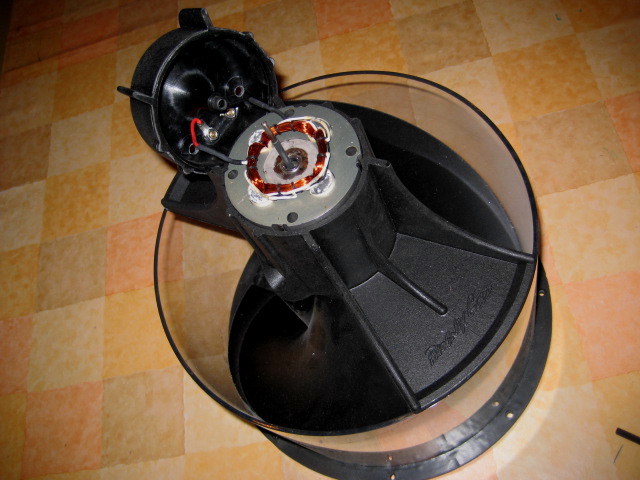
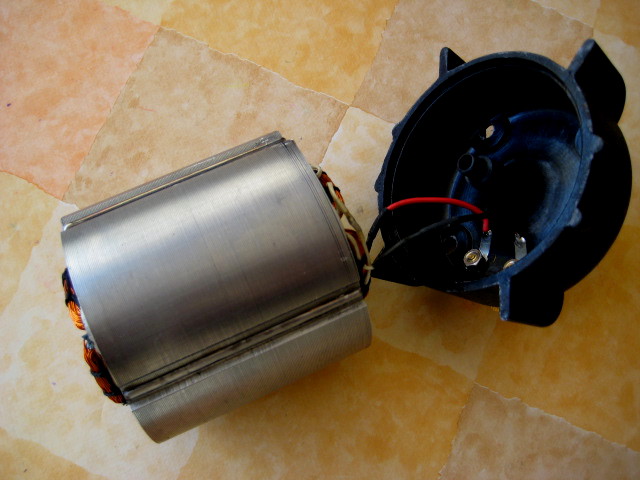
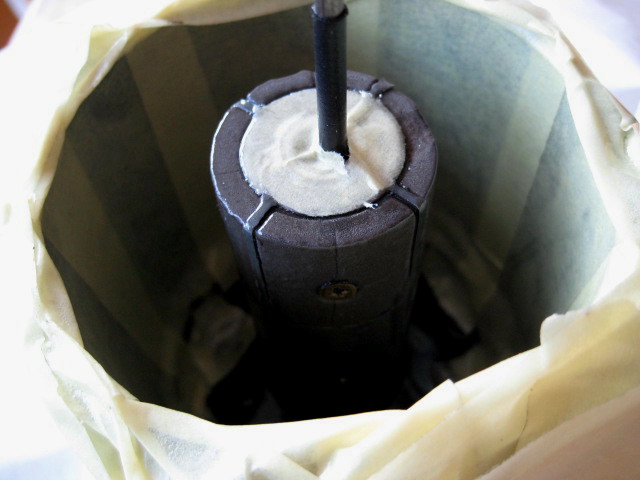
5. Place Cyclone driver on smooth floor. In this step, place feet over mounting flange to hold driver housing while pulling the Stator assembly out of the housing. Do this by placing two of the long, 3/16 head, plated Allen bolts, into two opposing holes in the stator. Using the threads for gripping the stator, use both hands (and feet) to pull the stator up, and out of the housing. You may need to apply some opposing force outwardly to the bolts to maintain a grip. (This stator removal may take some effort depending on how severe the debris accumulation is in the gap.)
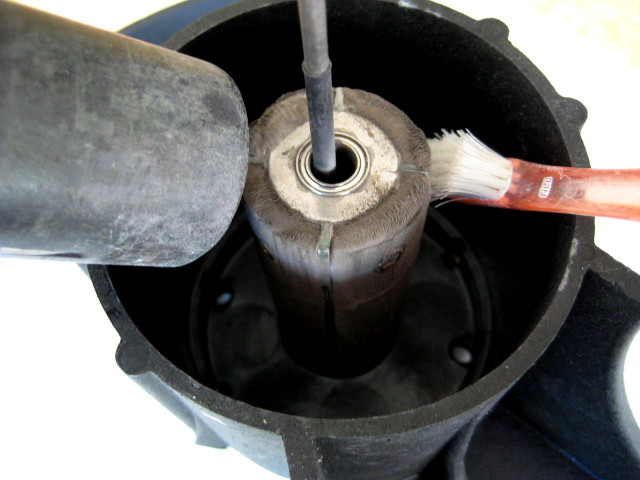
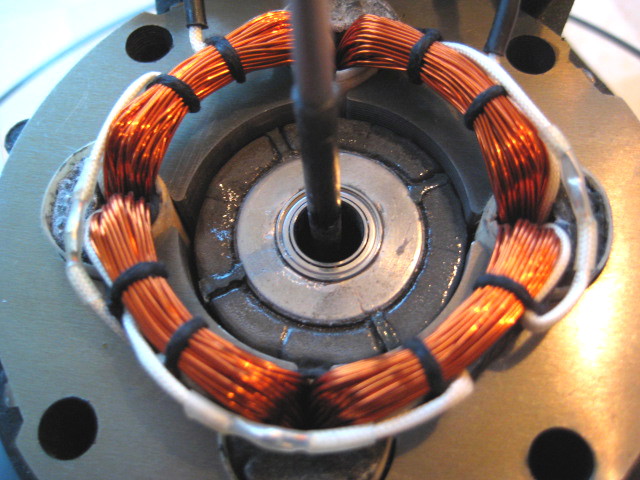
6. Inspect the stator for broken wires and particle debris. Inspect the magnet armature for particle debris and fragment cracks, or separation. Any magnet separation renders the motor unserviceable! Magnet particle debris can be removed.
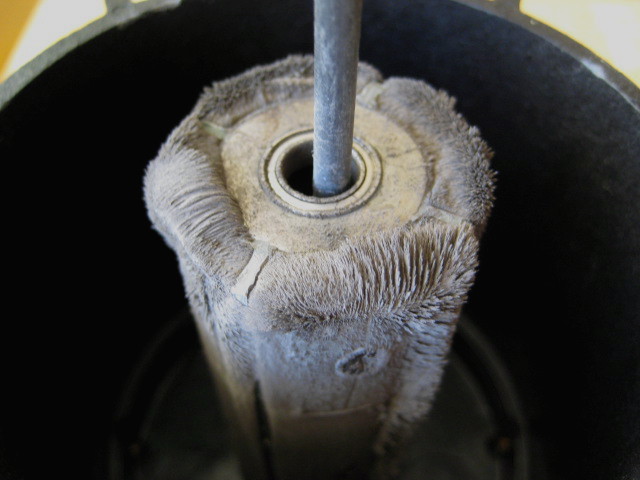
7. To clean the armature, use the shop rag. Place a portion of the rag on the fingertips. Starting from bottom to top, draw as much of the magnet debris "up" the magnet, to create small piles. Pull the accumulated debris piles away from the magnet by "pinching" it from the surface, with the rag, and discarding it. Do this as many times as needed, until a very small amount of residue remains. The armature should be as clean as possible.
8. Using compressed air, blow out the stator, magnet and overall housing to remove dust and particles.
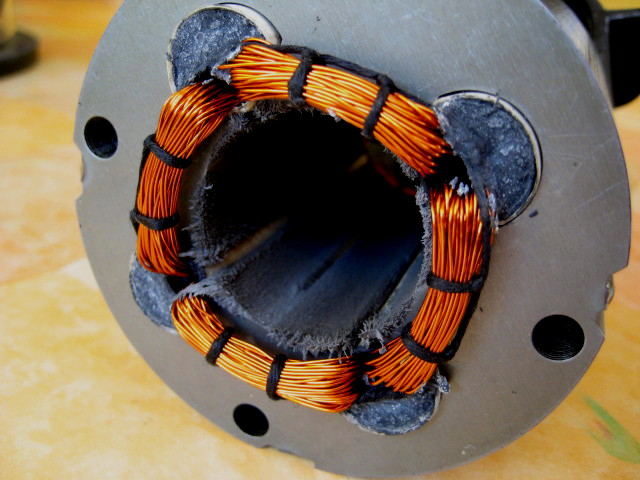
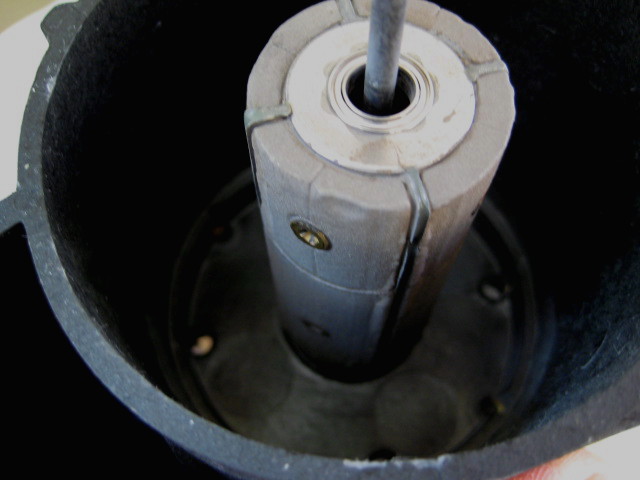
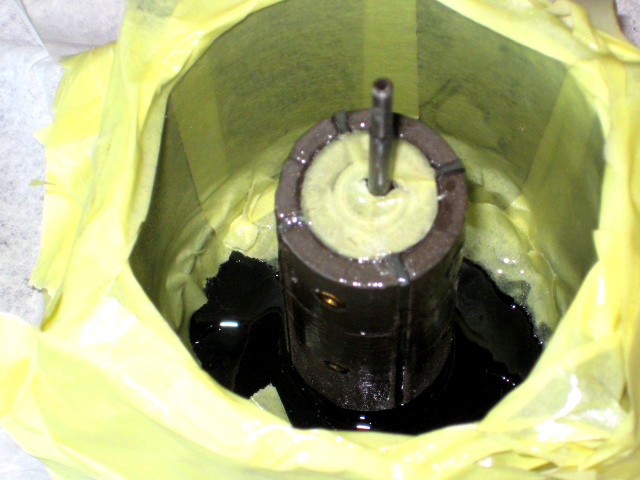
9. Using a small amount of putty, use the fingertips to begin rolling the putty up and down all the inside surfaces of the stator until all remains of the magnet debris are removed. Be careful not to break the input leads.
10. Using another small amount of putty. Roll the putty up and down the magnet surfaces thoroughly, to remove all debris. Be careful and avoid puncturing your hand on the torsion spring during this operation. Pay attention to small cracks, surface details and the undercuts between the magnet sections. All small details should be revealed when thoroughly cleaned.
11. Repair any broken leads at this time.
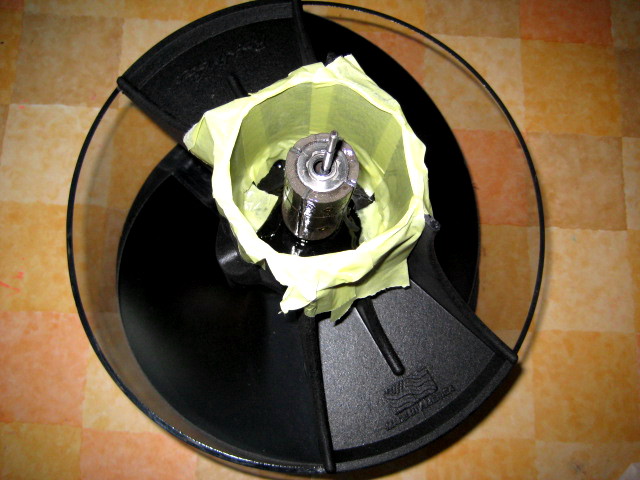
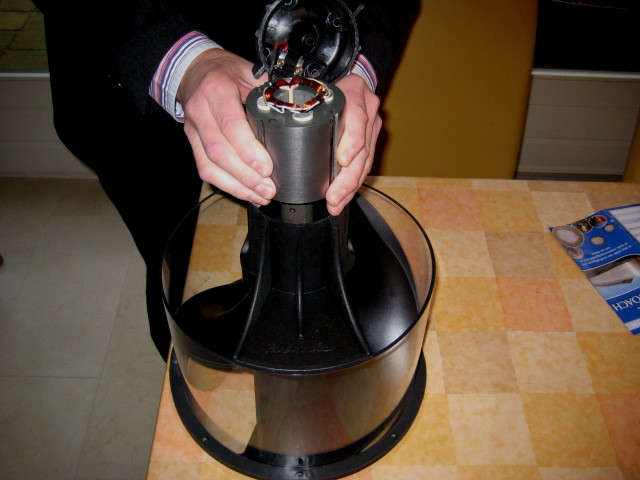
12. Place the main housing, once again, on the floor and secure with your feet. Hover the stator and motor cap over the magnet and main housing, aligning the four holes corresponding to the threaded holes in the bottom of the motor housing. The magnet is very strong. Grasp the stator tightly and very slowly lower the stator into the housing. Be careful not to let the stator jerk suddenly into the housing. Also be careful not to catch your fingers. Again, check for broken input leads.
13. Use two of the long hex head bolts and align the stator holes with the threaded holes by twisting back and forth so the bolts can seat in the threads. Remove the bolts.
14. Place the motor cap over the torsion spring and seat into the magnet bearing. The torsion spring should also go through the clamp block. Go slow. Align the four holes for the bolts. Be sure the leads are clear and not pinched or rubbing on the torsion spring before closing. Place the four long bolts into the housing and finger tighten. Place the blades in their natural (neutral) center stroke position.
15. Start progressively tightening the four long bolts, in an opposing pattern, to seat the motor cap squarely. Once snug, give 1/4 turn more and quit. Do not over tighten, as stress damage may occur.
16. Apply downward thumb pressure to the clamp block and tighten the two hex bolts securely. Keep the gap between the blocks parallel so the block floats during use.
17. Recheck to see if the blades are at their natural center.
18. Again, check for noise and binding by pushing on the blades by hand as initially done. The Cyclone should not make any noise and the blades should rotate freely. Any noise present is suspect to other internal problems, including:
· Bearings.
· Possible stress misalignment from over tightening.
· Racking, from parts not in absolute alignment.
· Trapped debris between the blades and the housing walls.
19. If none of the above appears, consider the unit ready for use.
Cyclone Subwoofer Cleaning Procedure
Glenn Phillips
Acoustics Dept.
PhoenixGold, Intl.
12/03/04
The majority of the Cyclone Low Frequency drivers, returned to PG for servicing, will exhibit grinding noise and resistance to motion with an applied signal. The high percentage of the problems stems from an outer layer breakdown of the motor magnet particle binder. This condition manifests itself as loose magnet material, which looks like dust, to create a bridge between the fixed stator and rotating magnet armature.
A simple procedure to remove the particulate nuisance is described here. Read through these directions before attempting this procedure.
Caution: The Cyclone motor system contains powerful magnets. Be alert! Slips can occur and fingers can be pinched during the disassembly and reassemble of the unit!
Tools Needed:
· 3/16 hex key
· 5/32 hex key
· Shop rag
· Sticky, automotive sealant putty (Gorilla snot)
· Compressed air
1. Check for noises and associated binding resistance to movement by rotating the blades back and forth by hand.
2. Place Cyclone driver on table and loosen the four long, (4) 3/16 head, plated, Allen bolts that retain the motor cap to the main housing. Set aside all 4 bolts.
3. Loosen the two, (2) 5/32 head, hex bolts securing the torsion spring axle clamp block. (These are hidden, at an angle, at the top center of the motor cap.) Gently loosen counter clockwise until they stop, then turn clockwise 1/4 turn for clearance. Do not remove the clamp block from its seat. It is bedded in silicone and floats during use.
4. Gently remove the motor cap from the main housing and let it dangle, to the side, from the input leads. Be very careful here, as it is easy to break the input leads from the motor cap to the stator. Do not break the leads.
5. Place Cyclone driver on smooth floor. In this step, place feet over mounting flange to hold driver housing while pulling the Stator assembly out of the housing. Do this by placing two of the long, 3/16 head, plated Allen bolts, into two opposing holes in the stator. Using the threads for gripping the stator, use both hands (and feet) to pull the stator up, and out of the housing. You may need to apply some opposing force outwardly to the bolts to maintain a grip. (This stator removal may take some effort depending on how severe the debris accumulation is in the gap.)
6. Inspect the stator for broken wires and particle debris. Inspect the magnet armature for particle debris and fragment cracks, or separation. Any magnet separation renders the motor unserviceable! Magnet particle debris can be removed.
7. To clean the armature, use the shop rag. Place a portion of the rag on the fingertips. Starting from bottom to top, draw as much of the magnet debris "up" the magnet, to create small piles. Pull the accumulated debris piles away from the magnet by "pinching" it from the surface, with the rag, and discarding it. Do this as many times as needed, until a very small amount of residue remains. The armature should be as clean as possible.
8. Using compressed air, blow out the stator, magnet and overall housing to remove dust and particles.
9. Using a small amount of putty, use the fingertips to begin rolling the putty up and down all the inside surfaces of the stator until all remains of the magnet debris are removed. Be careful not to break the input leads.
10. Using another small amount of putty. Roll the putty up and down the magnet surfaces thoroughly, to remove all debris. Be careful and avoid puncturing your hand on the torsion spring during this operation. Pay attention to small cracks, surface details and the undercuts between the magnet sections. All small details should be revealed when thoroughly cleaned.
11. Repair any broken leads at this time.
12. Place the main housing, once again, on the floor and secure with your feet. Hover the stator and motor cap over the magnet and main housing, aligning the four holes corresponding to the threaded holes in the bottom of the motor housing. The magnet is very strong. Grasp the stator tightly and very slowly lower the stator into the housing. Be careful not to let the stator jerk suddenly into the housing. Also be careful not to catch your fingers. Again, check for broken input leads.
13. Use two of the long hex head bolts and align the stator holes with the threaded holes by twisting back and forth so the bolts can seat in the threads. Remove the bolts.
14. Place the motor cap over the torsion spring and seat into the magnet bearing. The torsion spring should also go through the clamp block. Go slow. Align the four holes for the bolts. Be sure the leads are clear and not pinched or rubbing on the torsion spring before closing. Place the four long bolts into the housing and finger tighten. Place the blades in their natural (neutral) center stroke position.
15. Start progressively tightening the four long bolts, in an opposing pattern, to seat the motor cap squarely. Once snug, give 1/4 turn more and quit. Do not over tighten, as stress damage may occur.
16. Apply downward thumb pressure to the clamp block and tighten the two hex bolts securely. Keep the gap between the blocks parallel so the block floats during use.
17. Recheck to see if the blades are at their natural center.
18. Again, check for noise and binding by pushing on the blades by hand as initially done. The Cyclone should not make any noise and the blades should rotate freely. Any noise present is suspect to other internal problems, including:
· Bearings.
· Possible stress misalignment from over tightening.
· Racking, from parts not in absolute alignment.
· Trapped debris between the blades and the housing walls.
19. If none of the above appears, consider the unit ready for use.