Hello, I new to the forums. Here are some pics of my current setup I'm working on now. Well I'm in the process of redoing my whole trunk. I taking out my old system which was nice for the time being but isn't kid friendly at all since I don't have a spare tire. Here are pics of previous systems:
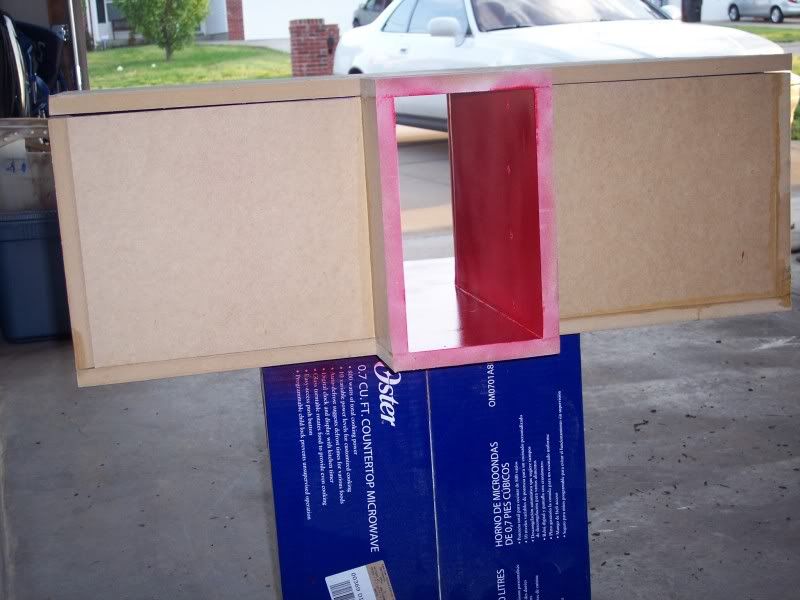
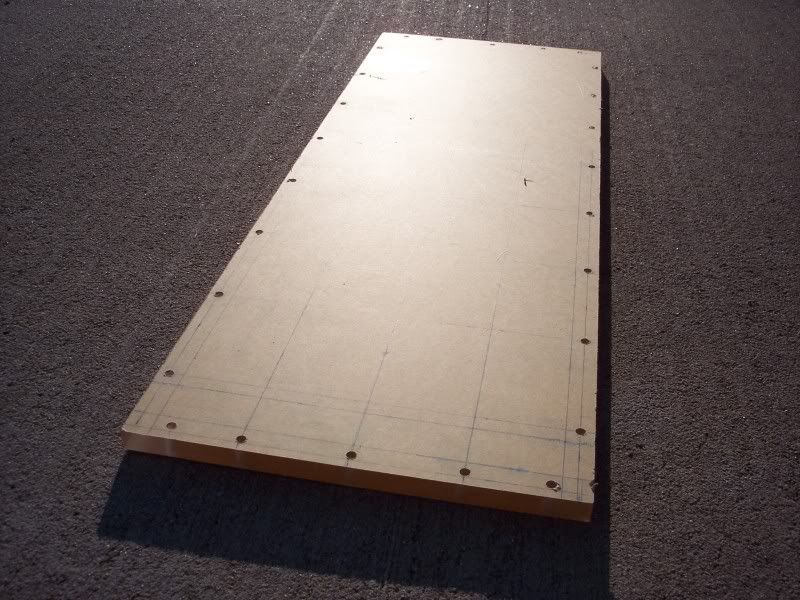
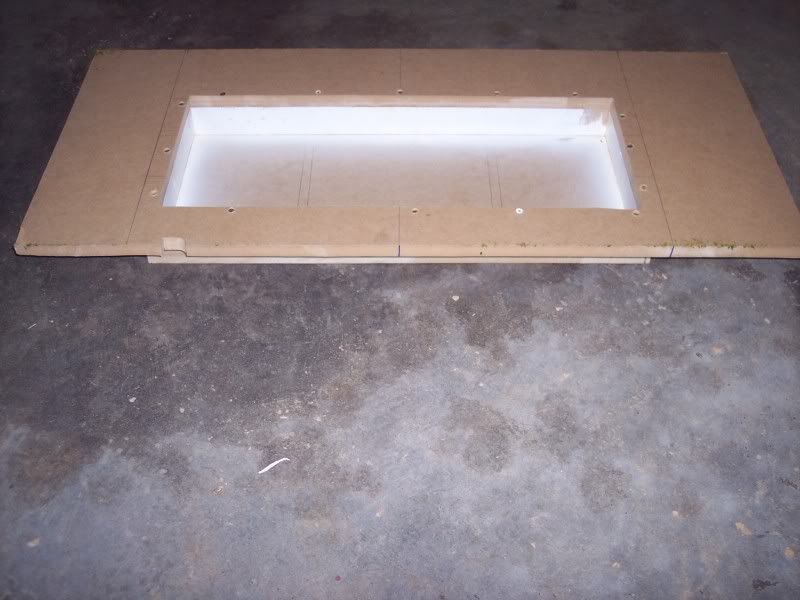
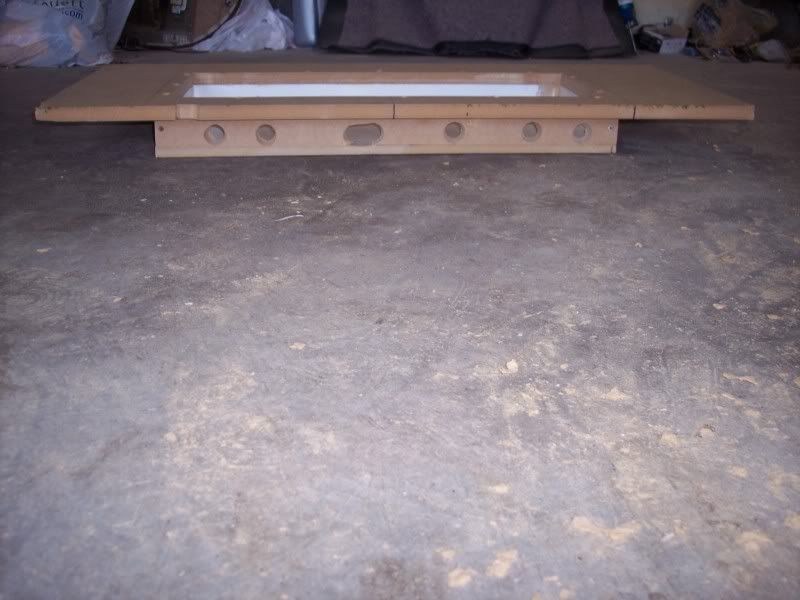
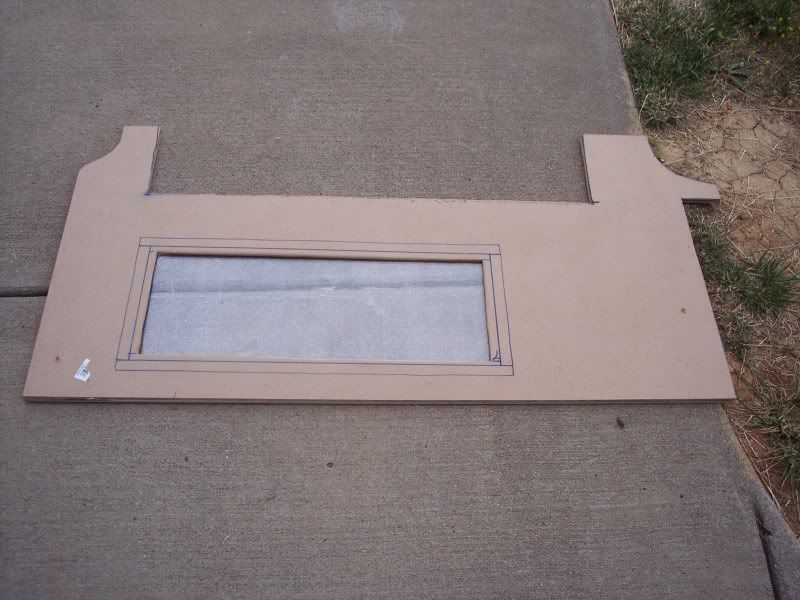
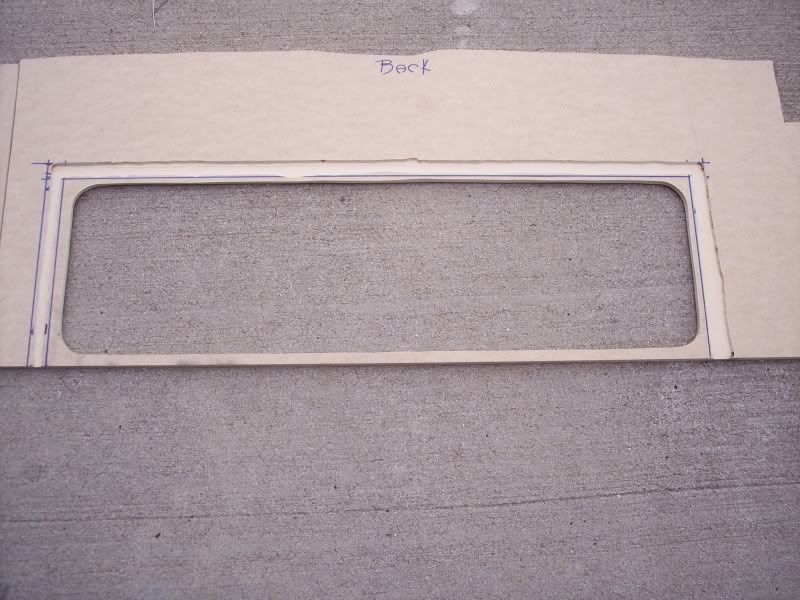
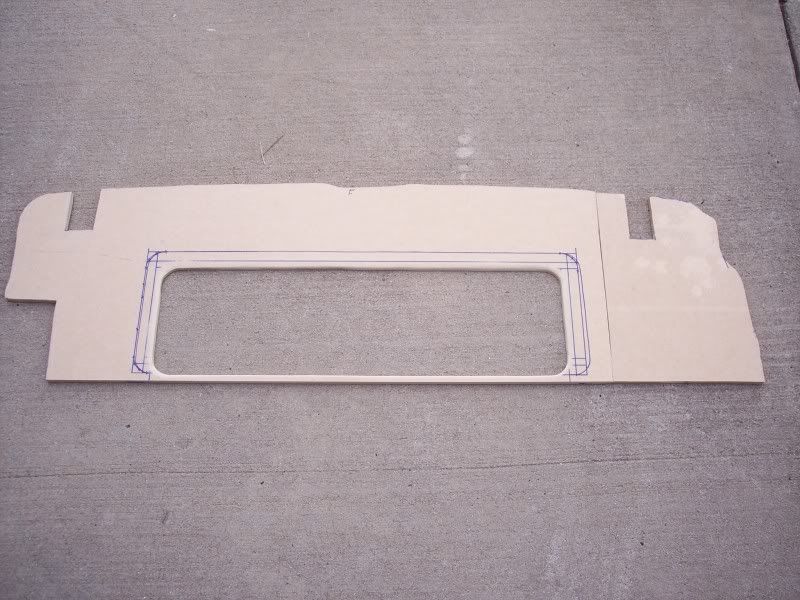
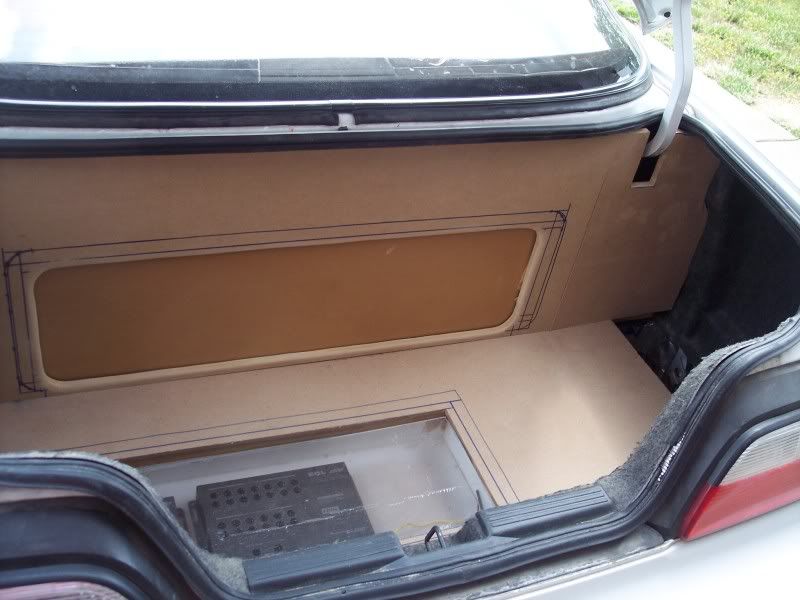
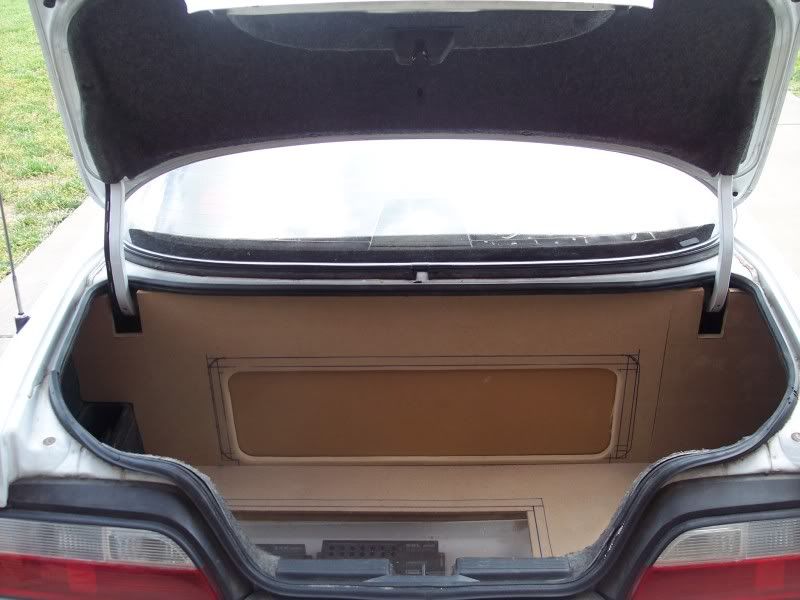
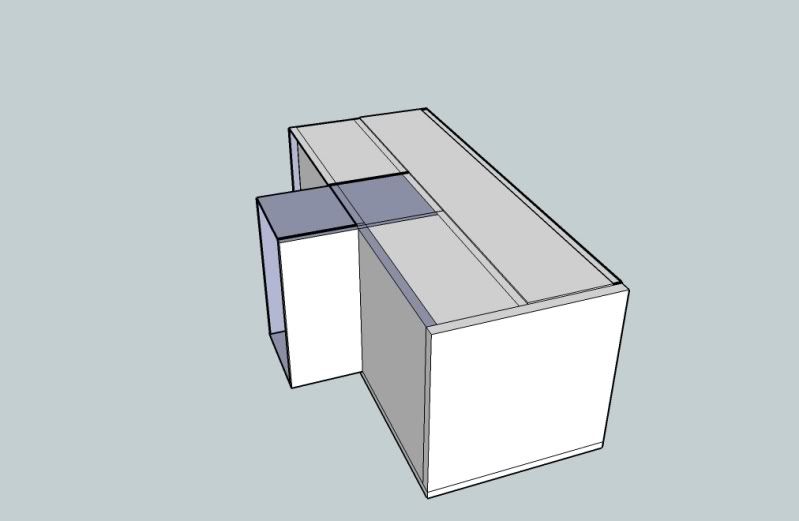
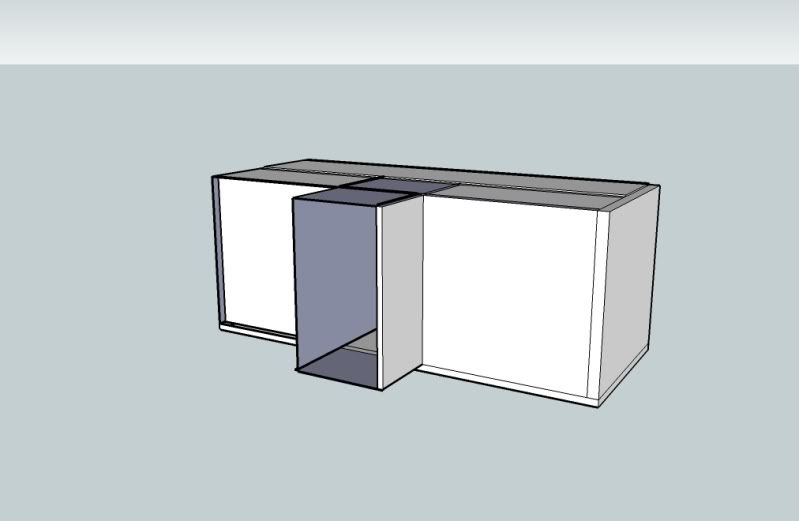
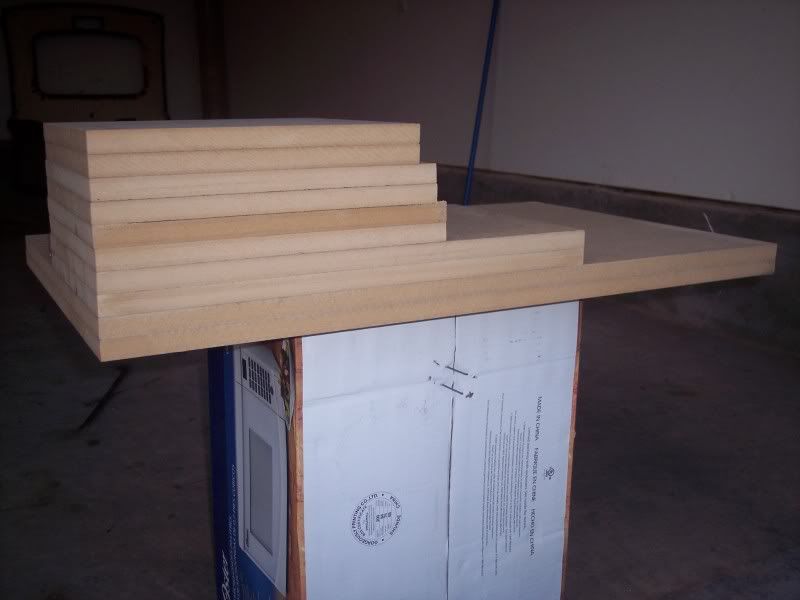
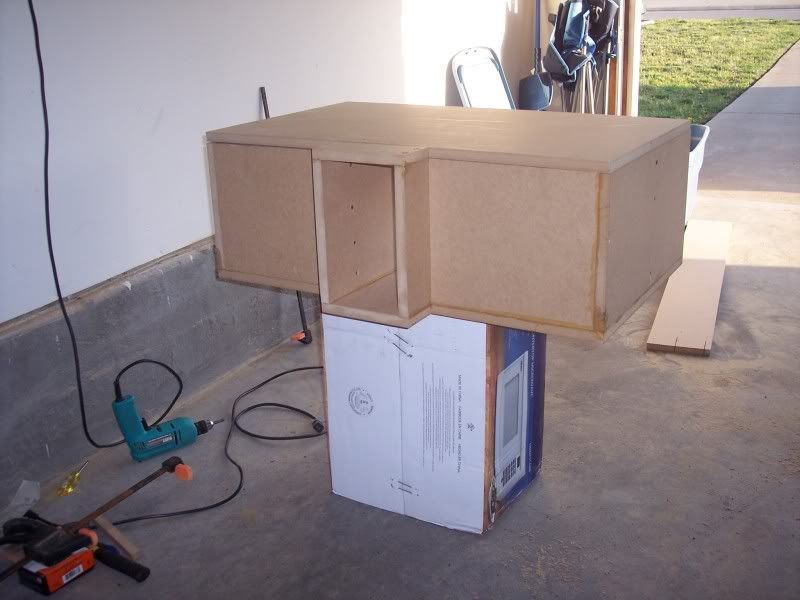
I am going to keep all equipment and go with a 4th order bandpass box. Sealed chamber is 1.35 cu ft, ported chamber is 1.622 after displacment with 60in of square port. The port seperates the sealed chamber and will stick out of the box as well. I'm by no means an expert in google sketchup but these will give you an idea of what the box will look like prior to completion:
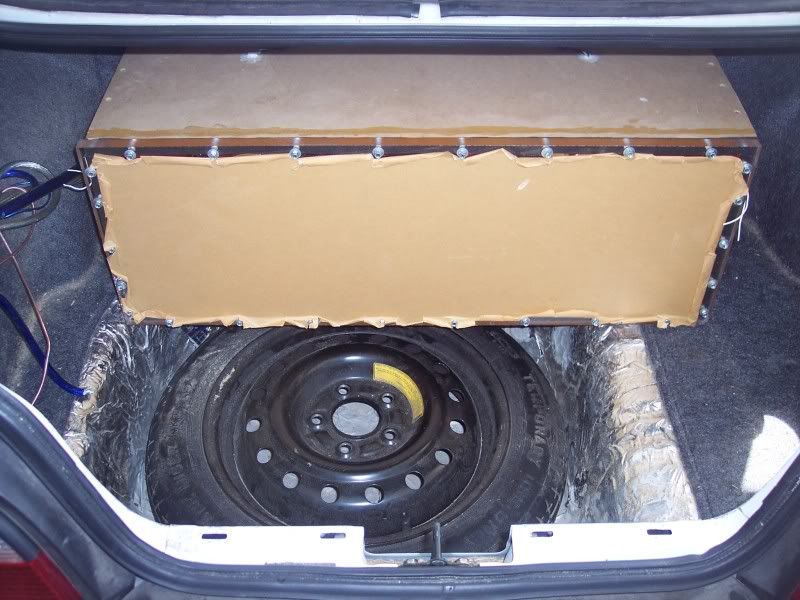
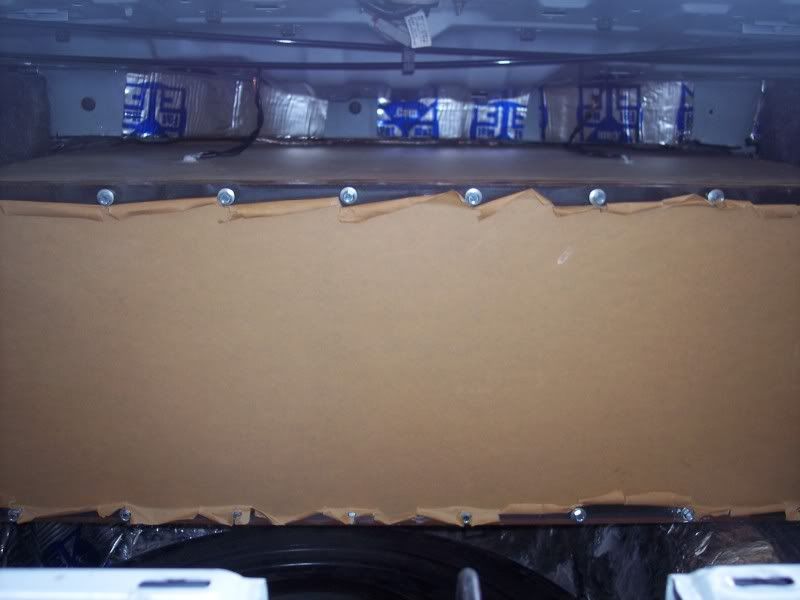
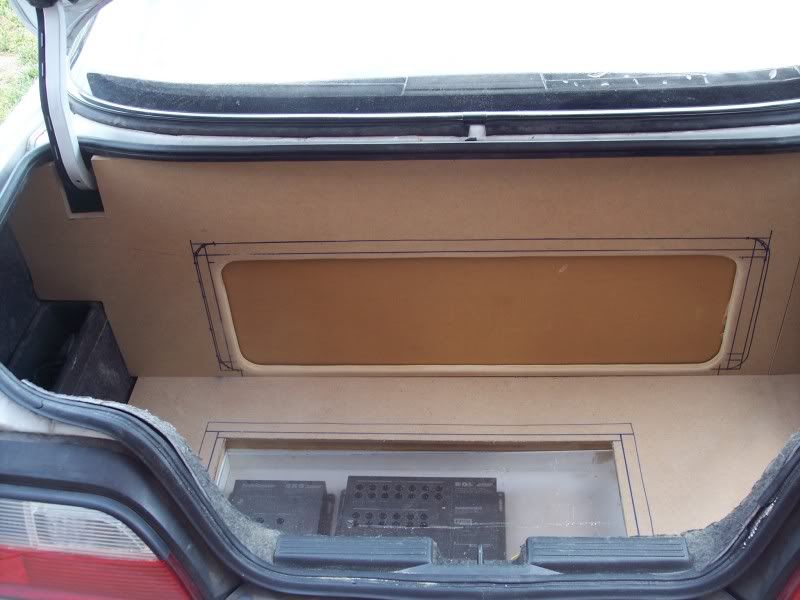
View from rear of trunk where plexiglass will be to show back of subs:
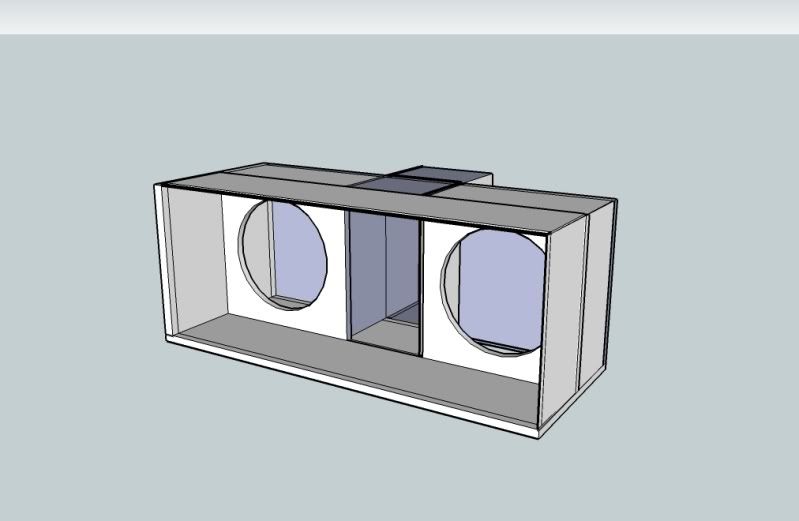
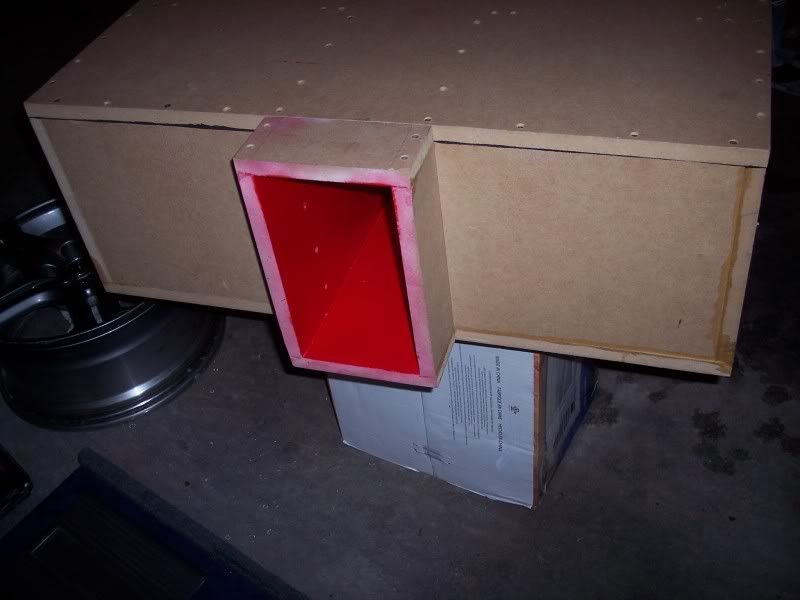
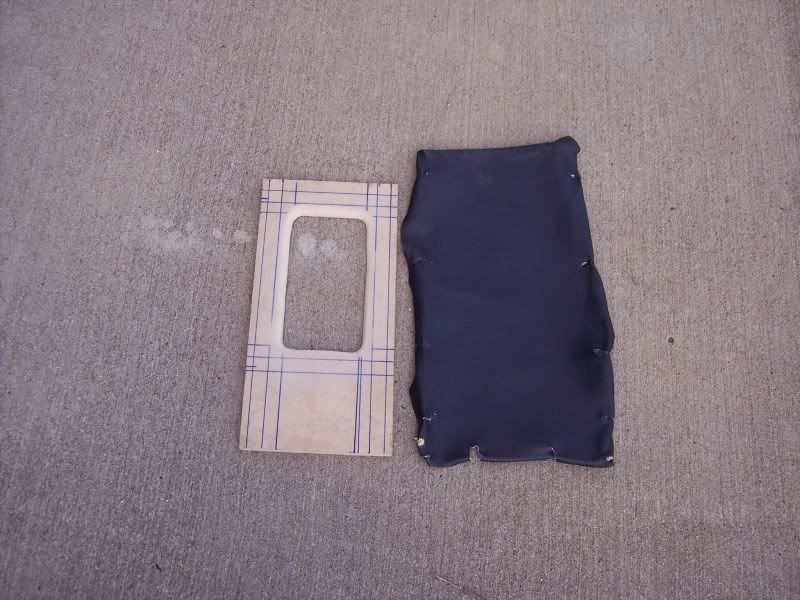
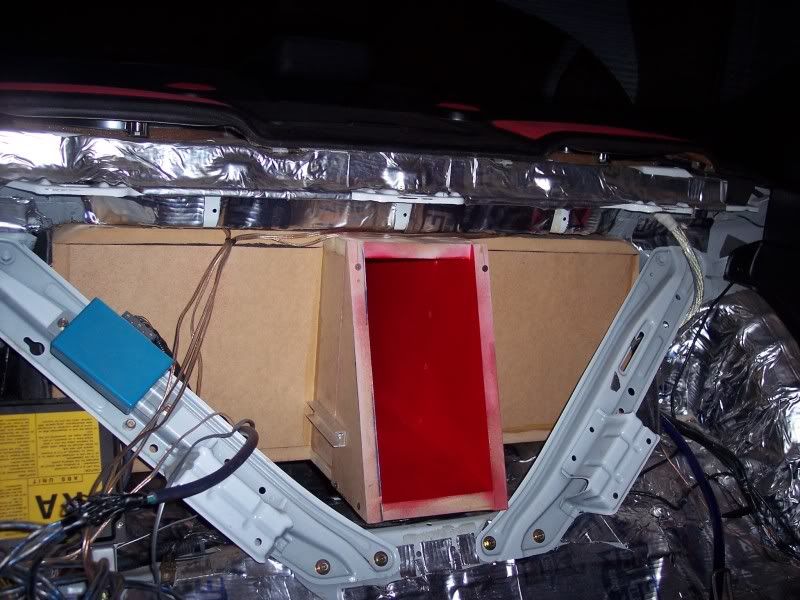
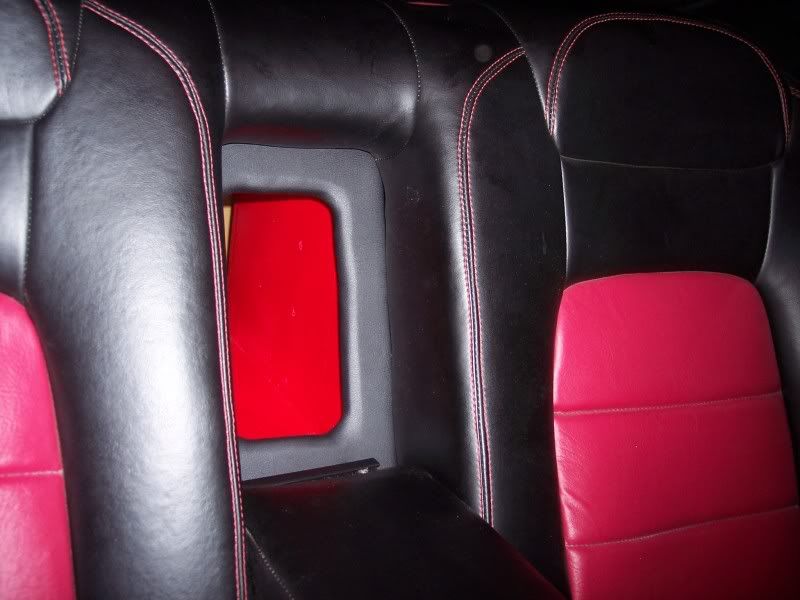
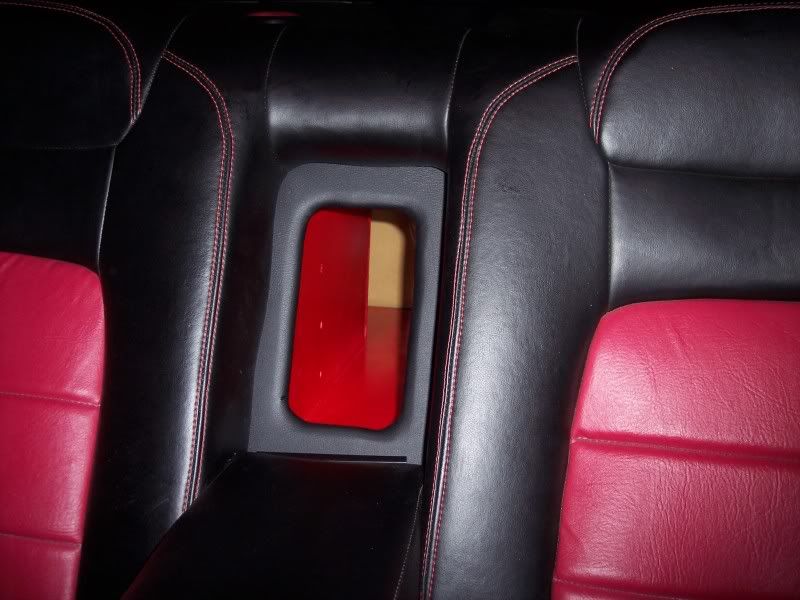
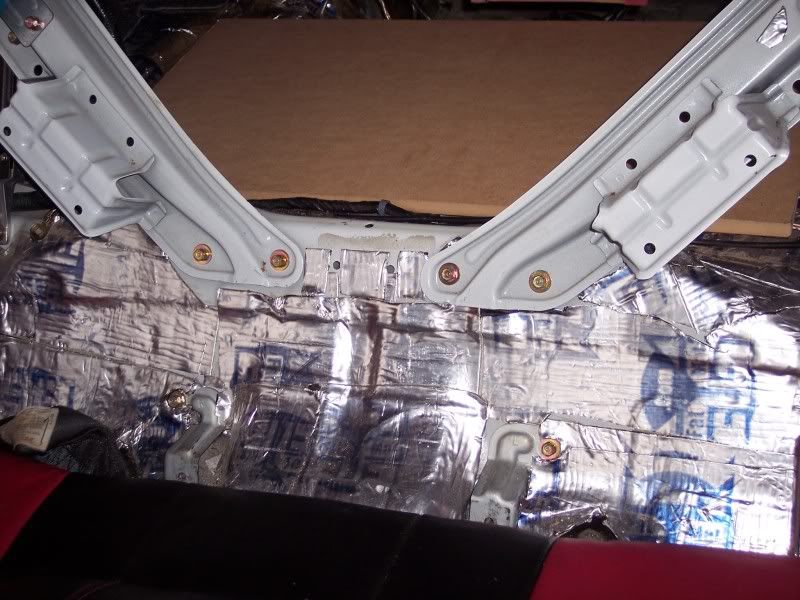
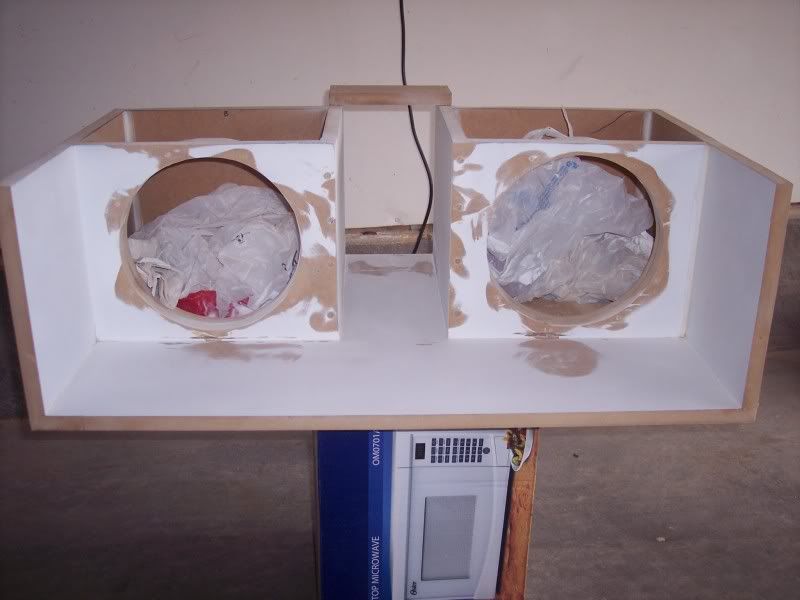
Top of the box with the port will come thru rear seat with a custom made ski port into the cabin of the car.:
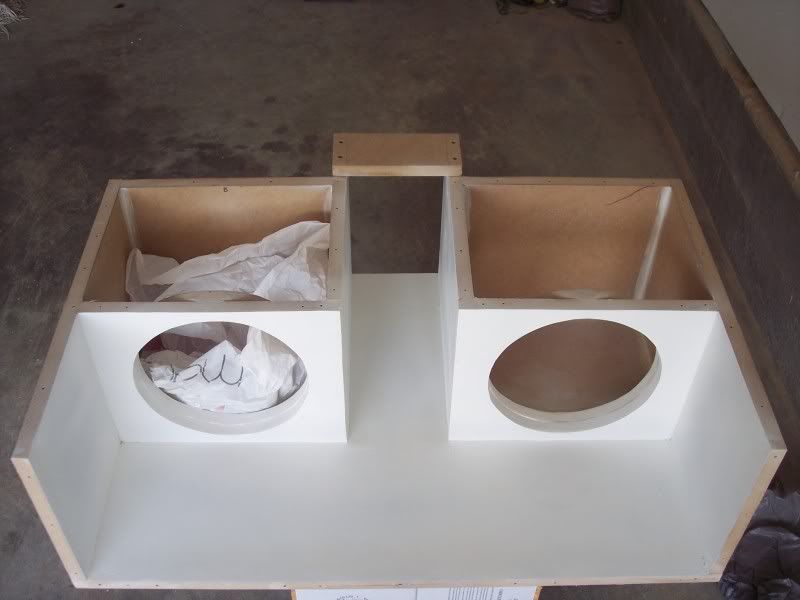
Pic from front of box looking thru back seat:
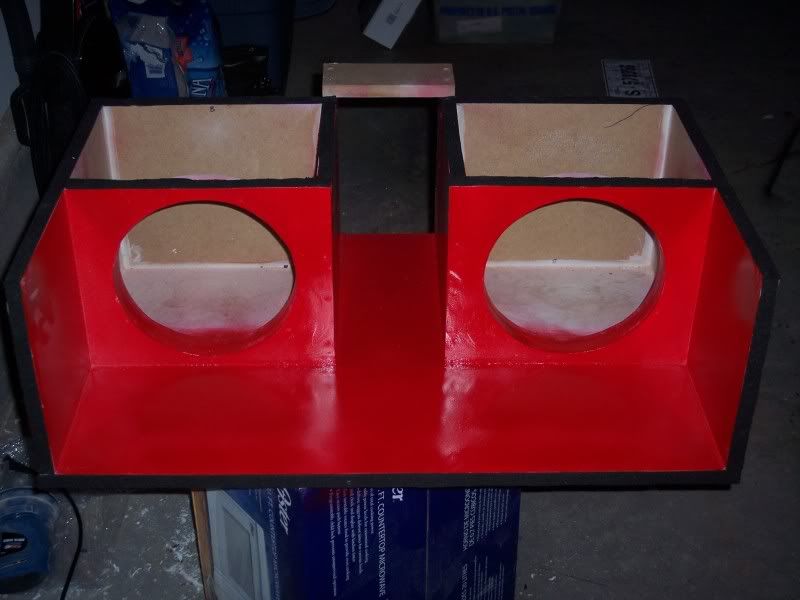
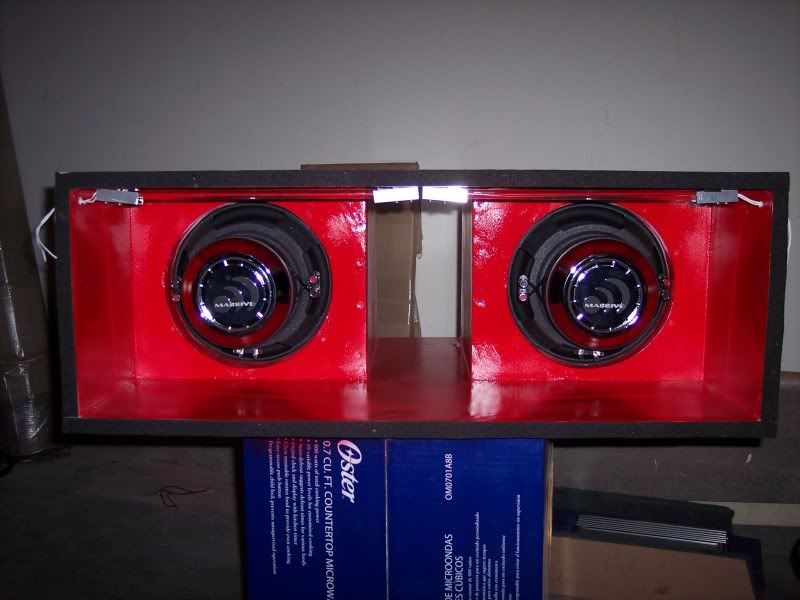
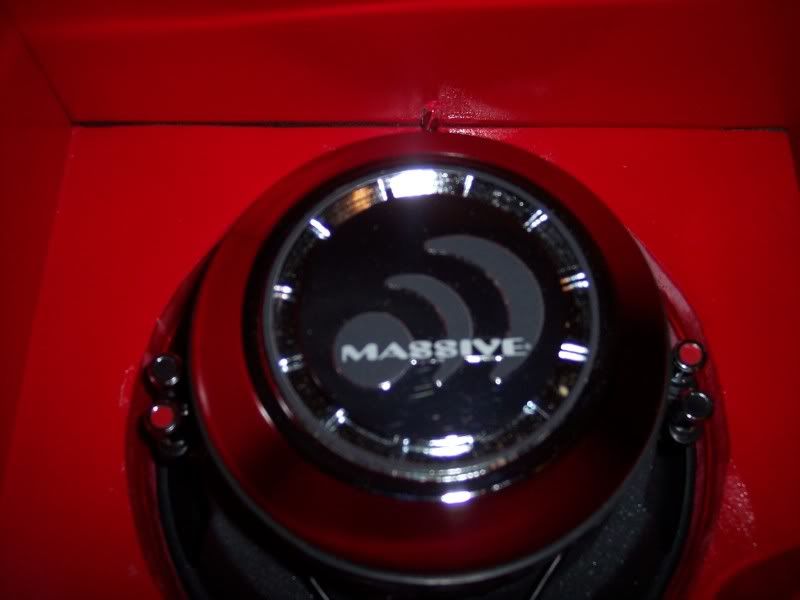
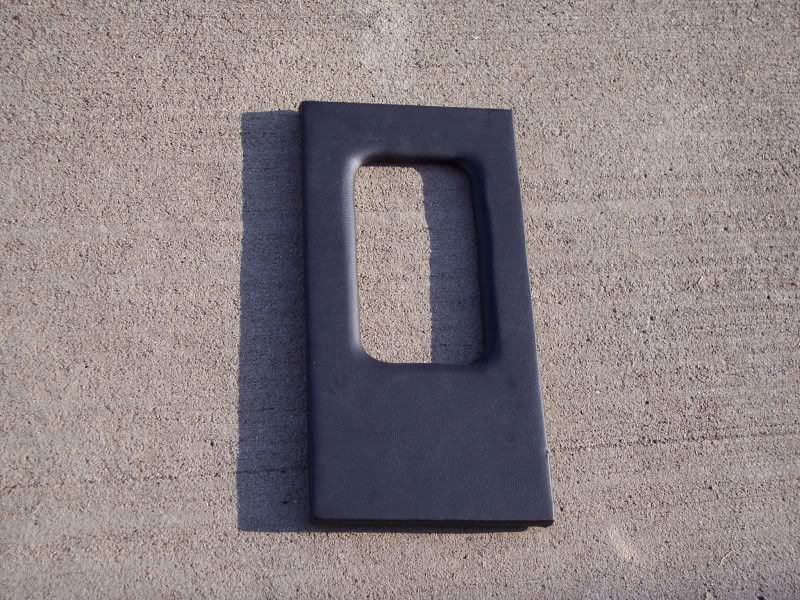
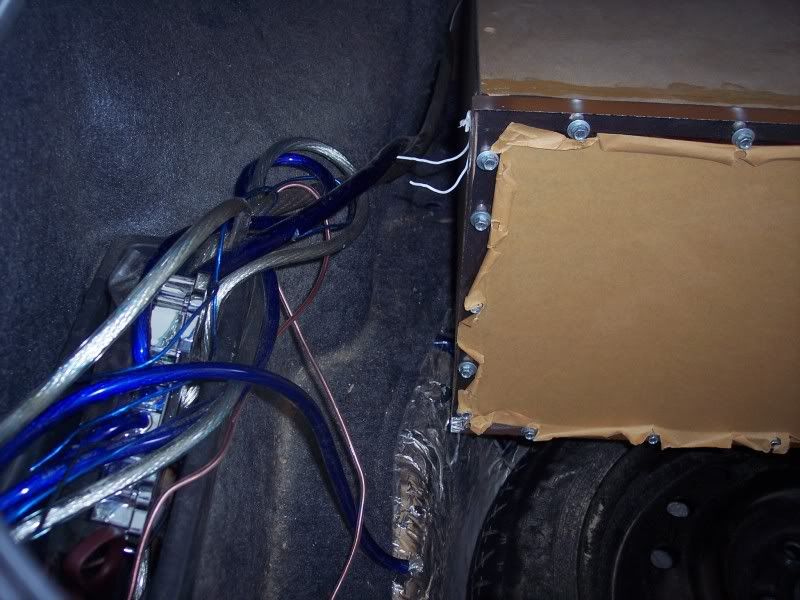
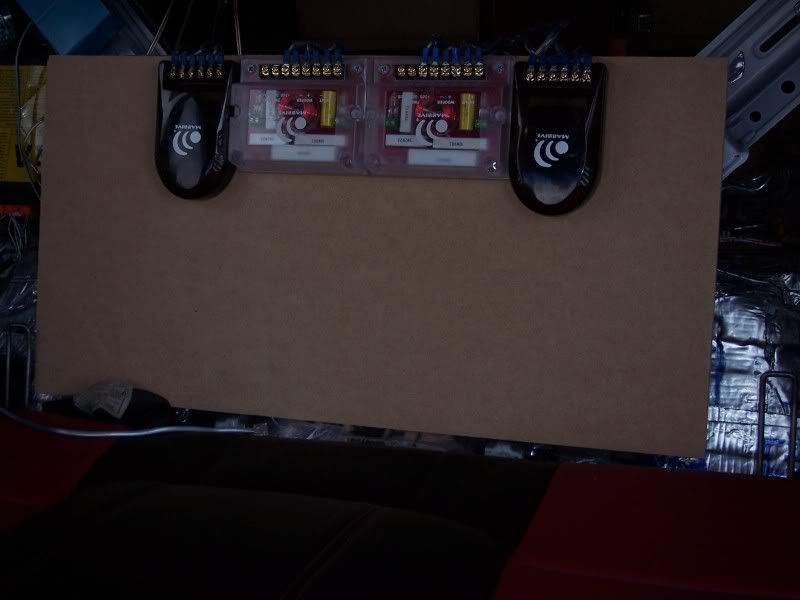
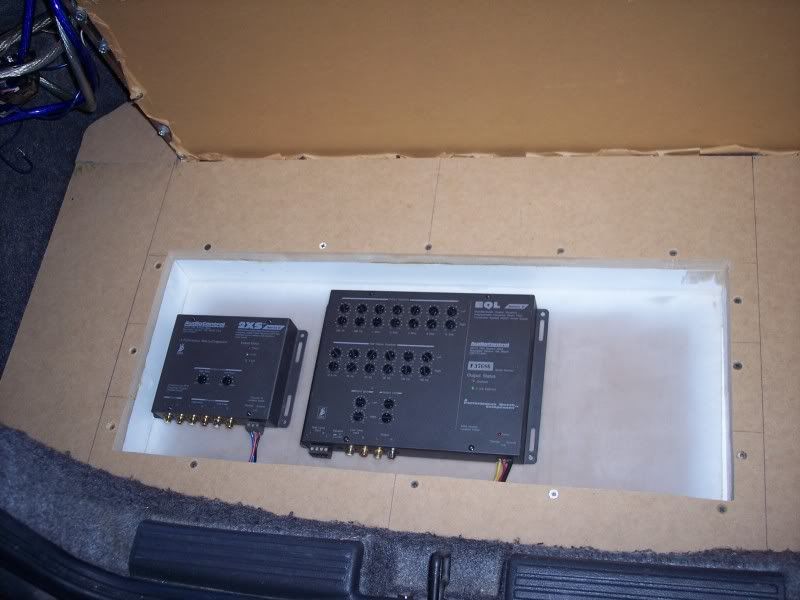
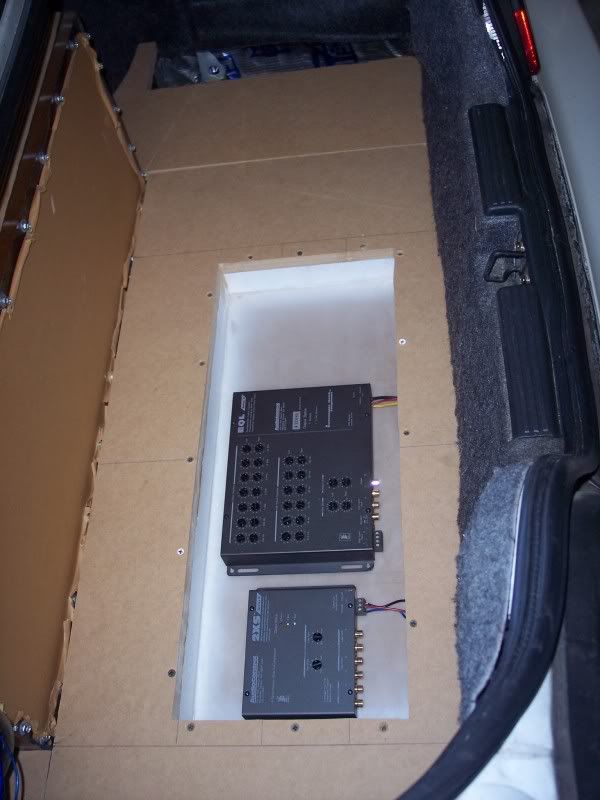
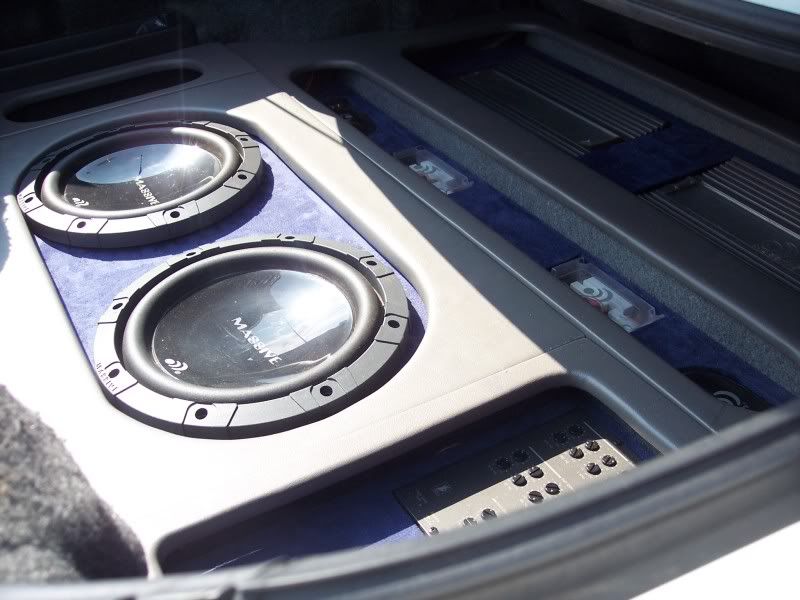
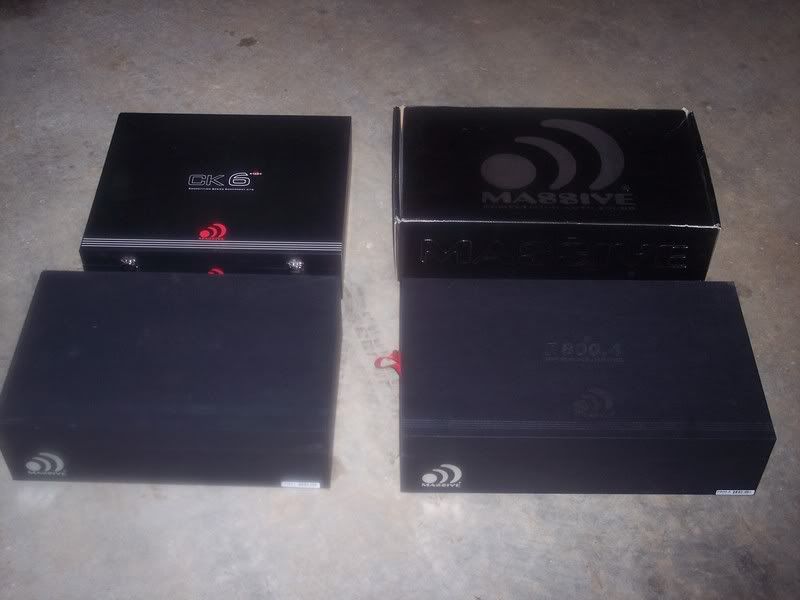
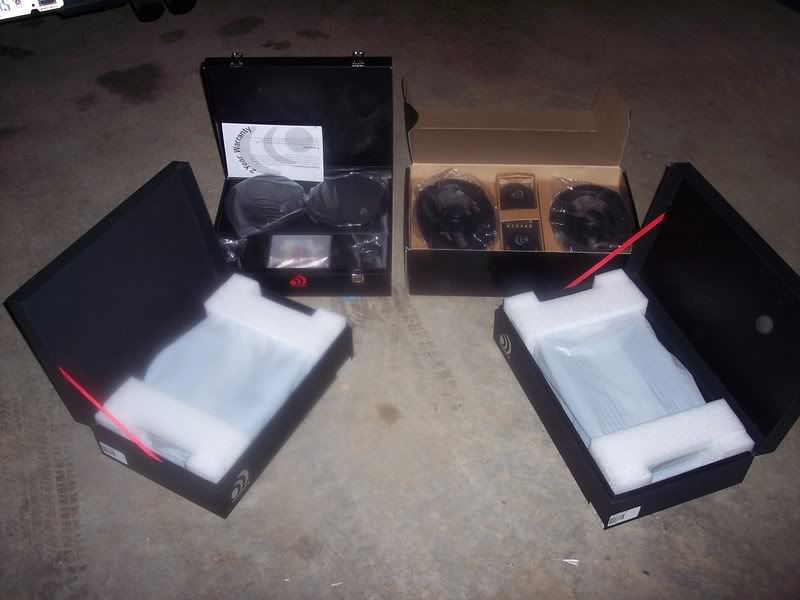
The trunk panels will all be reupholestered in black carpet and vinyl and the inside of the box will be red to match the interior of my car. Back of box will have a plexiglass window with my logo etched and lit by leds. My equipment is as follows: 1 1000 watt Massive Audio Class D amp which will run 2 10in Massive Audio RW10's. My other am is Massive Audio 800.4 which will power 5 1/4 in the front doors and 6x9's in the rear. I also will be running an audio control active 2 way x-over, audio control eql eq and audio control bass cube.
Well enough talking, subscribe to the thread if you like as I will take many pics of my update.
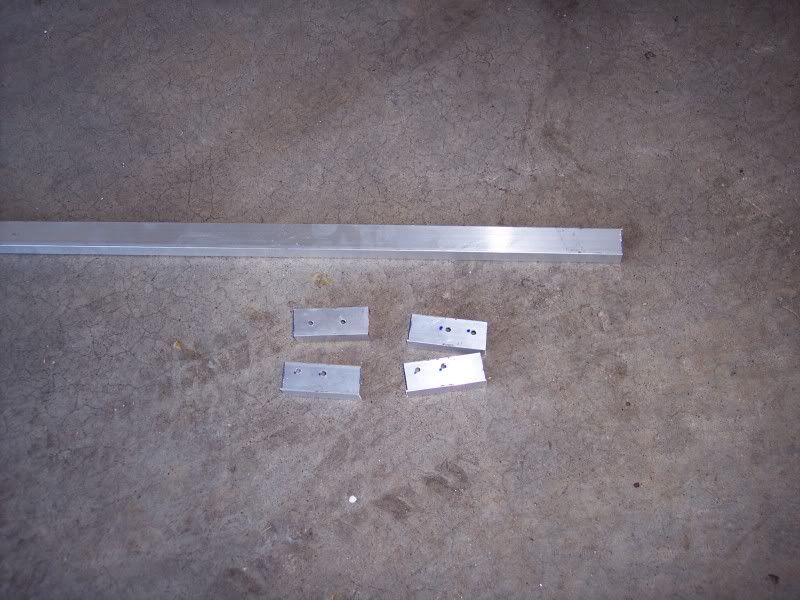
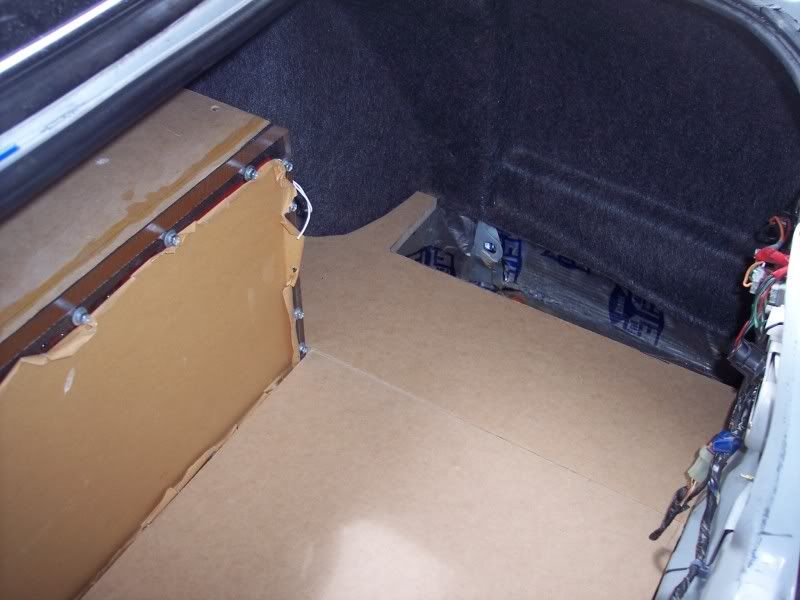
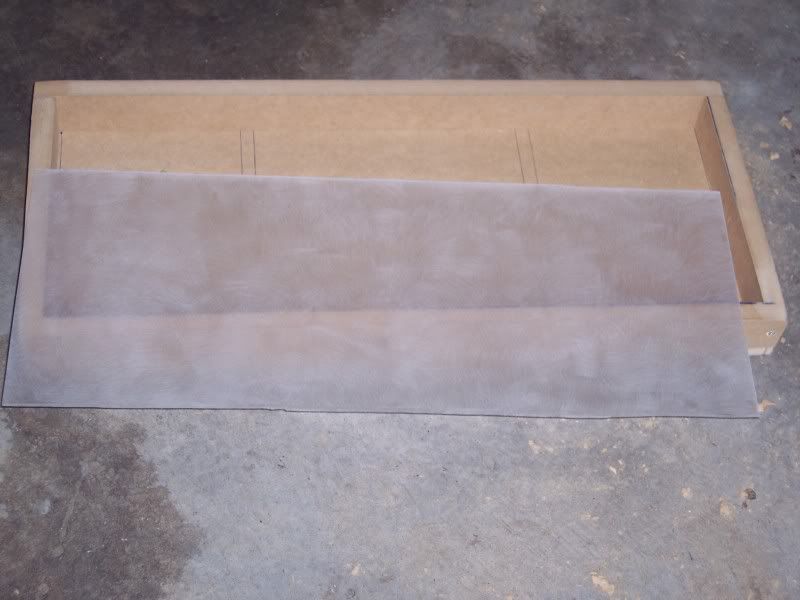
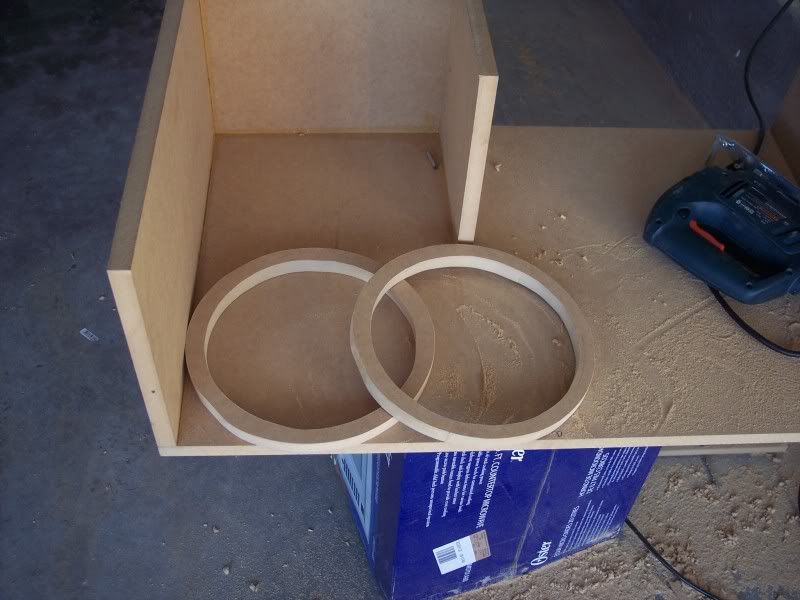
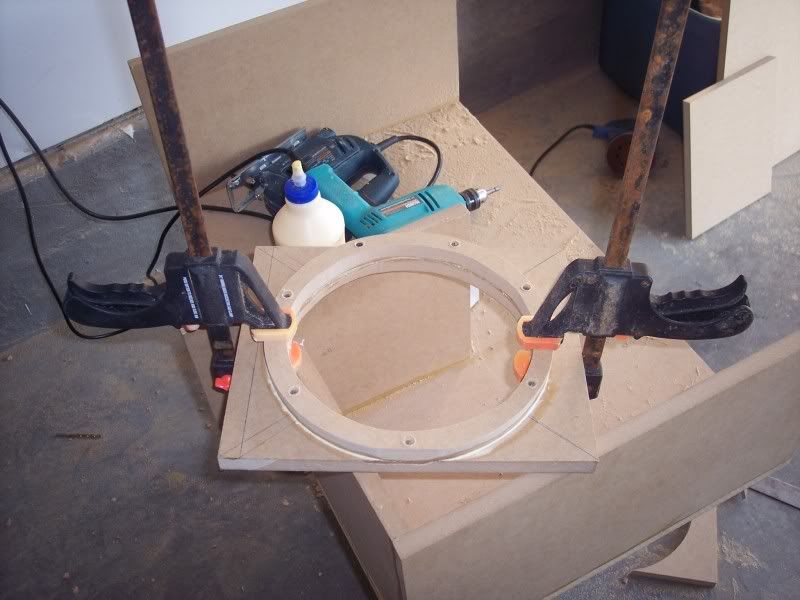
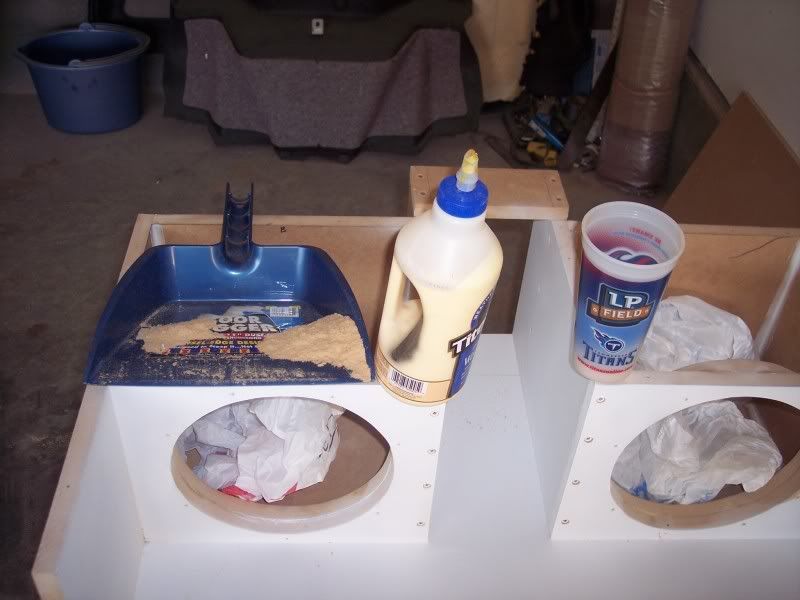
Make speaker rings so when mounting subs screws woudlnt show thru the wood.
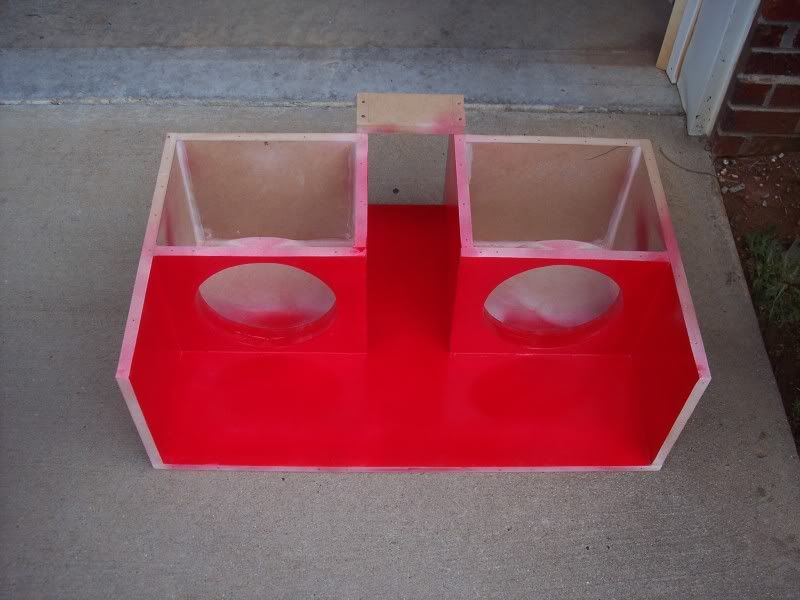
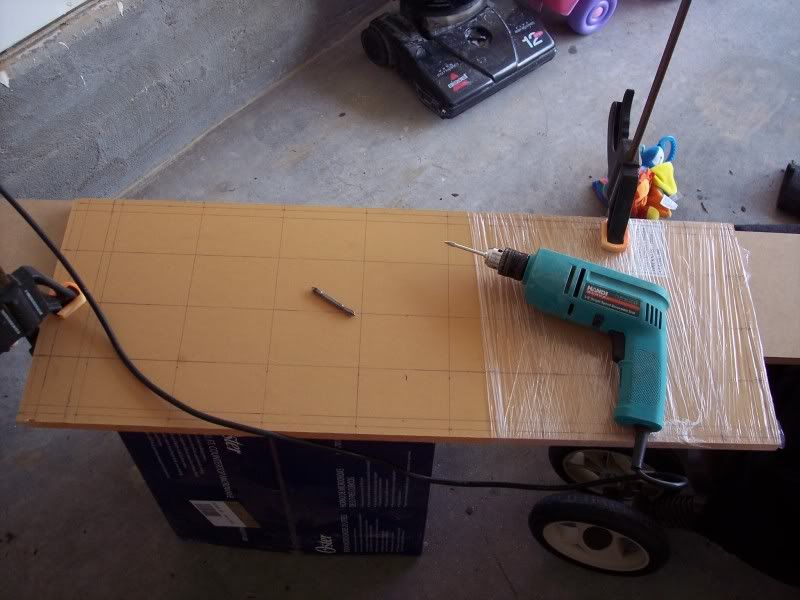
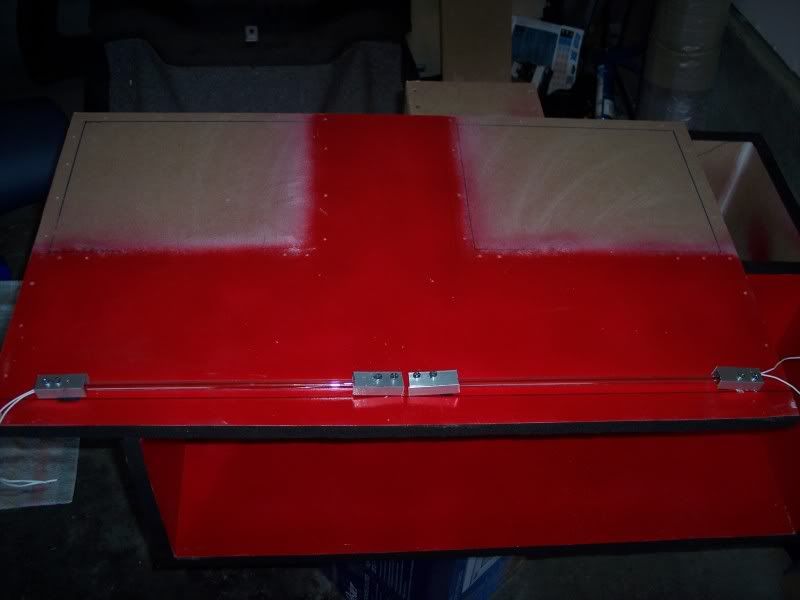
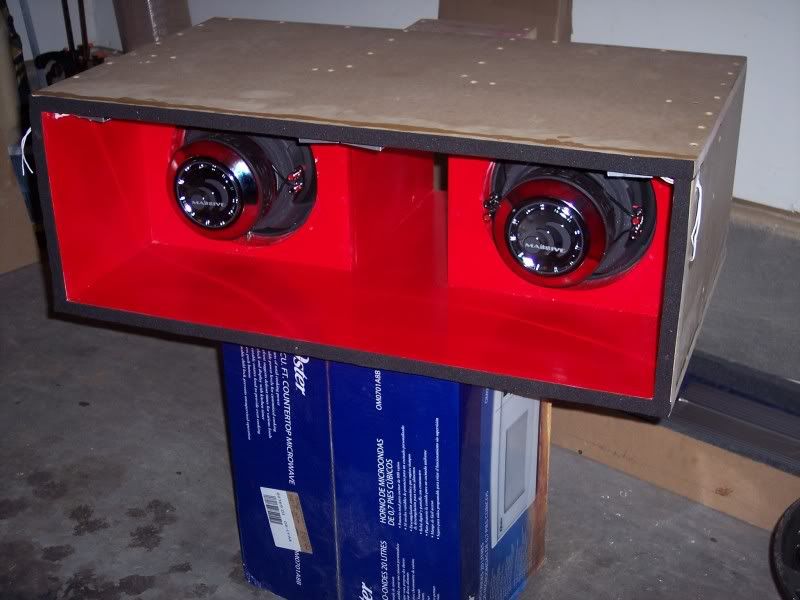
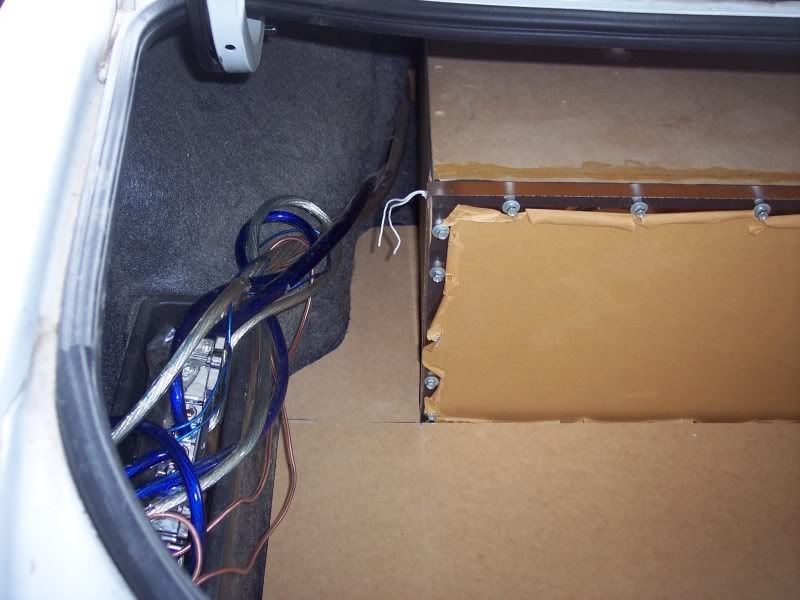
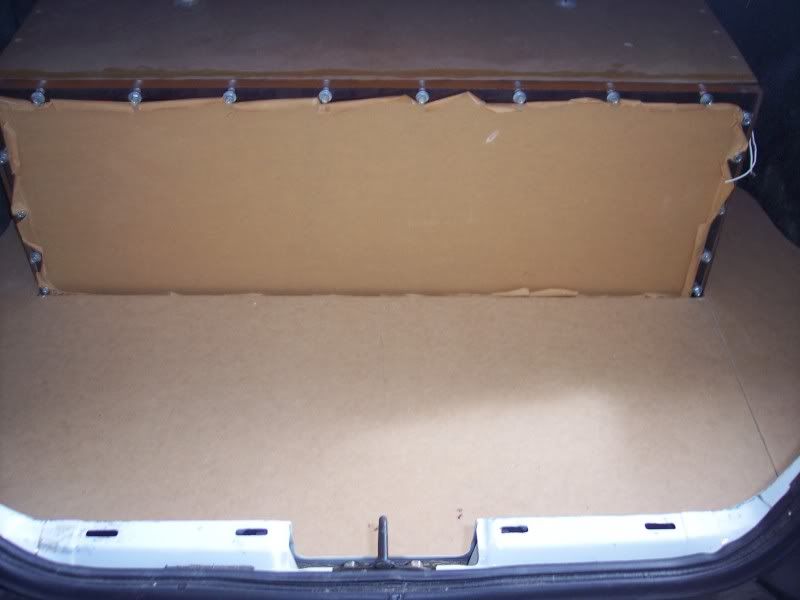
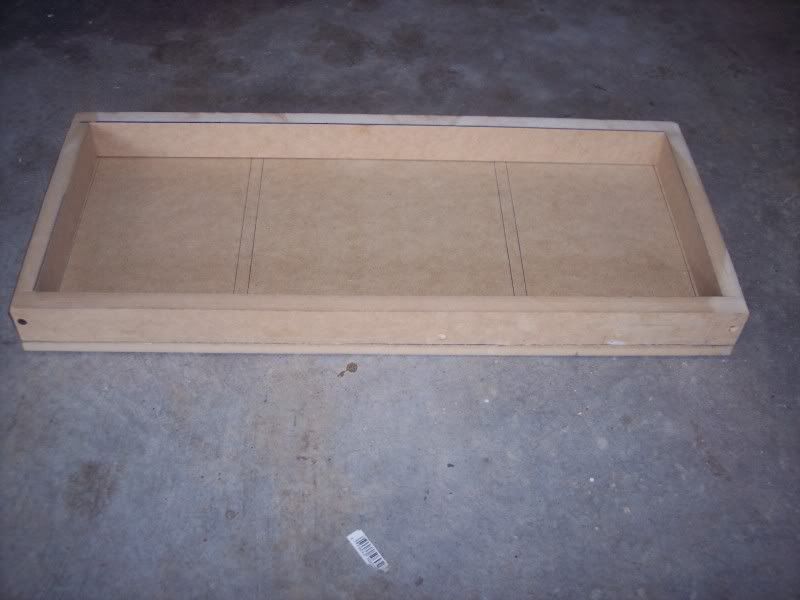
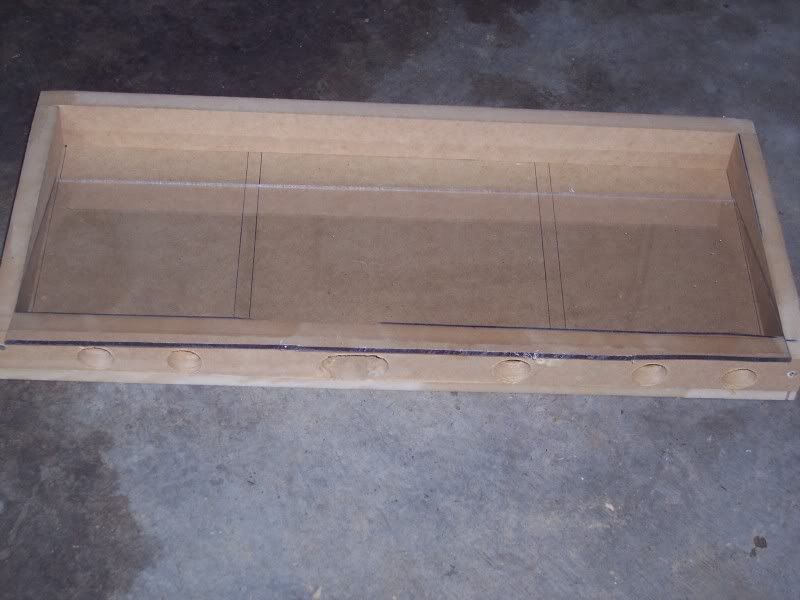
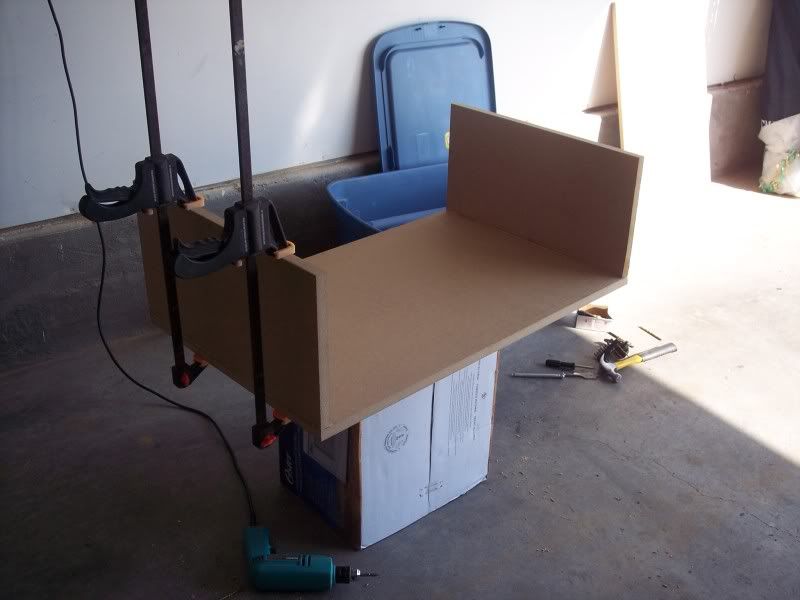
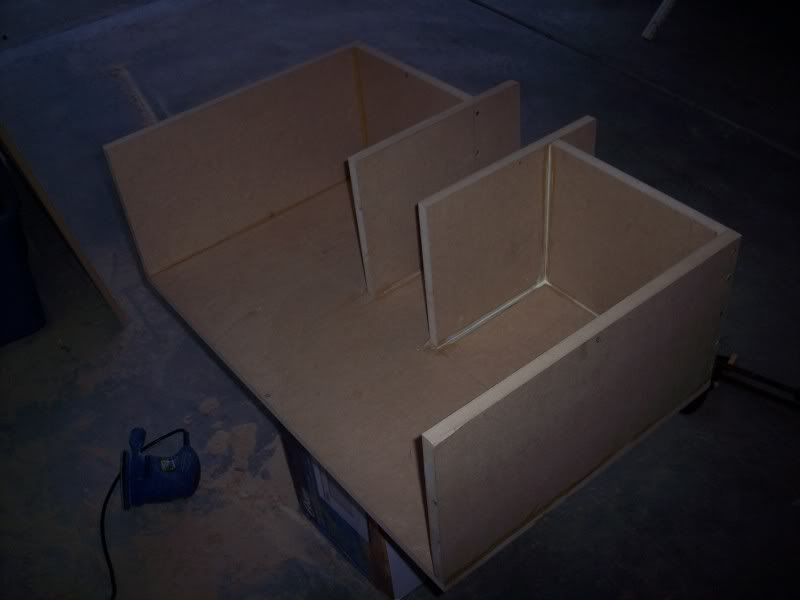
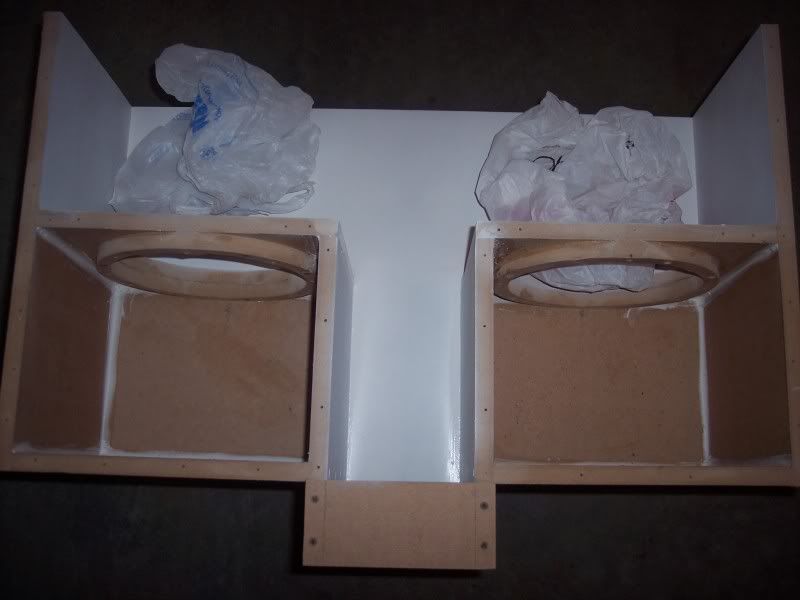
Ok finally got all the bottom pcs done and the sealed chambers together. As you can see the slot port will seperate the sealed chambers to go the ski pass.
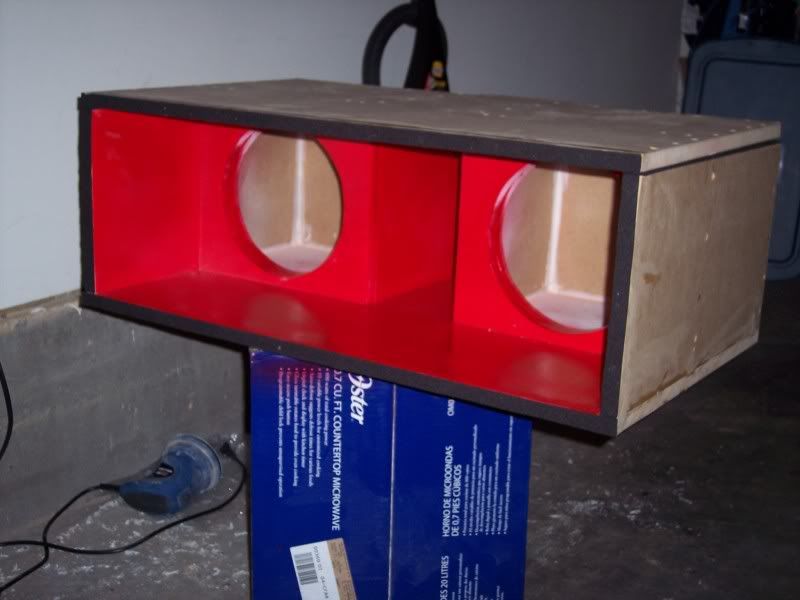
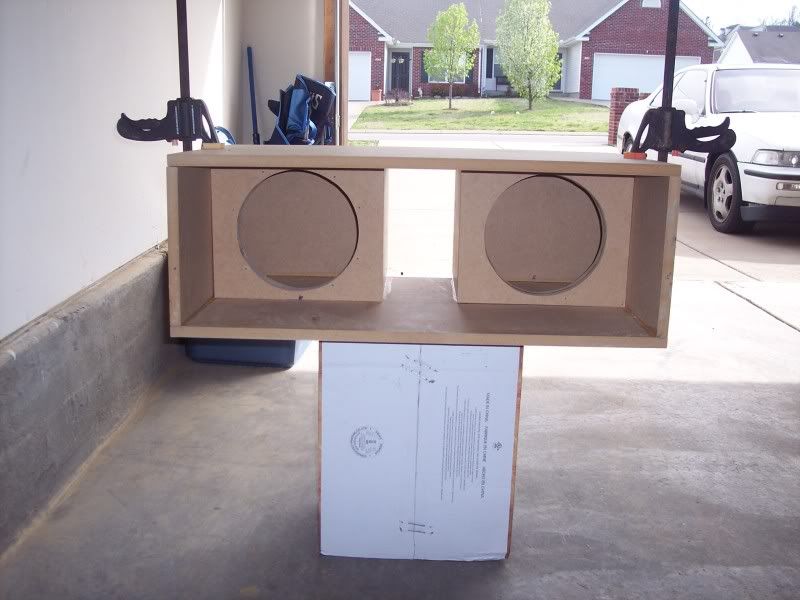
Completed pics of how it will all look once together.
Next step will be to remove screws and putty, caulk edges and then sand. After that I can start adding primer, sanding & then painting. More pics to come, stay tuned!
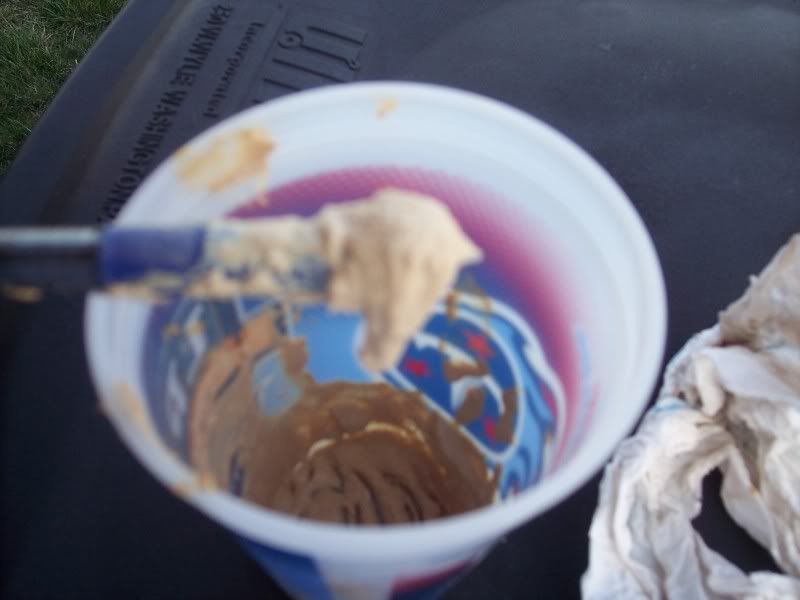
Added 1st coat of primer and removed screws which would be visible from back. Instead of buying wood putty its easier to make your own. All you need is your sawdust from cutting the wood and some glue and mix it til its like cookie dough. Push into the holes to fill, add some wood glue on top and let it sit til it dries.
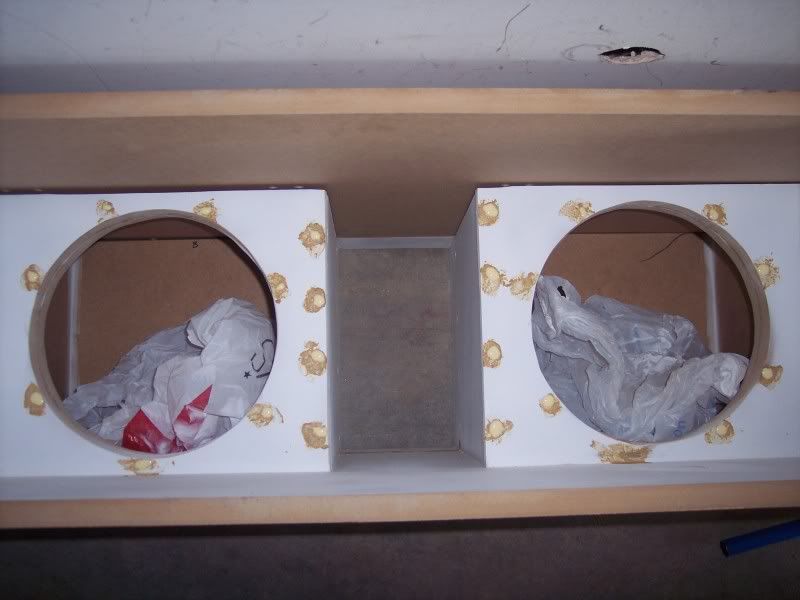
Caulked the edges of box to make sure its sealed.
After sitting over night drying, sanded to get ready for more primer.
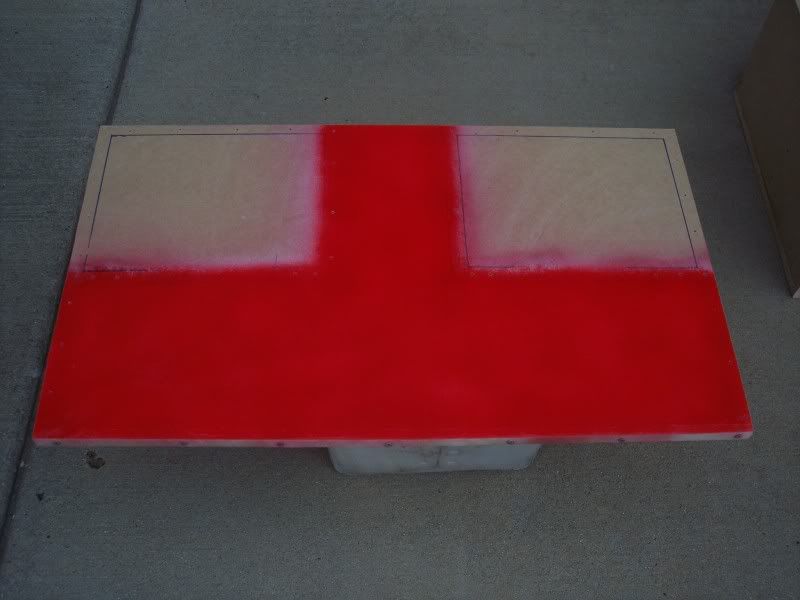
Added 2nd coat of primer. mdf soaks up alot of paint so I will be doing 3 coats of primer, 1 coat of white paint and then a final coat of red paint.
Hopefully I can get this done in the next day or so and I am waiting on my plexiglass to come ups as well.
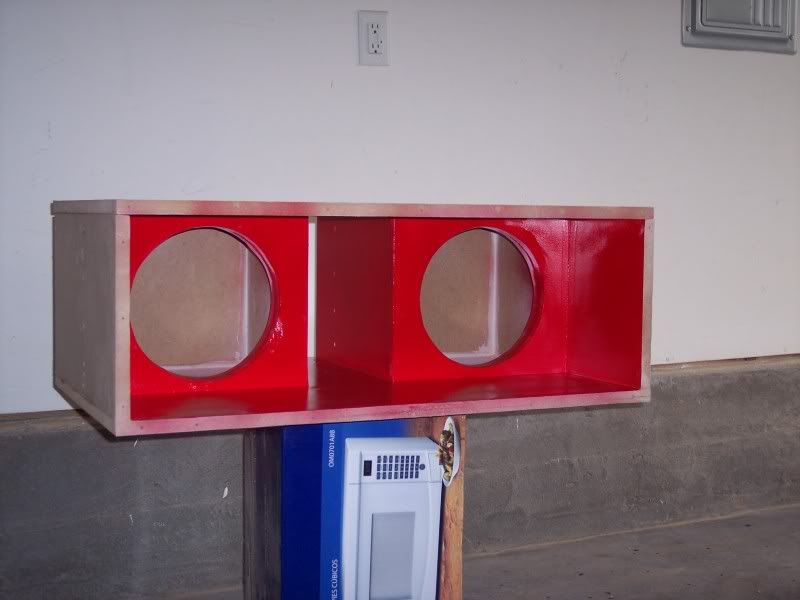
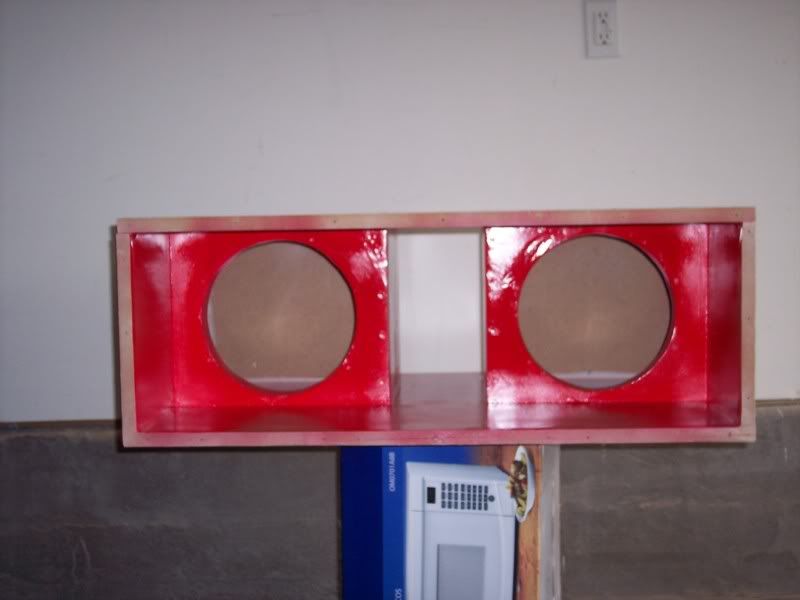
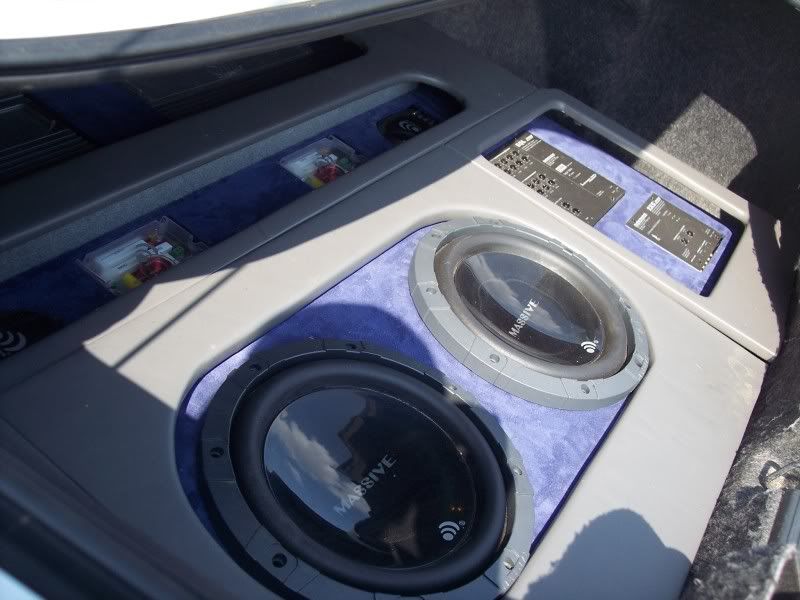
Updated pics of box after 3 coats of primer, 1 coat of white paint and then a couple coats of red. Still have to mount leds in box and drill holes for speaker wire.
Xclusive Acura Legend Coupe Build Log
...cont
Waiting on plexiglass to arrive & then its off to be engraved so i can finally finish. I'm working on the custom ski port while I wait UPS!
OK finaly getting a chance to get back on this after going to ATL meet last week (great turn out!). From previous box looks like box is almost done but there is still work to be done. Looked what arrived in the mail finally
This was my 1st time drilling plexi this thick. All you need is a glass bit, some water and a some patience. I used a baby bottle since it was laying around but a spray bottle will do as well. Mark hole on plexi, add water, drill a small bit, add more water, drill a small bit, etc. It took me about 5 to 6 passes to get one hole completely done.
Since I'm not able to glue the top down because of the way I desgined the box I will added some door/window sealer foam to make sure it is sealed (If I glue the top down and wanted/needed to get the subs I out, I wouldn't be able to without tearing up the box!). OK on to the pics:
Added foam gasket to top of the box and rear as well where plexi will connect to the box.
Next I added the red cold cathodes lights to top of box with some metal brackets I fab up:
Next I drilled holes for lights to go thru & wire subs in parrallel
I just got logo for the plexi so today or tomorrow hopefully I will get it on and plexi added to box to complete it for now before installing. Took me awhile because I don't want the wire to be visible when its installed in the car. I personally think it should be clean since it will be seen so Im going wrap speaker wire around the subs and go straight up so they arent easily seen once trim panel is added. Well more updates soon
Ok a few more pics. Wired subs in parrallel so speakers look like they arent wired, added final coat of paint & added plexi to box wtih hex bolts:
I will remove film from plexi once I'm done with the turnk. Then I finished ski port:
I need to go back and finishing the material on end of the armrest. Then started cutting out the floor for the trunk:
More pics to come soon! Next I have to mount amps, passive x-overs for componnents and 6x9's, make beauty board so box will be flush and finishing wiring system and I shall finally be done!
Ok since I didn't get to go to NALM 09' decided to do a little work on the system. Here is a little more progress and by the way thanks for all the comments on my build so far. Well not any room to display x-overs and I wanted to get them out of the way I'm going to mount them on a board that will sit under the sub box:
Next was going to keep it simple on this build but couldnt (not my style)..lol so I decided to mount my x-over, eq & epicenter(whenever I find it, I've put it somewhere so I would know where it was...lol). The equipment will sit on a piece of plexi I frosted to spread the neon light which will be under it:
clear plexi:
frosted plexl:
I love this because the equipment is thin enough that I can still have my spare tire and jack sit underneath it with no problem (I didnt even have to raise the height of the floor)! Next I started working on false floor. I used 2 sheets 1/4in mdf glue together and mounted plexit from the back:
Then started working on beauty panel. This was my first panel flush with sides of the trunk and I have to say it took me forever to get it just right. 3 wasted sheets of 1/2 mdf I finally got it right. I had to use a router so that it would sit flush against the box since I used hex bolts on the box. Making the beauty panel was harder than making the box...
Ok next since all the wood is finally cut, I can start wiring this thing up finally and once its playing, then Ill go back and start upholestering everything.
Since removing everything from the old system, I set e/thing aside so I wouldnt misplace it and of course, I cant find my epicenter now. I have always run audiocontrol eq's & x-overs but decided to give PG a try. I was able to find a bass cube & eq215 and now if I can find an active 2way PG x-over in black I will be set. If anyone has one please let me know and I will update pics as the build continues.
-
- Half Baked
- Posts: 3533
- Joined: Wed Dec 06, 2006 2:58 pm
- Location: TN, YEEEEEEEEEEEEEEEEEEHAW!!!!
- Contact:
- reallyxxxxxxloud
- Posts: 168
- Joined: Tue Jun 02, 2009 1:17 am
A lot of Honda's over here do fold down seats? odd they don't there...stipud wrote:Brian, it's bandpass, not just a regular port. Those two subs are sealed within the box, so there's no different "plane" to speak of.
Looking good so far
Why does Honda never do folding rear seats? I swear I use mine almost every damn day.
Looked like a nice old school system can't wait to see the finished job.
- Thunderdome
- Posts: 806
- Joined: Mon Feb 09, 2009 4:19 pm
- Location: Ont.