not completely done but covered. I have ordered some blue strip LEDs to go around the amp behind the coverboard that should be in any time. I had to double check my math, but to go all the way around the amp was almost 6 ft worth..... Tomorrow I am going to start on finishing the housing for the cd changer that will go in one of the jump seats, as well as hold the x-overs and the RMD. It will take a little time as I am going to flush mount the x-overs and the diamond hex x-overs are not a super simple shape to flush.
The good - I meant for it to look clean and simple so it would not attract attention and it is. I am almost afraid to say it is a little too clean but it does look a little out of place. I have thought about putting the cargo net that was there originally on the coverboard to break it up a little but not sure. I took it for a short spin tonight and was happy that there were no rattles.
The bad - AIRFLOW!!!!! I did a system with ZX amps in a similar way with the ends open in the amp rack long ago and it was fine. I did this the same way and cut holes in the coverboard directly on top of the cooling fans to allow air to move over it. The air is drawn in from the back of the cover board and there is no problem drawing it in from there but rather in the middle. I forgot that the octane being 2 amps put together, draws half of its air from the perferated metal top in the design logo and the coverboard is is resting on top of it preventing fresh air from comming in. I am first going to look into adding some cross-flow fans to see if I can force some more air in the sides before I consider tearing off the covering of the coverboard, trimming it to allow more air and then recovering it.
I was starting to wonder if the temp gauge I added to read the amp temp was going to go over 111 degrees as I had tried to play it hard for a while and never got over that. Tonight after about 30 mins of jamming on it, I noticed the temp was up to 133 which was was led me to pull the cover off. With the cover off it quickly dropped to 115 in only 4-5 mins, you guys gotta get one of those as it is cool.......
So, good or bad whatcha think? I'll just post a link rather then trying to resize pics again. If anyone has questions on how it was build feel free.
http://www.cardomain.com/ride/3237206/4
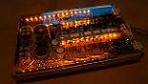
the amp rack is lit up!
the amp rack is lit up!
Last edited by ttocs on Sat Mar 14, 2009 10:15 am, edited 1 time in total.
-
waynehead

- No, you're a towel.
- Posts: 938
- Joined: Fri Aug 01, 2008 8:26 am
- Location: Butthole of Ohio
Clean install. How do your components perform in those baffles. I am building my daily driver doors for some boston sx69's. Right now I have a baffle alittle bigger than what you have there sealed on the door panel. would I get any kind of midbass in that small of an enclosure? I was planning on sealing the front and using the door as a baffle. Any suggestions?
We don't need no stinkin' bass boost!
thanks for the kind words. Sorry for the bad pics but these were taken only a moment after the "it DOES fit covered" moment. I also think my old camera is starting to go out on me.
I LOVE the enclosures. I get better responce out of the hex 6.5s in my mustang but they are getting a little more power since they are bi-amped. I have the x-over on the amp turned all the way down to allow as much sound as possible out of them and I have not played much on them that has not left me smiling. I have listened to speakers with and with out enclosures and like them.
The secret to the tupperware approach is stiffening them up with the sound damping. With out it the flat bottom would flex when the speaker was loaded into it and the cone was tapped. With as thick both the damping material in the second skin is, as well as the foil on both sides it hardly moves at all.
I also noticed a big difference with the luxery liner pro in the doors as this was my first time using it. The doors sounded solid with the layer of second skin but now they sound like a piece of wood if you knock on them.
I recently re-upped my subscription to sirius after getting everthing tuned and figuring out that they shouldn't go bankrupt ASAP. Has the quality dropped or is it just the combination of the solid doors and enclosures that is making the speakers pick apart the sirius? I have noticed it is no where near as clear and bright and never noticed such a large difference before.
If you guys have not checked out second skin yet you need to.

Looking good so far. I like the lighted emblem. nice touch.
As for the cooling issue, Those amps can only cool themselves threw the forced air flow which enters from the top of the amp. Blocking them off with the cover panel is gonna be a constant problem. Maybe a cut-out with a grill in the cover panel would be an easy enough fix. And still keep the stealth appearance.
As for the cooling issue, Those amps can only cool themselves threw the forced air flow which enters from the top of the amp. Blocking them off with the cover panel is gonna be a constant problem. Maybe a cut-out with a grill in the cover panel would be an easy enough fix. And still keep the stealth appearance.
Greg Kitching

I am really happy with the logo as it would have looked too plain with out it. Thinking back now I kinda wish I had put some pin-striping under the material that would have gone around the logo and continued around the sides I am going to finish but water under the bridge now. As I said I did a couple of systems with the ZX and Ti amps in a similar fashon and just never really thought about the fact that there is another set of heat sinks in the middle. It would not be a HUGE deal to rip off the fabric and make some more holes to let it breath but I am low on material at the moment. I have enough to recover the center section but would need more to finish the sides, but I think it would be easier and cheaper then the fan method. I idea was to get some squirrel-cage cross flow fans and just fource as much air as I could in there but I know that with no place to go except out by the other fans.
Thank god for the temp gauge, besides being neat as hell it probably saved my ass. I could feel the heat under the cover board when I took it off
Thank god for the temp gauge, besides being neat as hell it probably saved my ass. I could feel the heat under the cover board when I took it off
I put everything back in and fired up the lights! Cool blue even during the moring so I know this will be obnoxious at night. Thankfully I installed a switch that turns the lights out when the cover is in place as well as a switch in the consol to turn the off if I want. This was my first time doing a raised line and now my only regret is that I didn't do another line or two above and below it. It adds a nice tough and breaks up the big grey wall.
http://www.cardomain.com/ride/3237206/4
http://www.cardomain.com/ride/3237206/4
went out and took a look at it last night and was happy that the lights were not too bright. Took some more pics and updated the page, couldn't be happier with it so far.
Today I am going to start covering the housing for the cd changer that goes inside the jump seat. I am going to continue the raised line on the front of this piece and figure out some way to make it end cleanly.
Today I am going to start covering the housing for the cd changer that goes inside the jump seat. I am going to continue the raised line on the front of this piece and figure out some way to make it end cleanly.