Return To The ZX450v.2
-
dBincognito

- Randy Bo-Bandy
- Posts: 3301
- Joined: Fri Feb 06, 2009 11:32 pm
Return To The ZX450v.2
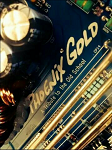
Alright, here we are.......I have begun the work on the ZX450v.2......this is what it looked like originally....no LED's, gain pots are a bit too wide, a chip is missing near the speaker terminals......I was going to paint it......but now I will be sending it to Hyde's Custom Franking Shop for a Frank'd out finish of some kind 
-
dBincognito
- Randy Bo-Bandy
- Posts: 3301
- Joined: Fri Feb 06, 2009 11:32 pm
-
dBincognito
- Randy Bo-Bandy
- Posts: 3301
- Joined: Fri Feb 06, 2009 11:32 pm
-
dBincognito
- Randy Bo-Bandy
- Posts: 3301
- Joined: Fri Feb 06, 2009 11:32 pm
-
dBincognito
- Randy Bo-Bandy
- Posts: 3301
- Joined: Fri Feb 06, 2009 11:32 pm
-
dBincognito
- Randy Bo-Bandy
- Posts: 3301
- Joined: Fri Feb 06, 2009 11:32 pm
While cleaning it, I came across these.....here's what Jason said about them
That resistor smokes because of high DC on the input signal. Either a problem at the HU, or the line out is in hard clipping and you have what amounts to pulsed DC on the input. The Capacitor acts like a dead short to DC and passes it all through that 1/8w resistor to physical ground. If it is over driven hard enough, long enough it burns the little critter up.
-
dBincognito
- Randy Bo-Bandy
- Posts: 3301
- Joined: Fri Feb 06, 2009 11:32 pm

How much time, patience, and practice does it take to de-solder things and have a clean, unburnt looking board?
What exactly do you use to suck up the solder? Solder sucker? Is that what they're called? What wattage iron do you use? I have an M50 board that needs parts added to it, but until I get a job she's on hold.
Looks good.
What exactly do you use to suck up the solder? Solder sucker? Is that what they're called? What wattage iron do you use? I have an M50 board that needs parts added to it, but until I get a job she's on hold.
Looks good.
"ZPA's will have the same sound essentially as you get from the MS, they just feature a bigger shinier set of balls."
Install:
http://phoenixphorum.com/viewtopic.php?f=10&t=16998
Install:
http://phoenixphorum.com/viewtopic.php?f=10&t=16998
I've always used this stuff and have had great success. Smaller components on a board you may want to use a 15W fine tipped iron and for larger components (transistors with thicker leads or other larger components) a 30W regular tip....some irons have a switch between low and high output.smgreen20 wrote:How much time, patience, and practice does it take to de-solder things and have a clean, unburnt looking board?
What exactly do you use to suck up the solder? Solder sucker? Is that what they're called? What wattage iron do you use? I have an M50 board that needs parts added to it, but until I get a job she's on hold.
Looks good.
-
dBincognito
- Randy Bo-Bandy
- Posts: 3301
- Joined: Fri Feb 06, 2009 11:32 pm
Desoldering everything on this board took about 2.5 hours......it's not that hard, more tideous than anything....you need good eyes and a steady hand.....I use a solder sucker....inexpensive...like $10, and much faster than copper braid....I use a 60 watt iron.smgreen20 wrote:How much time, patience, and practice does it take to de-solder things and have a clean, unburnt looking board?
What exactly do you use to suck up the solder? Solder sucker? Is that what they're called? What wattage iron do you use? I have an M50 board that needs parts added to it, but until I get a job she's on hold.
Looks good.
Here we are now.....all of the BA4560 op-amps have now been removed.
-
knightrider358
- Posts: 1318
- Joined: Mon May 04, 2009 3:37 am
- Location: Virginia, Near D.C.
this would be a great how-to upgrade or replace post randy, Great work man! I salute ur talented hands. I hope the same goes into the 2 amps I sent and gave u to have them turn out great amps. Keep up the photos and instructions man.
Current 1 of 2 current installs
HU-Alpine IVA-D310
DSP-PXA-H701
Comps-JL ZR 650
Sub-3 JL 10w6v1ae's sealed
Highs amp-MS275
Mids amp-MS2125
Subs amp-MS2250TA
HU-Alpine IVA-D310
DSP-PXA-H701
Comps-JL ZR 650
Sub-3 JL 10w6v1ae's sealed
Highs amp-MS275
Mids amp-MS2125
Subs amp-MS2250TA
-
oldskoolmseriesfan

- Sherlock Homey
- Posts: 2517
- Joined: Sun Oct 19, 2008 10:03 pm
- Location: WEST SIIIIDE!!