FRANKED & OTHER PC SAMPLES> 5th RUN> EQ & D-BL

Need help with your car stereo system? Have a technical question? Post here.
User avatar
mhyde71
Dr. Jekyll
Posts: 6231
Joined: Sun Jan 20, 2008 8:34 pm
Location: PG FanBoy in Green Mtn Vermont
Contact:

Post by mhyde71 »

ttocs wrote:that is cool looking. I assume it would be possible to wetsand the clear and try to get rid of alot of the orange peel and I wonder if that would look even better?

Do you have a link to the pc system that you are using?
not quite sure i understand about the orange peel removal? maybe you can clarify for me/us?

here is the gun i am using:
http://cgi.ebay.com/Pony-Hyper-Smooth-3 ... 7C294%3A50

pic's of oven are up-top above these last couple posts. It is a 20" x 18" x 19" (inside demensions) oven; A Cadco 440 or something like that.
PAST WORK/S HERE::
https://www.facebook.com/KhameleonKoatings/photos_albums
ttocs
the Floor Sweeping Hack with Golden Ears
Posts: 14797
Joined: Fri Dec 19, 2008 9:53 pm

Post by ttocs »

orange peel is the term for paint when it comes out in a way that is not perfectly flat and looks like the peel of an orange in some form. It is common to have some type of this effect in almost any painting technique unless it goes through a wetsand/buff process. Most clear coats will say that they are sandable and this is why. Put down a couple of good thick coats and then wetsand with 800-1000 and even 2000 if you feel the need but be sure to use some kind of block or flat surface to keep the paper perfectly flat. When you do this you will take the top of the orange peel off of the clear coat and if you go down enough you will make a glass-like surface of the clearcoat. When you buff it and polish it I bet that the flakes in the PC would really REALLY pop and look even better then it already does.


I am talking about 10-15 mins of light sanding on each grit. The last time I did it the pieces was small enough to do in my sink so I just let a light stream of water go over the piece as I sanded it . You don't really need to go over 1000 grit and a light buff and polish(power ball time!) and I bet with 45 mins of work you will be dying to make a new video to show us how good it looks.
User avatar
mhyde71
Dr. Jekyll
Posts: 6231
Joined: Sun Jan 20, 2008 8:34 pm
Location: PG FanBoy in Green Mtn Vermont
Contact:

Post by mhyde71 »

ttocs wrote:orange peel is the term for paint when it comes out in a way that is not perfectly flat and looks like the peel of an orange in some form. It is common to have some type of this effect in almost any painting technique unless it goes through a wetsand/buff process. Most clear coats will say that they are sandable and this is why. Put down a couple of good thick coats and then wetsand with 800-1000 and even 2000 if you feel the need but be sure to use some kind of block or flat surface to keep the paper perfectly flat. When you do this you will take the top of the orange peel off of the clear coat and if you go down enough you will make a glass-like surface of the clearcoat. When you buff it and polish it I bet that the flakes in the PC would really REALLY pop and look even better then it already does.


I am talking about 10-15 mins of light sanding on each grit. The last time I did it the pieces was small enough to do in my sink so I just let a light stream of water go over the piece as I sanded it . You don't really need to go over 1000 grit and a light buff and polish(power ball time!) and I bet with 45 mins of work you will be dying to make a new video to show us how good it looks.
well ya know that is very interesting... thx for the info... what's more is that I noticed it as i laid the first coat of the black with the flakes... And then i laid down two top clear gloss's, in hopes that it would do just as you described.... so given that being the case, what about doing the black a couple times and then sanding and then laying down clear gloss? and or, is there something a little more deep rooted to fix and not that easy? Thinking that I prolly should have worn latex gloves (didnt know wife moved them), and be sure to remain 6" from substrate, will help, but not sure that will remedy the issue...

Thanks for that info on the process, So, i can take the piece in the state it is in now and still continue with the next stage and wet-sand it sounds... Excited to see, may have to do all that way if yields (i can yield) favorable
results!
PAST WORK/S HERE::
https://www.facebook.com/KhameleonKoatings/photos_albums
User avatar
mhyde71
Dr. Jekyll
Posts: 6231
Joined: Sun Jan 20, 2008 8:34 pm
Location: PG FanBoy in Green Mtn Vermont
Contact:

Post by mhyde71 »

more samples this weekend...! :D
PAST WORK/S HERE::
https://www.facebook.com/KhameleonKoatings/photos_albums
ttocs
the Floor Sweeping Hack with Golden Ears
Posts: 14797
Joined: Fri Dec 19, 2008 9:53 pm

Post by ttocs »

I am not familiar with sanding powdercoat but I am sure it is not much different. It is important to try and keep the paint flat but I had the same layering problem when I did my carbon fiber paint recently.

just lay the clear as thick as you can with out running and then start wet sanding. The first time you do it you will be a little scared as you will take what looks like a fairly good clear job and then sand it to a dull finish. The top will start to look very very cloudy but after a short time you should be able to feel the difference on the top. AFter you buff that bitch(power ball mini) and put a coat er two of wax you will just want to stay home and look at it and rub it all day long....
scottn29
Posts: 461
Joined: Mon May 04, 2009 4:04 pm

Post by scottn29 »

paint has the "orange peel" effect not the clear coat, you would sand the paint then apply the clear
roybou64
Posts: 7
Joined: Sat Jul 18, 2009 8:11 pm

Re: FRANKED & OTHER PC PAINT SAMPLES> 3rd RUN 3 new v

Post by roybou64 »

mhyde71 wrote:OKAY GUYS! I think i am in the right direction for getting the exact ratio/color/etc for making/dupe'ing the frank paint color....

BEFORE PASSING JUDGEMENT please note:

1) this is my first go'round with trying to do the franked PC and yes I know that the concentration was too high for the blue and pink.. I am making second round this afternoon- but wanted to give you guys something to look at for starters...
2) I do not have the size of oven I would like and can only do small items... (larger oven is in the works though) which a larger oven will allow me to (obviously) do larger items, sinks/covers/etc...
3) THE END PLATE SHOWN- That is OEM, and what I am working off of for/as a "template"
4) THE LAST PIC, I think out of the 1st run was/is the closest... just needs maybe a little more black

BUT I AM Heading in right direction, I think a few more shots at trying to get the exact (close enough too exact) ratio of blue and pink flakes and the right black etc... should have it figured/worked up by this afternoon... if I do not get distracted trying/fooling with other colors I have...

(@DDD- CANDY RED SAMPLES AS SOON AS IT COMES IN- BEEN ORDERED JUST WAITING)
nice
rlockwood
Posts: 344
Joined: Sun Jan 21, 2007 10:14 am

Post by rlockwood »

hmm. can you fit an 17x8 wheel in your oven? :P
I'm afraid of widths.
User avatar
mhyde71
Dr. Jekyll
Posts: 6231
Joined: Sun Jan 20, 2008 8:34 pm
Location: PG FanBoy in Green Mtn Vermont
Contact:

Post by mhyde71 »

rlockwood wrote:hmm. can you fit an 17x8 wheel in your oven? :P
in fact I could. oven measures in at 20" x 20.5 x 20

:shock:
PAST WORK/S HERE::
https://www.facebook.com/KhameleonKoatings/photos_albums
User avatar
mhyde71
Dr. Jekyll
Posts: 6231
Joined: Sun Jan 20, 2008 8:34 pm
Location: PG FanBoy in Green Mtn Vermont
Contact:

Post by mhyde71 »

WELL i did an EQ232 today with a semi gloss black and just regular red and blue flake.

unfortunately i have seemed to break my camera just after stripping the cases.

But wanted to say that all the Ti- Gear is just brushed metal with a clear coat.
PAST WORK/S HERE::
https://www.facebook.com/KhameleonKoatings/photos_albums
User avatar
mhyde71
Dr. Jekyll
Posts: 6231
Joined: Sun Jan 20, 2008 8:34 pm
Location: PG FanBoy in Green Mtn Vermont
Contact:

Post by mhyde71 »

okay camera decided to work for about 5 minutes this morning... so i took a few shots. Not the best, lighting and wanting to get as many in w/o having camera fail on me again... but here are some of the process
Attachments
IMG_9027.JPG
IMG_9027.JPG (201.94 KiB) Viewed 7094 times
IMG_9023.JPG
IMG_9023.JPG (176.7 KiB) Viewed 7094 times
IMG_9024.JPG
IMG_9024.JPG (202.58 KiB) Viewed 7094 times
IMG_9022.JPG
IMG_9022.JPG (208.89 KiB) Viewed 7094 times
IMG_9020.JPG
IMG_9020.JPG (208.4 KiB) Viewed 7094 times
IMG_9014.JPG
IMG_9014.JPG (203.77 KiB) Viewed 7094 times
IMG_9013.JPG
IMG_9013.JPG (189.92 KiB) Viewed 7094 times
IMG_9009.JPG
IMG_9009.JPG (163.85 KiB) Viewed 7094 times
IMG_9008.JPG
IMG_9008.JPG (180.76 KiB) Viewed 7094 times
IMG_9005.JPG
IMG_9005.JPG (131.92 KiB) Viewed 7094 times
PAST WORK/S HERE::
https://www.facebook.com/KhameleonKoatings/photos_albums
User avatar
joerg
SOFA-KING
Posts: 5351
Joined: Sat Nov 29, 2008 11:54 am
Location: Graz, Austria

Post by joerg »

Nice work Matt! What about some TIDD10 pics? :wink:
Music is silver, PHOENIX is GOLD
User avatar
mhyde71
Dr. Jekyll
Posts: 6231
Joined: Sun Jan 20, 2008 8:34 pm
Location: PG FanBoy in Green Mtn Vermont
Contact:

Post by mhyde71 »

joerg wrote:Nice work Matt! What about some TIDD10 pics? :wink:
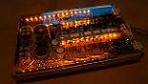
waiting for the right black to come in... Ordered 5 pounds of it on tuesday - should be here tomorrow or next day. These pic's are of just of red and blue flake, not the same flake as FAS/SOFAS, but kinda close... but i intentionally did not wish to do a frank sample as i just didnt have the right black powder on hand.. but will be here this week, and next weekened the DD10's should be good to go.

AND I am still kinda toying around with figuring the exact ratio of base coat and flake... this obviously was a lil heavy on the flake. But it was intentional. I have a small digital scale that I am recording the results and want to find that exact ratio of flake and powder to dupe the frank color/scheme exactly.

(addendum) - I also have no more top clear, so knowing i didnt have much left going into the weekend, I wanted to do this piece as practice some more..., versus running out on the dd10's- nothing major, I just ordered 2 pounds of 120% gloss clear this morning...

I will say this though, between the full PG pieces, and all the small little pieces i have hanging in shop, I have gotten (at least I feel) pretty good with all this... I have learned how to control the air to my advantage, carrying stuff to oven w/o dropping it, hanging stuff from ceiling for cooling w/o hitting my head on it, all that fun stuff... :shock: :( :roll:

NOW I just need to go get a PB mini or something so I can wet sand the top clear and buff it out... as mentioned above... I sanded last night the back cover for the 275... AND WHOLLY SHIT! Feels like fucking glass doods!!! I mean I was awfully fucking impressed with the results (save the cloudy-ness) which I will buff oput, and/but anxious to do so ... so i am off to auto shop now.

m
PAST WORK/S HERE::
https://www.facebook.com/KhameleonKoatings/photos_albums
ttocs
the Floor Sweeping Hack with Golden Ears
Posts: 14797
Joined: Fri Dec 19, 2008 9:53 pm

Post by ttocs »

I swear when you buff it your first words will be holy shit.... keep the camera close and working as I can't wait to see it.

Did you sand or wet-sand? Just curious what grit you used.
User avatar
mhyde71
Dr. Jekyll
Posts: 6231
Joined: Sun Jan 20, 2008 8:34 pm
Location: PG FanBoy in Green Mtn Vermont
Contact:

Post by mhyde71 »

ttocs wrote:I swear when you buff it your first words will be holy shit.... keep the camera close and working as I can't wait to see it.

Did you sand or wet-sand? Just curious what grit you used.
here is where I am at at this point....

I sanded w/ a 1000 grit wet (small/nominal stream of water running over the work area), got/is cloudy now, but very smooth... just walked in from auto shop, and bought the following:

1) micro-fibre bonnets (for orbital)
2) micro-fibre towels/rags.
3) Turtle wax rubbing compound
4) mothers FX Engineered Synwax, Synthetic wax

guy that does auto body work says to me, after having him read your PM to me about the steps/process you suggested for me to use the rubbing coumpound w/ orbital and then apply synwax as directed all w/ the micro-fibre rags/towels.

Sound about right, or am i off track here???
PAST WORK/S HERE::
https://www.facebook.com/KhameleonKoatings/photos_albums
User avatar
mhyde71
Dr. Jekyll
Posts: 6231
Joined: Sun Jan 20, 2008 8:34 pm
Location: PG FanBoy in Green Mtn Vermont
Contact:

Post by mhyde71 »

pic's of the gear/accessories i just mentioned/bought.
Attachments
IMG_9046.JPG
IMG_9046.JPG (163.52 KiB) Viewed 7073 times
IMG_9045.JPG
IMG_9045.JPG (195.14 KiB) Viewed 7073 times
IMG_9044.JPG
IMG_9044.JPG (188.23 KiB) Viewed 7073 times
IMG_9042.JPG
IMG_9042.JPG (145.78 KiB) Viewed 7073 times
PAST WORK/S HERE::
https://www.facebook.com/KhameleonKoatings/photos_albums
ttocs
the Floor Sweeping Hack with Golden Ears
Posts: 14797
Joined: Fri Dec 19, 2008 9:53 pm

Post by ttocs »

I don't think an orbital buffer will do much here but you can try. If it is flat enough it doesn't take much rubbing at all to shine it up. Now I am dying to see it, hurry up.......
User avatar
mhyde71
Dr. Jekyll
Posts: 6231
Joined: Sun Jan 20, 2008 8:34 pm
Location: PG FanBoy in Green Mtn Vermont
Contact:

Post by mhyde71 »

okay, and i now remember why i never like auto body work.. i suck at it.

WELL i have a mirror like smooth finish, and can see myself almost clearly BUT AND A BIG BUT! The down fall is that it doesnt look great all over. I just did the bottom cover for the 275, and polished, buffed, and waxed it, but there is some really gorgeous spots, but mostloy there are cloudy like areas that really make it look like crap.
PAST WORK/S HERE::
https://www.facebook.com/KhameleonKoatings/photos_albums
User avatar
mhyde71
Dr. Jekyll
Posts: 6231
Joined: Sun Jan 20, 2008 8:34 pm
Location: PG FanBoy in Green Mtn Vermont
Contact:

Post by mhyde71 »

maybe i did too much sanding - working on pics now...
PAST WORK/S HERE::
https://www.facebook.com/KhameleonKoatings/photos_albums
User avatar
joerg
SOFA-KING
Posts: 5351
Joined: Sat Nov 29, 2008 11:54 am
Location: Graz, Austria

Post by joerg »

I would just have thrown a layer of clearcoat on it after sanding Matt! 8)

BTW: Still need the 430 pics :wink:

Thanks
Music is silver, PHOENIX is GOLD
ttocs
the Floor Sweeping Hack with Golden Ears
Posts: 14797
Joined: Fri Dec 19, 2008 9:53 pm

Post by ttocs »

I think your problem was waxing prior to buffing. All you did was fill in the low areas with was before you polished it. Try some light wetsanding over the cloudy areas, maybe do a light finish over the entire thing to even it out and then hit it with the buffing compound. Were you using any kind of block to keep the paper flat while sanding? This is the most important part when doing flat pieces. Using just your hand or fingers will end up with an inconsistant finish that is smoother in some areas then others. This is commonly refered to as "finger fucking" your paint job from what I understand.
ttocs
the Floor Sweeping Hack with Golden Ears
Posts: 14797
Joined: Fri Dec 19, 2008 9:53 pm

Post by ttocs »

also when sanding don't forget proper sanding procedure. You do not have a grain to follow like in wood but you want to make sure you overlap your strokes to even it out. If you have a square shape infront of you, move your sanding block at a 45 degree angle from one side(left to right) to the other for a few strokes, then move it at 45 degrees in the other direction(right to left). This way your strokes are perpendicular to each other and the entire piece will be flat.

When you get use to this and have the equipment the small pieces you are doing will only take another 30 mins to sand/buff/polish and will be worth the work, trust me....
User avatar
mhyde71
Dr. Jekyll
Posts: 6231
Joined: Sun Jan 20, 2008 8:34 pm
Location: PG FanBoy in Green Mtn Vermont
Contact:

Post by mhyde71 »

joerg wrote:I would just have thrown a layer of clearcoat on it after sanding Matt! 8)

BTW: Still need the 430 pics :wink:

Thanks
yeah actually i just remembered those pic's myself about like 20/30 minutes ago...

AND after sanding it was like really really cloudy and would be concerned about throwing a top coat over the clouds... ya know what I mean???
ttocs wrote:I think your problem was waxing prior to buffing. All you did was fill in the low areas with was before you polished it. Try some light wetsanding over the cloudy areas, maybe do a light finish over the entire thing to even it out and then hit it with the buffing compound. Were you using any kind of block to keep the paper flat while sanding? This is the most important part when doing flat pieces. Using just your hand or fingers will end up with an inconsistant finish that is smoother in some areas then others. This is commonly refered to as "finger fucking" your paint job from what I understand.
YES defy, I used a flat sanding block...

Pic's here oif the results
:oops: :cry: :cry: :cry: :cry: :cry:
BUT i see p;otential... on the spots that are nice - they're unbelieveable.... smooth and shiny just the way i like it. but the spots that are not, are awfully disapointing. WOULD BE THE CREAM if it came out okay. I am about to try on other pieces i have. try again... i will eventually get it down, and when i do watch out~!
Attachments
IMG_9066.JPG
IMG_9066.JPG (170.3 KiB) Viewed 7046 times
IMG_9065.JPG
IMG_9065.JPG (187.68 KiB) Viewed 7046 times
IMG_9064.JPG
IMG_9064.JPG (185.59 KiB) Viewed 7046 times
IMG_9063.JPG
IMG_9063.JPG (161.76 KiB) Viewed 7046 times
PAST WORK/S HERE::
https://www.facebook.com/KhameleonKoatings/photos_albums
ttocs
the Floor Sweeping Hack with Golden Ears
Posts: 14797
Joined: Fri Dec 19, 2008 9:53 pm

Post by ttocs »

is that pic after sanding, or after sanding/polishing?

its hard to tell since we are working with PC. The cloudy areas are normally the high points that have been sanded and the dark areas are the unsanded areas. IF you had it perfectly flat the entire piece would be cloudy. With what I see I would spend a little more time sanding and maybe start with an 800 grit to even it out.

I did this same procedure on the grill I made for my truck located half way down the page here. This was with paint rather then pc but they came out smoother then glass....

http://www.cardomain.com/ride/3237206/3

If you look at the bottom you can see that it is smooth enough that you can see the reflection of my left leg, and my belly button... don't enjoy that too much....
User avatar
mhyde71
Dr. Jekyll
Posts: 6231
Joined: Sun Jan 20, 2008 8:34 pm
Location: PG FanBoy in Green Mtn Vermont
Contact:

Post by mhyde71 »

that is after sanding, polishing/buffing and waxing.

and ya know what I do now remember that i sanded with 400 and the pack of 1000 sitting right behond me... so I will grab the 1000 now and see if i can recoup. I bought 400 and 1000 yesterday, and started w/ 1000 but grabbed the 400 when i needed to refresh the paper (accidentally), so 1000 on it now.... results in a few.
PAST WORK/S HERE::
https://www.facebook.com/KhameleonKoatings/photos_albums
Post Reply