
I am removed the caps on my M25. I used Doc's tutorial.
http://www.soundbuggy.com/Eric/Car%20Au ... index.html
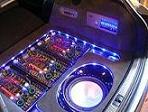
I am getting ready to make a digikey order. I now the input caps can use 493-1543-ND, but what about the larger caps (look like they are for the output). What part number should I use for them? (The M25 are smaller than the M50 caps) Also I am eventually going to replace my Outlaw caps, how of those do the M50/M100 boards use.
Buying new Caps
Buying new Caps
Dave
91 GMC Syclone - PG Ti 500.4AL, Boston Acoustic Z6, Exile XT10
12 Legacy - Stock
91 GMC Syclone - PG Ti 500.4AL, Boston Acoustic Z6, Exile XT10
12 Legacy - Stock
the bigger caps are the rail caps, these don't tend to fail like the smaller ones...
have a look on ampguts to see how many input caps are in the outlaw
have a look on ampguts to see how many input caps are in the outlaw
Ti1 headunit (unique)
Outlaw in crate.
2x original shrouded ms2250's.
Route 66 in box + custom m100 to match.
Roadster 66 in flight case
Octane LE in box.
Reactor #186 in flight case.
Reactor EQ232
Ti400.2 AL
AX204A + EQ232 + ZPX2 + TBA set
ZCS6 component set
Tantrum+Titanium bass cubes
Ti12d Elite sub
DD5 + DD10 + 6 Ti blocks!
Those rail caps will cost you plenty to buy and replace. I need a set of four a MS-2125 that I converting to a MS-2250. the rails caps in the 2125 had a blow out, one snapped off one of its terminal and someone tried to hot glue it back to the board 
I got the amp for free as a junker and there was nothing else wrong with it, so I decided to upgrade to a higher standard, after i stopped laughing at the Hot glue,
I got the amp for free as a junker and there was nothing else wrong with it, so I decided to upgrade to a higher standard, after i stopped laughing at the Hot glue,
-
brenzbmr@sb

- Booty Connoisseur
- Posts: 1611
- Joined: Wed Dec 06, 2006 9:49 pm
- Location: as ziggy marley said" on a beach in hawaii"
what else is involved from swapping an ms2125 to ms2250 spec? i know the input fets are upgraded from 044's to 054's and the toroids are obviously bigger but what else?
Ti1 headunit (unique)
Outlaw in crate.
2x original shrouded ms2250's.
Route 66 in box + custom m100 to match.
Roadster 66 in flight case
Octane LE in box.
Reactor #186 in flight case.
Reactor EQ232
Ti400.2 AL
AX204A + EQ232 + ZPX2 + TBA set
ZCS6 component set
Tantrum+Titanium bass cubes
Ti12d Elite sub
DD5 + DD10 + 6 Ti blocks!
Outlaw in crate.
2x original shrouded ms2250's.
Route 66 in box + custom m100 to match.
Roadster 66 in flight case
Octane LE in box.
Reactor #186 in flight case.
Reactor EQ232
Ti400.2 AL
AX204A + EQ232 + ZPX2 + TBA set
ZCS6 component set
Tantrum+Titanium bass cubes
Ti12d Elite sub
DD5 + DD10 + 6 Ti blocks!
a forth one can be fitted on the m50 but they must be shorter than stock caps, looks like pg planned to fit 4 untill they tried fitting the lid on 
Ti1 headunit (unique)
Outlaw in crate.
2x original shrouded ms2250's.
Route 66 in box + custom m100 to match.
Roadster 66 in flight case
Octane LE in box.
Reactor #186 in flight case.
Reactor EQ232
Ti400.2 AL
AX204A + EQ232 + ZPX2 + TBA set
ZCS6 component set
Tantrum+Titanium bass cubes
Ti12d Elite sub
DD5 + DD10 + 6 Ti blocks!
Outlaw in crate.
2x original shrouded ms2250's.
Route 66 in box + custom m100 to match.
Roadster 66 in flight case
Octane LE in box.
Reactor #186 in flight case.
Reactor EQ232
Ti400.2 AL
AX204A + EQ232 + ZPX2 + TBA set
ZCS6 component set
Tantrum+Titanium bass cubes
Ti12d Elite sub
DD5 + DD10 + 6 Ti blocks!
marko wrote:what else is involved from swapping an ms2125 to ms2250 spec? i know the input fets are upgraded from 044's to 054's and the toroids are obviously bigger but what else?
Its mostly all power supply upgrading. I can't list it all here as it would hog this thread up. I only use IRF 064 mosfet <heres the beef> they are rated at a very sturdy 110 amperes each. Way stronger than the 054's.
In short, rail caps, Toroids, input inductor, mosfets. Then the control circuit needs updating to the adjusted higher rails. <Just the power supply.
The amp needs to be adjusted for the higher rails, sink clips in the to-128 drivers etc...

When you upgrade to a MS2250 from a lesser model, there is also the need for about 10-20 small parts being replaced in the preamp section. This is to correctly match the gains and bass control to the new level of output voltage. The amp will still work without these being changed (mine did at least), but the gain controls are so out of whack, it is not all that easy to use.
+ & - 15 is the same on those chips 
 Are you raising the lower rails also ? I would not raise the lower rails unless Burr-Brown IC's were installed as they can take a slightly higher rail then the stock 4560 IC's. This could give you more drive voltage, but the input section on each main amp only requires so much signal to achieve full output. ?????
Most of the changes are power supply related, BUT as with any increase of mains supply there will be corresponding issues inside the main amp section related to increased DC rails such as bias issues as this will be in left field on first turn on with the higher rails. And any voltage reduction circuitry will also not be setup properly for the higher mains rail supply.
I have carefully looked at this for some time now, before attempting it, so I have compared and drawn diagrams of the differences I found across the entire amplifier just to prepare for this.
This not something anyone should do unless you have a lot of time inside these sorts of devices. It is not for the basic experimenter, or hobbyist that just wants to boost a amp. PG spend hours of engineering time in this effort, and once they achieved the desired upgrade I am sure it was all double tested and verified several times before a production unit was turned out.
Increased rails means lots of circuitry variances to deal with, but after all the time I spend inside these things its just another day in the park
I don’t know if you were directing that at me or not, but if you were, I am referring to the preamp section itself, not the power supply to the preamp section. I set my amp up for 15V still, but needed to change several values for the opamp feedback, and some tied to the gain and bass pots.
As for the 15V rails, the resistors used before the zanier regulation need to be damn beefy. They have so much current through them, they cook, and I have seen a few of these style amps with scorched boards in this area. I try to stick the largest ones in I can, and solder them in a bit higher so they can dissipate heat. In my next MS amp mod I plan to mount these resistors on the underside of the board, and grind a small spot in the heatsink so they fit nicely with some thermal paste on them.
PG really should have just used voltage regulators instead of the zanier setup they went with. It tends to self destruct over time.
I may be dead wrong on this, but my findings have been that once the rail voltages have been modified, bias adjustment was not necessary. I took measurements before my mod and after, and nothing changed. This may have a lot to do with PG amps being unregulated. With the engine off, or on, you are effectively changing the rail voltages, and the design needs to be robust enough to handle this without going out of control. PG seemed to have designed the biasing to maintain its adjustment as rail voltages increase.
Hey Eric, is this part of the work you performed on that boosted 2250 you built ? The one that did 2 ohm power at 4 ohm loads ?
Thats the first work of yours I ever saw, and I agree that with the mods you made on that one there will be several upgrades needed to the audio circuitry, as PG never built that amp to those spec's before you did.
The 2250 was their final expression of that amp, and you certainly did raise the bar on that one.
My plan does not exceed PG's original design expression. I have T0-220 Vishay 1% tolerance power resistors to use in mine to replace ALL high power resistors with. They will mount under the board in contact with the sink, as they do not conduct to the tab like semi's do, so no insulator is needed. They are rated 10 watts free air and 50 watts sinked, and 1% mil-spec grade.
So yes I see your point of view on the power resistors. PG used dual three terminal regulators on the the Xenon line to regulate the lower rails. Dual 317's and dual 337"s.
So I was thinking sort of the same lines on my 2250. A lot of devices can be mounted just under the board hidden from view so the mods cannot be detected by the average person.
Hope I have cleared up my design goals, so we can be on the same page my friend
I would consider doing a boost like you did, but I don't have a fan shroud and just going to the 2250 level will suit my needs. With all of my little improvements hidden under the board it will start to look barren on top anyway
I booted my MS2250TA up to exact PG spec for an original MS2250. The only step I took beyond PG is the changing of one resistor value on the zanier feedback circuit to the optical isolator, which controls the final rail voltage of the amp. So, my amp was boosted only about 2V over that of an original MS2250.
However, all the reviews I found of the MS2250 measured it at 360W a channel, and mine came in at about 320W prior to tweaking this resistor value. My guess is PG changed the resistor on their final amps also.
However, all the reviews I found of the MS2250 measured it at 360W a channel, and mine came in at about 320W prior to tweaking this resistor value. My guess is PG changed the resistor on their final amps also.


Eric D wrote:I booted my MS2250TA up to exact PG spec for an original MS2250. The only step I took beyond PG is the changing of one resistor value on the zanier feedback circuit to the optical isolator, which controls the final rail voltage of the amp. So, my amp was boosted only about 2V over that of an original MS2250.
However, all the reviews I found of the MS2250 measured it at 360W a channel, and mine came in at about 320W prior to tweaking this resistor value. My guess is PG changed the resistor on their final amps also.
So your saying you ONLY adjusted a single resistor value to gain a meager 2 volts on the rail to jump the amp about ~ 40 watts or so over stock configuration ? Do I have that right ?
So you did not rewind the toroid, or alter the zener feedback, by adjusting the zener to a higher voltage ?
And you would not have had to do any bias setup and lower rail adjustments because a 2 volt rise would impact all those things minimally in the big picture of things, except for a slightly higher dissipation of the lower rail zener diodes and there associated current limiting resistors.
I was under the notion that you had jumped the rails like + - 10 volts or so to get your boost. This would have caused significant changes across the amplifier. regulators would have overheated, bias circuits would be set for lower mains rails, and there fore might be a tad to high at idle, current limits in the supply's would have been pushed to there thermal and power limits, etc....
I still can't understand why you would adjust the simple RC network that ties to common ground between the op-amps in the frontend to alter the bass boost ?
I mean it ties the signal path through the network to a ground. Raising and lower the resistance changes how the cap loads the circuit to ground reference. Why would that need any thought, and or modding at all, as it is completely isolated from any rail voltages by the op-amps themselves
Plus 10 or 20 components are about all there are in the front end, since it consists of three op-amps, and a handful of resistors and caps all of which are either in feedback loops on the IC's or are input and coupling devices between the op-amps and the simple bass boost circuit that forms a RC net to ground ????
I will look into your need to alter the basic and simple front end of the amp, as i see no reason to explain any need for a mod in this area. My thoughts would be to upgrade to BB op-amps and then increase the lower rails about + - 4 volts more. This should give a a clean 2 volts more drive to the input of each main amp. Thanks for you input and experiences, I find the information stimulating to say the least

I bought a MS100TA. It measured 230W a channel into 4 ohms (sad, since this is under the factory rating of 250W).
I replaced or remade the parts necessarily to make it exactly the same as an original MS1000. This got me to 330W or so a channel. It involved changing or adding around 50 components each board in the amp. Several of which were in the preamp section.
After reading a review of the amp from back in the day I found out it should be at 360W a channel. At this point I changed one resistor on each powersupply to get the additional few volts needed for 360W of output. I might have got as high as 380W, but I don’t remember.
The only difference between my amp and an original MS1000 was the 4 different resistors, and I used 26ga wire instead of 22ga in the transformer, but I used multiples of 26ga which equaled greater than 22ga in the end.