Page 1 of 2
Custom M44 Frank'ing Progress
Posted: Wed Jun 25, 2008 11:24 am
by PassatBloke
I may aswell keep an up to date thread, I am just in the process of making the images to be sent for transfer cutting.
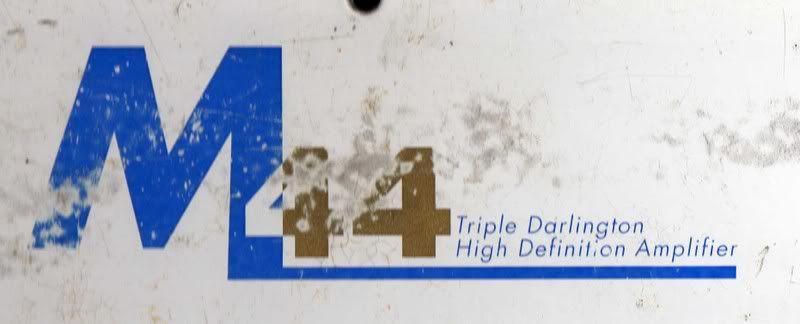
Heres the first - please note, some of the font characters are a little wrong but not by much to be fair, get it ok so far.
This picture is the low quality one, with a white bacground, the main one is high Q and transparent back, but doesnt look so great on posted forum pic.

Only loads more to do

Posted: Wed Jun 25, 2008 9:43 pm
by marko
that looks awsome paul!! loving the lilac colour too

Posted: Wed Jun 25, 2008 10:16 pm
by Jacampb2
So, how about sharing with us what fonts you used? This would make my projects go a bunch smoother, vectorizing the logo's is pain staking work.
Thanks,
Jason
Posted: Wed Jun 25, 2008 11:42 pm
by PassatBloke
Font? Sharing.....NO IT TOOK ME AGES OF GOING THROUGH EVERY FONT DISK I HAVE!
Not really, font is called : Gills Sans MT - The AV spacing is 47-50
As for the colour, I think its pretty close!

Just so you know what crap I am working from for originals, heres a sample
Posted: Thu Jun 26, 2008 12:51 am
by shaheen
Hey dude,
I will do scans of the stuff for you as well , and post them in this thread so we can keep a log of it.
Posted: Thu Jun 26, 2008 12:59 am
by Jacampb2
Cool! Thanks. How about the M44, is it hand drawn, or the same font photochopped?
Later,
Jason
Posted: Thu Jun 26, 2008 6:47 am
by Rold Gold
marko wrote:that looks awsome paul!! loving the lilac colour too
Should a man
really know what color that is......?

J/K-
I might darken it a touch as it may look alittle light when ya put it on that vast area of black-ish sparkley paint.
Nice!!!!!!

Posted: Thu Jun 26, 2008 9:58 am
by PassatBloke
Jacampb2 wrote:Cool! Thanks. How about the M44, is it hand drawn, or the same font photochopped?
Later,
Jason
The M44 part is hand drawn, hence taking so long
- I'll keep the thread updated showing what fonts / colours / hues I use in case anyone needs to replicate it at any time!
Shan, thanks mate its much appreciated!
Posted: Thu Jun 26, 2008 12:45 pm
by stipud
FuzzyHoNutz wrote:marko wrote:that looks awsome paul!! loving the lilac colour too
Should a man
really know what color that is......?
Actually, it's more Mauve than Lilac

Posted: Tue Jul 01, 2008 8:51 am
by PassatBloke
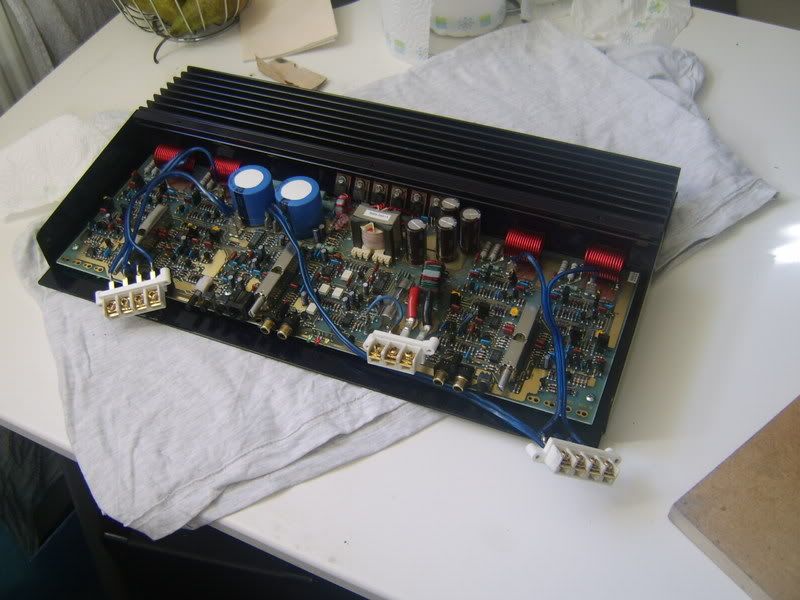
Ok guys spent some of today perfecting the frank colour, I cleaned up the heatsink, sanded out any damage and set to the task, I have been through what must be 10 different types of paint before I landed on this pretty much perfect match!.
Firstly the heatsink was cleaned up, scotched and hi temp etch primed, over the etch prime we have a standard standox waterbased "antique black".

Next up (and this was the arsey part) I had to get just the right mix of candy / mica / glitter effect without it being too dark / too purple / too light - Over the top of the antique black I Put a heavily watered down standox amethyst pearl, so little infact that you could barely see it, this pearl however has a slight metallic flake to it, which was the bit i wanted. Heres a pic as you can see, even though thouroughly watered down it was still massivly too purple, not a problem we have a soloution to this!
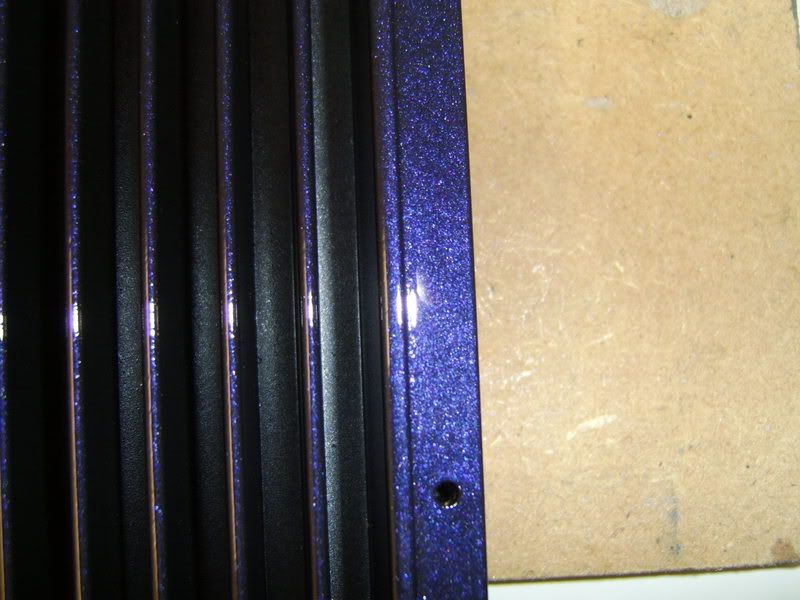
Ok next up was a laquer coat, because you cannot add waterbased pearls into laquers I had to nip to my local autopaint and buy a 1/4 ltr of Purple Mica Pearl Translucent paint (bargain at £8) which will be more than enough to do the M44 and the M100 eventually when i've saved enough cash to buy it off marko! - This was added to the clear laquer with hardener aswell as some translucent black toning tinter, to get rid of that massive purple finish we have above!

As you can see a pretty darn good match and lovely colour.
Just now need to add a few more coats of clear laquer to get it nice shiney and deep! and then get onto playing around with the rest of the case!
This is the original frank colour for comparison

Posted: Tue Jul 01, 2008 9:15 am
by marko
very nice paul, but did you remember what i told you about painting where the fets sit?
i'm almost certain you can't put fets on top of paint

Posted: Tue Jul 01, 2008 11:23 am
by PassatBloke
Theres always thinners

Posted: Thu Jul 03, 2008 12:18 pm
by PassatBloke
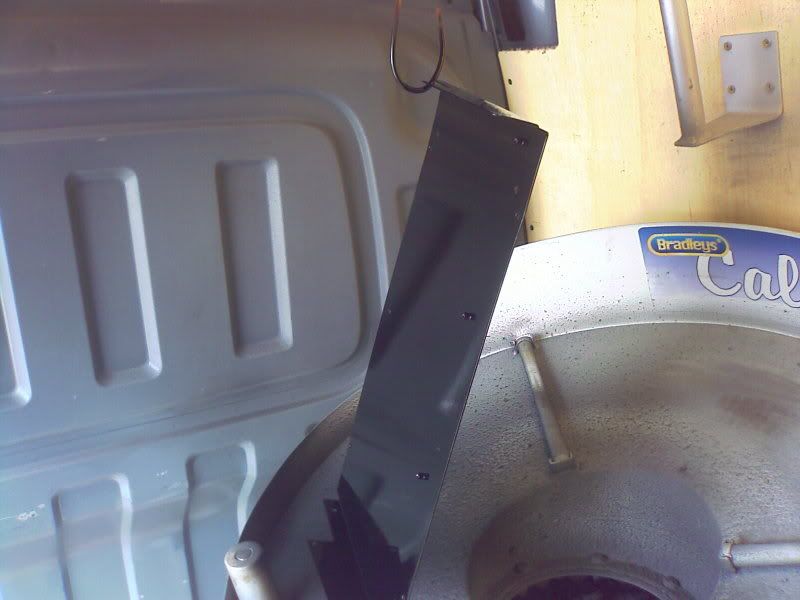
Ok more shizzle done, got the bottom plate done today in a spare 30 mins I had at work.
Also @ Marko, took me ages to get rid of the paint / laquer where the fets go, used a scalpel to cut a guide line then a screwdriver to kinda chisel it back, took me ages lol, shoulda just remebered and masked it lol!
Heres some pics (excuse quality, was on my phone)
Painted at one angle
Another showing the purpley colour to it
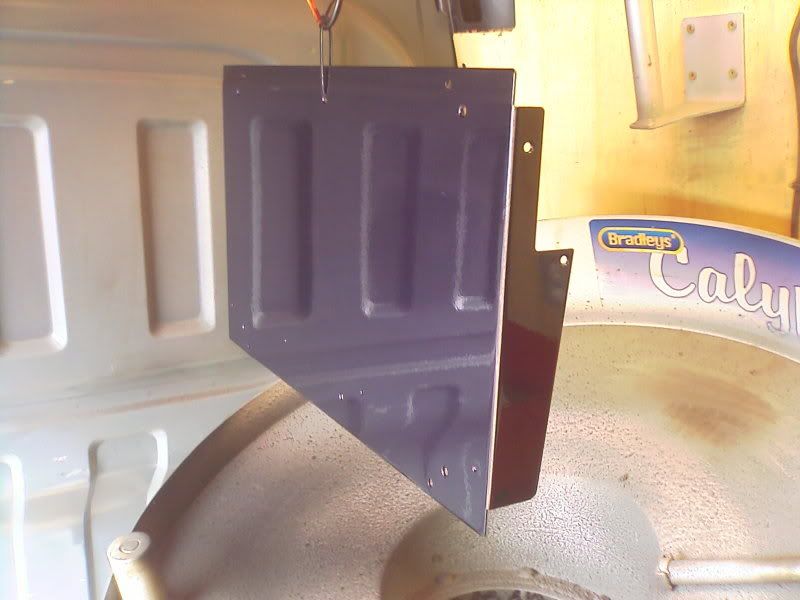


Built back up so far

I;ve made the plexi for it aswell, just need to router off an 1cm edge so the original metal part can be attached! - This will all become clear when i've finally done it!
Posted: Thu Jul 03, 2008 12:21 pm
by fuzzysnuggleduck
Very nice!
Posted: Thu Jul 03, 2008 12:32 pm
by stipud
Mmmmmmmm... Man I love black amps
Posted: Thu Jul 03, 2008 12:34 pm
by marko
i'm very impressed!! did you have much problems with the screw holes where paint got in? another tip is to screw old screws in to them before painting, that way keeping the threads nice and clean

Posted: Thu Jul 03, 2008 12:35 pm
by AVICJR
Posted: Thu Jul 03, 2008 1:15 pm
by PassatBloke
Nope no problems marko at all! All feels very solid! Couldnt really put the screw in while painting due to them being at home in Huddersfield and me being in Skipton at the time of painting
- Also Marko why cant you put fets onto the paint? Becaus eof the heat? or what, your the techie im the painter
color
Posted: Thu Jul 03, 2008 6:39 pm
by kg1961
I love, want to do my route 66 as a test and I pay the cost???let me know very nice!!!!!
Posted: Thu Jul 03, 2008 9:59 pm
by marko
PassatBloke wrote:Nope no problems marko at all! All feels very solid! Couldnt really put the screw in while painting due to them being at home in Huddersfield and me being in Skipton at the time of painting
- Also Marko why cant you put fets onto the paint? Becaus eof the heat? or what, your the techie im the painter
fets get very hot, it would melt/burn the paint and not transfer heat to the sink efficiantly, that's why pg never painted the inside of ms amps! anodising is ok as in the m series and original ms2250
when i did my m100 i completely masked the internal sections to avoid this... keeps the fet screw holes clean as well to avoid any hassle on rebuild
Posted: Thu Jul 03, 2008 11:02 pm
by PassatBloke
Yar, only trouble is with me making the plexi front then though, it would have gold bits of the sink on view through the plexi and not look very nice
- Still looks funky now, even if it did take me ages to scalpel off the paint!
Re: color
Posted: Thu Jul 03, 2008 11:04 pm
by PassatBloke
mikelycka wrote:I love, want to do my route 66 as a test and I pay the cost???let me know very nice!!!!!
I suppose I could do mate, the only problem i'll have is having to vectorise all the Route 66 logo etc and convert to Frank colours - which will take me some time! - Lets see how this one turbs out first - I wouldnt want to ruin a 66!
Posted: Sat Jul 05, 2008 5:02 pm
by PassatBloke
Okies took Gurus advice and did them properly in Adobe Illustrator, spent a few hours getting used to the program then started (never used it before) its not looking too bad, changed the colour a little too.
Taking AGES though
Posted: Sun Jul 06, 2008 10:06 pm
by martinkruit
Can you please send me the file by email??
I have to do a M100 and a M25.
Regards.
martin@kruitenco.nl
Posted: Mon Jul 07, 2008 10:01 am
by PassatBloke
Which file?