
I should have done this a very long time ago, but I finally got around to updating my leaking cap tutorial...
http://www.soundbuggy.com/Eric/Car%20Au ... index.html
As always, any comments, suggestions, finding of typos, or questions are welcome.
Leaking capacitor tutorial update
Leaking capacitor tutorial update
Got "schooled" by member shawn k on May 10th, 2011...
No longer really "in tune" with the audio industry, and probably have not been for some time.
Hands down the forum's most ignorant member...
Don't even know what Ohm's law is...
No longer really "in tune" with the audio industry, and probably have not been for some time.
Hands down the forum's most ignorant member...
Don't even know what Ohm's law is...
Re: Leaking capacitor tutorial update
Thanks for the update Eric, did you give up on the Chipquik?
Re: Leaking capacitor tutorial update
I only use Chipquik for the large rail capacitors, or any multi-pinned parts I need to remove (like a PWM controller for example). It is not needed for the smaller input supply capacitors, with the technique I show.
Got "schooled" by member shawn k on May 10th, 2011...
No longer really "in tune" with the audio industry, and probably have not been for some time.
Hands down the forum's most ignorant member...
Don't even know what Ohm's law is...
No longer really "in tune" with the audio industry, and probably have not been for some time.
Hands down the forum's most ignorant member...
Don't even know what Ohm's law is...
-
thedeal7235

- Posts: 1866
- Joined: Fri Jan 25, 2008 7:49 pm
- Location: Sanford, Florida(orlando area)
Re: Leaking capacitor tutorial update
I like the small"needle nose" you use with one hand, while using other hand with iron. I think, from experience, theres NEVER too many tutorials on cap replacement- thanx for sharing!!!:)
as she walked out the door she expressed, 'enjoy your amp addiction'
Re: Leaking capacitor tutorial update
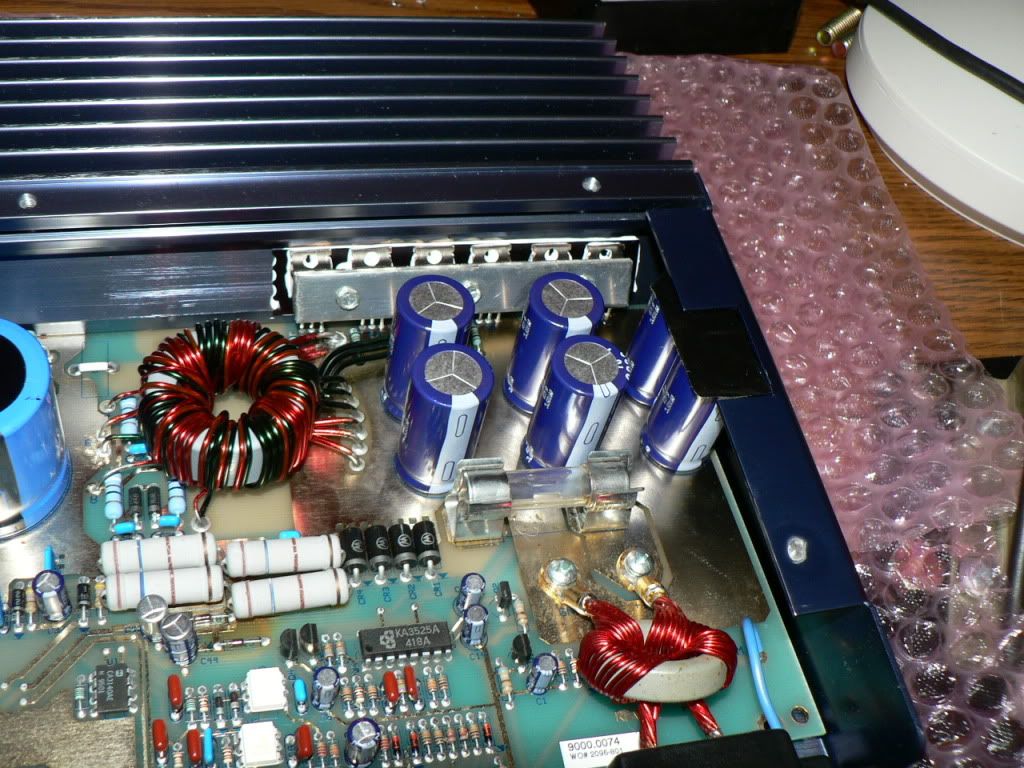
Here are a few pics of my Outlaw I just did.
It cannot be stressed enough that these caps need to be changed.
If you cannot afford to change them right now. Do your board a favor and follow the directions and remove the old caps and clean the board.
Just because you cannot see that they are leaking. They are.
You can see the board damage from leaking on the M50 side
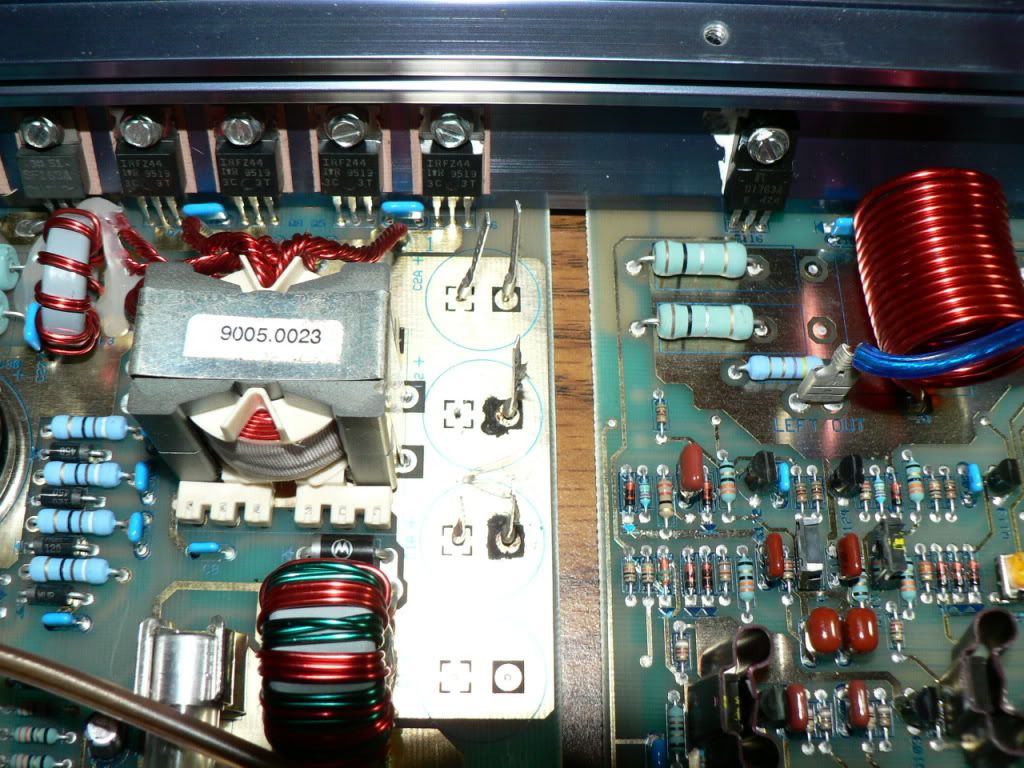
And all the fluid that was under the caps on the M100 side.
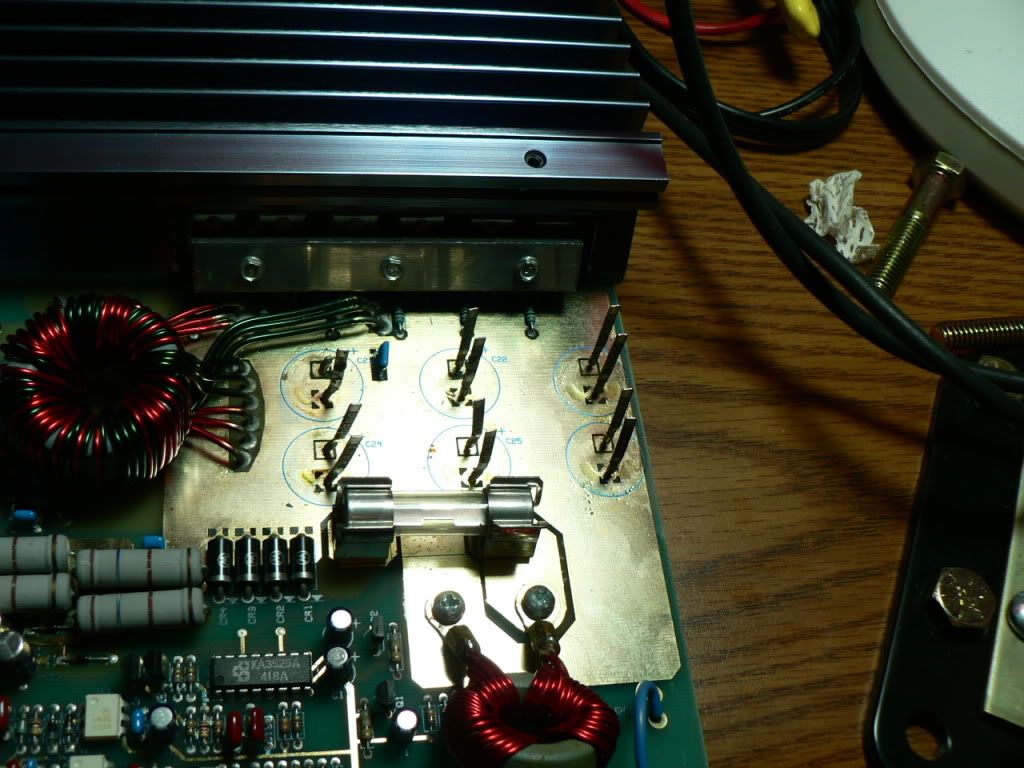
I added the cap to the M50 side that would not fit vertically like this.
If anyone thinks this will be a problem LMK and I will remove it.
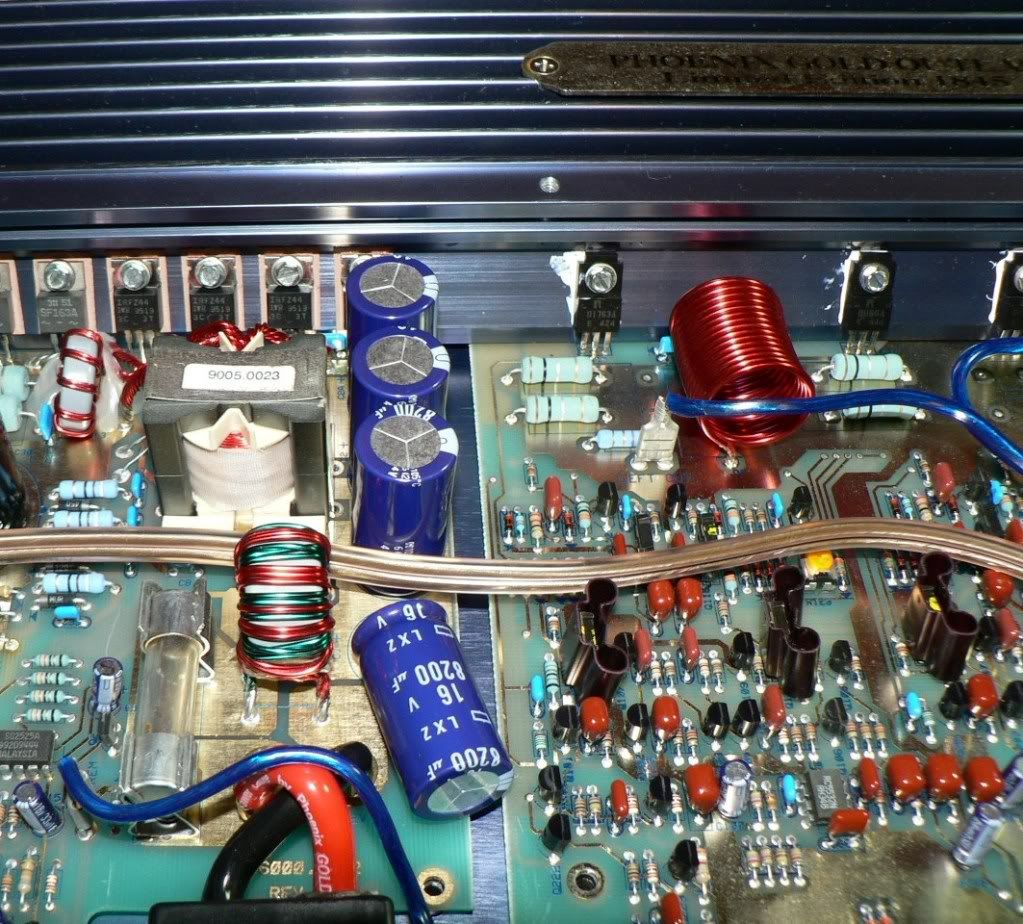
And the M100 side all done.
These earlier boards are more delicate. So be careful and take your time.
I had to repair a via. on each board.
It cannot be stressed enough that these caps need to be changed.
If you cannot afford to change them right now. Do your board a favor and follow the directions and remove the old caps and clean the board.
Just because you cannot see that they are leaking. They are.
You can see the board damage from leaking on the M50 side
And all the fluid that was under the caps on the M100 side.
I added the cap to the M50 side that would not fit vertically like this.
If anyone thinks this will be a problem LMK and I will remove it.
And the M100 side all done.
These earlier boards are more delicate. So be careful and take your time.
I had to repair a via. on each board.
Re: Leaking capacitor tutorial update
i would silicone or hot glue it down to keep it from breaking the leads from vibration.
Phoenix Gold,Don't Leave Home Without It !!!
-
bretti_kivi

- Shutterbug
- Posts: 1595
- Joined: Tue Aug 26, 2008 1:06 pm
- Location: Päijät-Häme or Uusimaa
Re: Leaking capacitor tutorial update
do you think I should do my QX series amps? They're a *bit* more recent, but not much...
Bret
Bret
Re: Leaking capacitor tutorial update
Has already been donei would silicone or hot glue it down to keep it from breaking the leads from vibration.
I don't think they use the same caps. It is all the early amps that use the 2200uF caps on the power supply. M, MS/MPS/MQ/MAC, ZPA, ZX & ZXti.do you think I should do my QX series amps? They're a *bit* more recent, but not much...
Re: Leaking capacitor tutorial update
I listened to the fruits of my labor last night.
WOW. The amp sounded amazing !!
WOW. The amp sounded amazing !!
Re: Leaking capacitor tutorial update
it alway's sound's better when you do it yourself and it works 
Phoenix Gold,Don't Leave Home Without It !!!
Re: Leaking capacitor tutorial update
100% true!!wooferdog wrote:it alway's sound's better when you do it yourself and it works
Re: Leaking capacitor tutorial update
I think you would have been find leaving the cap standing up. I know with the caps I use, I can get 4 in a M50 and not have any height issues. I put 4 in my Outlaw as well.
Got "schooled" by member shawn k on May 10th, 2011...
No longer really "in tune" with the audio industry, and probably have not been for some time.
Hands down the forum's most ignorant member...
Don't even know what Ohm's law is...
No longer really "in tune" with the audio industry, and probably have not been for some time.
Hands down the forum's most ignorant member...
Don't even know what Ohm's law is...
-
nico boom

- Deus ex MS

- Posts: 2089
- Joined: Fri Jan 05, 2007 1:40 pm
- Location: the land of wooden shoes
Re: Leaking capacitor tutorial update
Eric; THANKS for your time and efford to [again] help out others here. 
This method is indeed far better then the original one. Three things I'd like to bring forward;
-I do advice to replace the railcaps simply because they too have a limited lifespan, beeing chemical products and when you're going to recap; go all the way IMO.
-In every amp I serviced I always replaced the silpads; they usually stick to the sink, and will leave a small print [material] there after removal. For cleaning purposes and for cleaning and chamfering the holes I always remove them and replace. This way I am sure every device is having the best contact with the sink again after screwing them down to the sink.
-I may have overlooked it in your text; applying more heat [higher temp.] to the solderings which are connected to the larger contact-areas and less heat [lower temp.] on the smaller pads is crucial for good flowing of the solder, while preventing to overheat the smaller ones.
I started recapping MS amps years ago after reading your first tutorial; I'm happy to see that the latest methods are integrated into this new one; GREAT WORK!
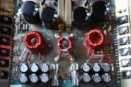
[pic; harvest of a bussy evening ]
]
Nico
This method is indeed far better then the original one. Three things I'd like to bring forward;
-I do advice to replace the railcaps simply because they too have a limited lifespan, beeing chemical products and when you're going to recap; go all the way IMO.
-In every amp I serviced I always replaced the silpads; they usually stick to the sink, and will leave a small print [material] there after removal. For cleaning purposes and for cleaning and chamfering the holes I always remove them and replace. This way I am sure every device is having the best contact with the sink again after screwing them down to the sink.
-I may have overlooked it in your text; applying more heat [higher temp.] to the solderings which are connected to the larger contact-areas and less heat [lower temp.] on the smaller pads is crucial for good flowing of the solder, while preventing to overheat the smaller ones.
I started recapping MS amps years ago after reading your first tutorial; I'm happy to see that the latest methods are integrated into this new one; GREAT WORK!
[pic; harvest of a bussy evening
Nico
- Attachments
-
- IMG_3970.JPG (150.78 KiB) Viewed 81467 times
Re: Leaking capacitor tutorial update
Nico,
Thanks for the kind words. In the tutorial, I state why I am against replacing rail caps. Far too many people damage their amp replacing them, so I do my best to discourage people from doing this.
When you remove a rail cap, if you damage one of the vias, the power supply can become out of balance. With either a positive or negative rail missing, certain components which reside in the circuit count on a balanced power between them. With one rail missing, too much voltage reaches a lot of parts and damages them. I have had MANY people send me their amps to fix once they tried to replace the rail caps themselves. It is not a matter of just fixing the via, I have to spend a lot of time tracking down all the other components which have been damaged.
So, I do agree, if you are working on your amp, it is good to go all the way and do some preventative maintenance as well. However, I feel this should only be done by those who know what they are doing. Any time a novice tries to replace their rail caps, they open themselves up for a very big mess.
Got "schooled" by member shawn k on May 10th, 2011...
No longer really "in tune" with the audio industry, and probably have not been for some time.
Hands down the forum's most ignorant member...
Don't even know what Ohm's law is...
No longer really "in tune" with the audio industry, and probably have not been for some time.
Hands down the forum's most ignorant member...
Don't even know what Ohm's law is...
Re: Leaking capacitor tutorial update
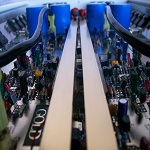
Thanks for the write up Eric. I had no previous experience with soldering or circuit boards but your guide gave me the confidence to tackle this on my own. I watched a bunch of videos on YouTube on how to properly solder and I jumped right in. Everything turned out wonderfully and my 16 year old zx500 is still going strong  I picked up a zx200 off of ebay for $100 and recapped it as well. Fun stuff! I even bought a little am/fm radio soldering kit just for the heck of it. Only thing I did differently is I bought a de-soldering iron, they are only $12 at Radio Shack. Once I sucked the solder off the bottom the caps popped right off the top. I didn't have to pull them apart or anything. Thanks for the help!!

http://www.radioshack.com/product/index ... soldering#
Finished product

http://www.radioshack.com/product/index ... soldering#
Finished product
-
nico boom
- Deus ex MS
- Posts: 2089
- Joined: Fri Jan 05, 2007 1:40 pm
- Location: the land of wooden shoes
Re: Leaking capacitor tutorial update
Thanks for sharing your experience, I might just try one of those as well. There's always room for improvement right?
Fine looking amps btw, enjoy!
Fine looking amps btw, enjoy!
Re: Leaking capacitor tutorial update
In my experience, even the best solder sucker leaves solder between the pin and the side wall of the via. When you then remove the cap, it takes this part of the via with it. Unless the solder sucker works so well the cap actually FALLS out of the hole when you flip the board over, it will be leaving enough solder to damage something.
The only way which has worked for me is to remove the pins hot, so the solder does not stick to the via and damage it.
The only way which has worked for me is to remove the pins hot, so the solder does not stick to the via and damage it.
Got "schooled" by member shawn k on May 10th, 2011...
No longer really "in tune" with the audio industry, and probably have not been for some time.
Hands down the forum's most ignorant member...
Don't even know what Ohm's law is...
No longer really "in tune" with the audio industry, and probably have not been for some time.
Hands down the forum's most ignorant member...
Don't even know what Ohm's law is...
-
nico boom
- Deus ex MS
- Posts: 2089
- Joined: Fri Jan 05, 2007 1:40 pm
- Location: the land of wooden shoes
Re: Leaking capacitor tutorial update
My experience as well so far....
The opinions about this device range from "best buy" to "do not recommend". The method you describe and which I used to recap many amps simply works without any risk of damaged via's.... everytime.
Nontheless I will give it a try, starting on a old board and find out.
The opinions about this device range from "best buy" to "do not recommend". The method you describe and which I used to recap many amps simply works without any risk of damaged via's.... everytime.
Nontheless I will give it a try, starting on a old board and find out.

Re: Leaking capacitor tutorial update
I started recapping a MS275 last night. I can't believe how easy it was removing the caps by rocking and then pulling them out! Hardly any force was needed, the leads just slipped out of the caps 
Thanx for the tutorial!
This MS275 is rev. H so its relatively new and has hardly been used at all. Still there was some fluid under the caps.
Thanx for the tutorial!
This MS275 is rev. H so its relatively new and has hardly been used at all. Still there was some fluid under the caps.
- Attachments
-
--
M50, MS275, MPS2500, ZX450, ZPA0.3
M50, MS275, MPS2500, ZX450, ZPA0.3
-
tattooemil
- Posts: 44
- Joined: Sat Jun 16, 2012 2:27 pm
Re: Leaking capacitor tutorial update
greetings all..... im brand new to this forum.....read all the treads about re-capping so i wanna give my ms2125 some new caps.....also i have a sapphire 3,0 ....does this also suffer from leaking caps? in that case which one need replacements? both the 7 small ones and the 4 big...?

ms 2125
zx475ti x2
zx600ti x3
zx1000.2ti
eq232(yellow)
eq215
ax406
zpx2
pld1
12" xmax x3
boston 8,4lf x2
zx475ti x2
zx600ti x3
zx1000.2ti
eq232(yellow)
eq215
ax406
zpx2
pld1
12" xmax x3
boston 8,4lf x2
-
nico boom
- Deus ex MS
- Posts: 2089
- Joined: Fri Jan 05, 2007 1:40 pm
- Location: the land of wooden shoes
Re: Leaking capacitor tutorial update
I do not have any experience with the sapphire series.....Eric?

Re: Leaking capacitor tutorial update
So I've decided to replace the caps in all my amps since I am finaly starting to install my gear, now I see every one is using larger then stock values, is there really any reason to do so other then the new 2200uf are a lot smaller then the originals?
-
nico boom
- Deus ex MS
- Posts: 2089
- Joined: Fri Jan 05, 2007 1:40 pm
- Location: the land of wooden shoes
Re: Leaking capacitor tutorial update
Even better noise rejection, but you could also choose to stay with the original value; that's up to you.
When you look at every upgrade- post made for amps, wether in car or home equipment, you always see larger values beeing used. Manufacturers tend to use the smallest value possible, since that keeps the cost down.
This is not a wildcard to put bigger value caps everywhere though! In this case it's a proven fact that using larger caps will only have benefits and no negative effects for you car amp. This is already explained earlier in several other posts, but like I said; choose for yourself.
Nico.
-
Starunit10
- Posts: 308
- Joined: Thu Mar 29, 2012 3:33 pm
- Location: Ont. Canada
Re: Leaking capacitor tutorial update
I am doing caps in my outlaw and bandit , I noticed the m50 side and the bandit only have 3 caps in , but room for 4. Jammer750 pics show 4 installed. Can anyone explain this ? Does it help/ hurt ?
Collection Growing..........

Leaking capacitor tutorial update
I think the smaller value caps are better for higher frequency noise filtering if the PS caps do anything other than hold reserves of energy for the power supply... I think I have used the 8200 uf 16 volt caps in my MS amps...
Sent from my iPad using Tapatalk HD
Sent from my iPad using Tapatalk HD