
Smgreen, thanks for the pics. That will help.
As for the inserts, the hurricane nuts would probably work. The reason I blew the one tee nut out was my bolt circle was to tight-- meaning that the circle the holes were drilled on is a shade to small. The strokers came with 1/4-20 bolts and tee nuts. No template, or bolt circle measurements. There is exactly enough room in the subs mounting flange for a 1/4 bolt. I measured as best as is possible and came up with 11.75" circle. That obviously isn't right. If I can use the hurricane nuts, then I will be golden, as the nuts take a 8-32 screw. A bit smaller than the 1/4-20's and will give me some wiggle room.
Thread in inserts likely wont work. There is about .3 inches between the sub cutout and the center-line of the bolt circle. The holes are all .3 inch diameter, so that leaves .15"s between the edge of the hole and the inside of the cutout. Not enough room for a real beefy insert. Honestly, even nyloc nuts will look better than deck screws sticking through, I am not super concerned with it. I can always paint the hardware to match the inside of the box...
Thanks for all of the input. I am going to head to the industrial fastener place monday and try to return the box of 100 tee nuts I bought and see if they have a better solution.
Thanks,
Jason
Working on my P/U install
Yes, and I have one around the corner from me-- great for last minute weekend purchases, but way, way more money then they should be.ttocs wrote:ace hardwares bolt isle has most of the fasteners that we have listed. Love that isle.......
Just last week I bought a bunch of stuff from my industrial supplier- Prime Fastener. I got a box of 100 1/4-20 1.25" Allen head alloy bolts, 100 1/4-20 tee nuts, a box of 250 truss screws and a handful of other things for about $10. They have a huge warehouse here in town, and have almost anything possibly imaginable in stock. It looks like they will have the hurricane style tee nuts as well. That is what I am thinking I am going to go with.
Thanks,
Jason
M: M100, M44 for a custom amp project
Zx: Zx500, Zx450, Black Zx350
ZxTi: 4 Zx600Ti's, 1 Zx400Ti
Ti: 5 800.1's & 900.7 for a custom amp project. 1 1200.1, 1 1000.2
Tantrum: 2 1200.1's, 1 600.4, 1 500.2
XS: XS6600
Zx: Zx500, Zx450, Black Zx350
ZxTi: 4 Zx600Ti's, 1 Zx400Ti
Ti: 5 800.1's & 900.7 for a custom amp project. 1 1200.1, 1 1000.2
Tantrum: 2 1200.1's, 1 600.4, 1 500.2
XS: XS6600
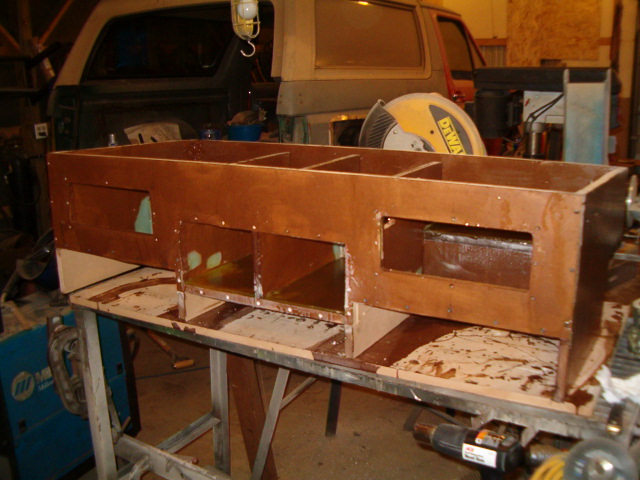
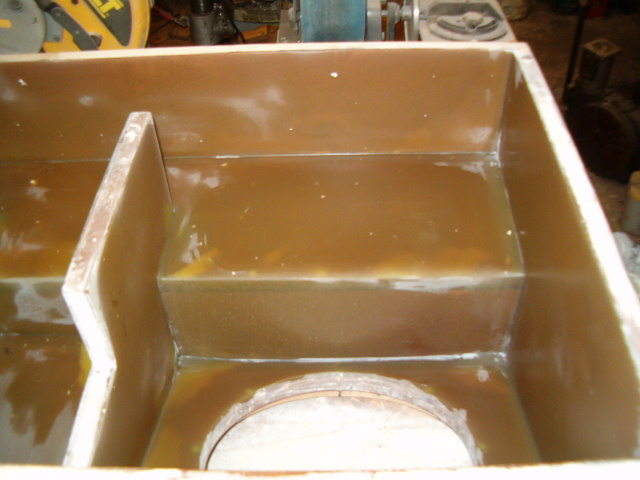
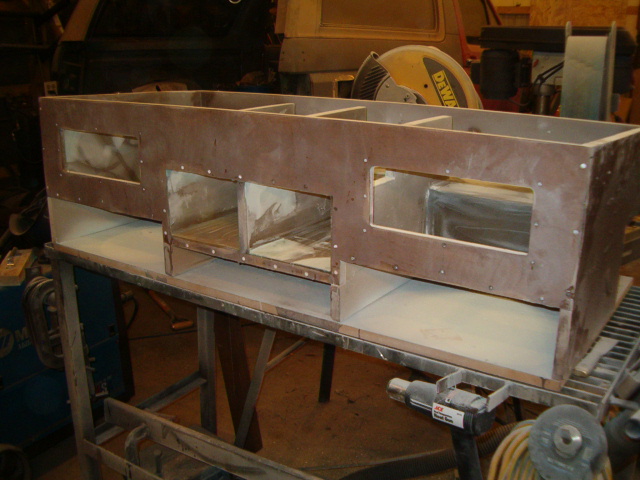
I made a bit of progress over my one day off this week. I have the inside of the box glassed and ready to start sanding-- yeah me. Things were going along nicely, I found a brand new gallon of resin on the shelf, paint on the container was a little peely and old looking, but what the hell, it was brand new. I mixed up a big batch and glassed the whole inside. 4 hours later at ~60° it still wasn't dry. Turned the heat on in the shop overnight. This morning, still not dry. Damn it. Must have been really old resin. I had two relatively new gallons in the bronco, but I didn't want to dig them out. That is what I get for being lazy.
I cleaned out most of the unset resin that had not soaked into the MDF. I mixed up a new small test batch of resin from one of the "newer gallons" that was already opened. Good it set up just fine. I mixed up a big batch, glassed over all the other crap again. God damned if the nasty old shit didn't come up to the surface and give me all kinds of hell. Back to the drawing board. I took a putty knife to it and scraped everything that was fubar up. Messed up the MDF a bit in the process...
Hmmm, this is gonna be a bitch. New plan-- I decided to dam up the really fucked up parts and pour resin and let it level. This left me with about a quarter inch of glass on the bad parts, and a lot less finish work as long as it doesn't delaminate That much resin got to be one hot bitch. I would guess the MDF was close to 200° before the reaction finished and it began to cool.
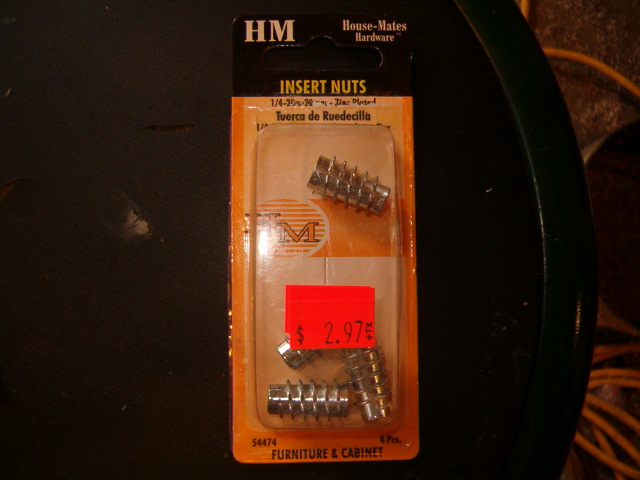
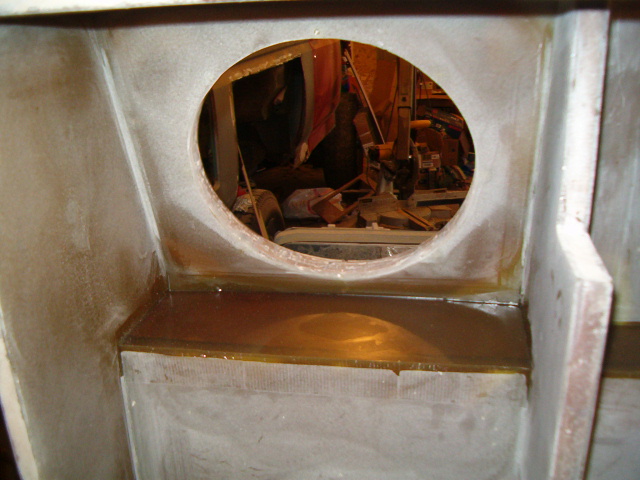
Anyhow, I have a lot of finish work ahead of me, but it is getting there. I also found a solution to the Tee nut issue, at home depot, of all places. They have a insert that threads into the MDF. I put some super glue on the inserts and threaded them in, and they look like they will work well. Picture bellow of the product.
Later,
Jason
I cleaned out most of the unset resin that had not soaked into the MDF. I mixed up a new small test batch of resin from one of the "newer gallons" that was already opened. Good it set up just fine. I mixed up a big batch, glassed over all the other crap again. God damned if the nasty old shit didn't come up to the surface and give me all kinds of hell. Back to the drawing board. I took a putty knife to it and scraped everything that was fubar up. Messed up the MDF a bit in the process...
Hmmm, this is gonna be a bitch. New plan-- I decided to dam up the really fucked up parts and pour resin and let it level. This left me with about a quarter inch of glass on the bad parts, and a lot less finish work as long as it doesn't delaminate
Anyhow, I have a lot of finish work ahead of me, but it is getting there. I also found a solution to the Tee nut issue, at home depot, of all places. They have a insert that threads into the MDF. I put some super glue on the inserts and threaded them in, and they look like they will work well. Picture bellow of the product.
Later,
Jason
M: M100, M44 for a custom amp project
Zx: Zx500, Zx450, Black Zx350
ZxTi: 4 Zx600Ti's, 1 Zx400Ti
Ti: 5 800.1's & 900.7 for a custom amp project. 1 1200.1, 1 1000.2
Tantrum: 2 1200.1's, 1 600.4, 1 500.2
XS: XS6600
Zx: Zx500, Zx450, Black Zx350
ZxTi: 4 Zx600Ti's, 1 Zx400Ti
Ti: 5 800.1's & 900.7 for a custom amp project. 1 1200.1, 1 1000.2
Tantrum: 2 1200.1's, 1 600.4, 1 500.2
XS: XS6600
i bought a 100pk of those threaded inserts from mc master carr. they work amazingly well. they even sell a hex bit with an oversized bell head to prevent from mounting the inserts too far into your MDF. worked like a charm when i did up my Fi Q enclosure.
2007 Scion Tc
Kenwood DMX097S
JL Audio TwK88
JL Audio HD900/5
Morel Virtus 602
PG Ti312D2 Sealed
Kenwood DMX097S
JL Audio TwK88
JL Audio HD900/5
Morel Virtus 602
PG Ti312D2 Sealed

Yeah I've used that resin pouring method before. Leave your box angled and let it set and harden in the corners, then flip it over and over until you do all the other corners. Works fantastic for stiffening up the box and making sure everything is absolutely sealed. However that's usually just on square boxes and not something as fancy as yours... so I definitely admire your patience!
So once that's all set, you plan to paint the interior black?
I have had issues with those screw in threaded inserts before... because it's nearly as easy to strip them as it is just using a regular screw in the first place. My mongoloid ham handed friends seem to be able to destroy everything however. Your superglue idea will hopefully take care of that though.
-
oldskoolmseriesfan

- Sherlock Homey
- Posts: 2517
- Joined: Sun Oct 19, 2008 10:03 pm
- Location: WEST SIIIIDE!!
-
fuzzysnuggleduck

- Soy Milquetoast
- Posts: 4423
- Joined: Wed Dec 06, 2006 1:08 pm
- Location: The best place on earth
- Contact:
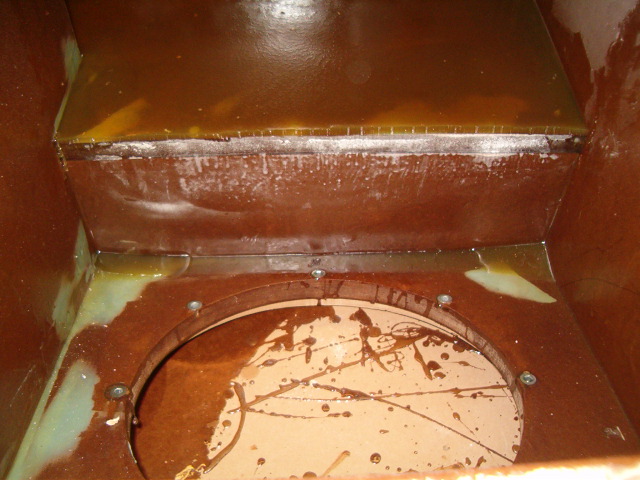
Most of the inserts have a flange that keeps them from going through the other side. The one pack I thought to take a picture of was evidently mis-shelved, because I got it in with three packs of the flanged ones. In the pic of the sub cutout above, you can see that they are flanged. Anyhow, along with the CA on the threads, they are now glassed in. I am actually going to have to run a tap through them all because some are completely obstructed with resin. They really ought not go anywhere...
I think that I am going to go buy some more resin over the weekend and take the time to set the box on each end, dam up all the panels and pour every surface. I am happy with what I have in there now, but it is going to be a royal PITA to sand and finish everything. By pouring it, if you work quickly enough, it mostly self levels before it sets. This will take a lot of the finish work out of the equation.
My choices on internal finish are as follows:
1)Hammered metalic paint if the resin turns out to be to wavy for other glossy finishes.
2)Possibly the same "candy" type rattle can paint I used on the ZX600 case, maybe the black. They make a silver flake primer for this stuff to make it look like candy over metal, regardless of base material.
3)Gloss black or white, but the interior will have to come out perfect for it...
Later,
Jason
M: M100, M44 for a custom amp project
Zx: Zx500, Zx450, Black Zx350
ZxTi: 4 Zx600Ti's, 1 Zx400Ti
Ti: 5 800.1's & 900.7 for a custom amp project. 1 1200.1, 1 1000.2
Tantrum: 2 1200.1's, 1 600.4, 1 500.2
XS: XS6600
Zx: Zx500, Zx450, Black Zx350
ZxTi: 4 Zx600Ti's, 1 Zx400Ti
Ti: 5 800.1's & 900.7 for a custom amp project. 1 1200.1, 1 1000.2
Tantrum: 2 1200.1's, 1 600.4, 1 500.2
XS: XS6600
Well, I have made some more progress. The box is all glassed. The last pour is still curing and will need sanded. I have a handful of spots that need filler, then I am going to spray it. All in all it is coming along quite well, although much slower than I would like...
Later,
Jason
Later,
Jason
M: M100, M44 for a custom amp project
Zx: Zx500, Zx450, Black Zx350
ZxTi: 4 Zx600Ti's, 1 Zx400Ti
Ti: 5 800.1's & 900.7 for a custom amp project. 1 1200.1, 1 1000.2
Tantrum: 2 1200.1's, 1 600.4, 1 500.2
XS: XS6600
Zx: Zx500, Zx450, Black Zx350
ZxTi: 4 Zx600Ti's, 1 Zx400Ti
Ti: 5 800.1's & 900.7 for a custom amp project. 1 1200.1, 1 1000.2
Tantrum: 2 1200.1's, 1 600.4, 1 500.2
XS: XS6600
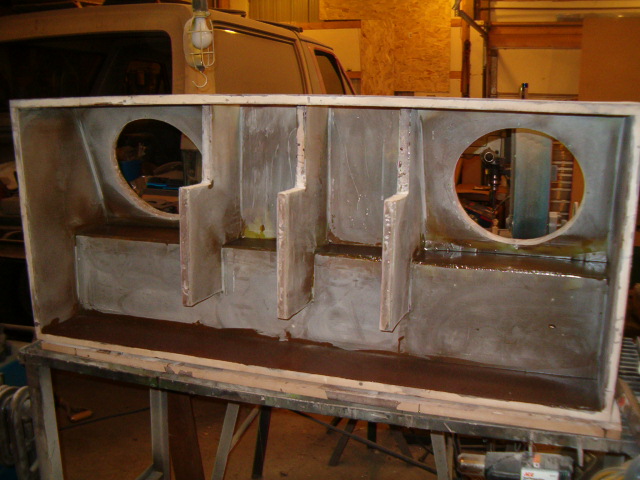
More work: Glass is all sanded, started on filler. I am almost done for the day...

Later,
Jason
Later,
Jason
M: M100, M44 for a custom amp project
Zx: Zx500, Zx450, Black Zx350
ZxTi: 4 Zx600Ti's, 1 Zx400Ti
Ti: 5 800.1's & 900.7 for a custom amp project. 1 1200.1, 1 1000.2
Tantrum: 2 1200.1's, 1 600.4, 1 500.2
XS: XS6600
Zx: Zx500, Zx450, Black Zx350
ZxTi: 4 Zx600Ti's, 1 Zx400Ti
Ti: 5 800.1's & 900.7 for a custom amp project. 1 1200.1, 1 1000.2
Tantrum: 2 1200.1's, 1 600.4, 1 500.2
XS: XS6600
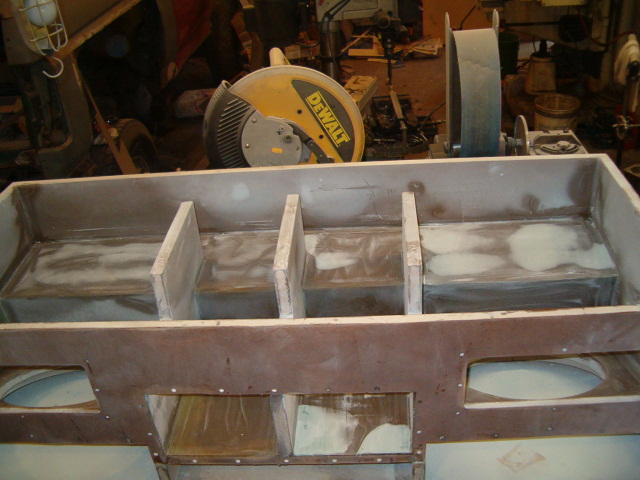
Filler is down and sanded out. Needs a bit more filler in the ports, then I have to put the port back together and finish that out. Then prep the top, sand some more, and throw some paint at it-- see what sticks
Done for the next few days though. Back to work tomorrow.

Later,
Jason
Done for the next few days though. Back to work tomorrow.
Later,
Jason
M: M100, M44 for a custom amp project
Zx: Zx500, Zx450, Black Zx350
ZxTi: 4 Zx600Ti's, 1 Zx400Ti
Ti: 5 800.1's & 900.7 for a custom amp project. 1 1200.1, 1 1000.2
Tantrum: 2 1200.1's, 1 600.4, 1 500.2
XS: XS6600
Zx: Zx500, Zx450, Black Zx350
ZxTi: 4 Zx600Ti's, 1 Zx400Ti
Ti: 5 800.1's & 900.7 for a custom amp project. 1 1200.1, 1 1000.2
Tantrum: 2 1200.1's, 1 600.4, 1 500.2
XS: XS6600
-
fuzzysnuggleduck
- Soy Milquetoast
- Posts: 4423
- Joined: Wed Dec 06, 2006 1:08 pm
- Location: The best place on earth
- Contact:
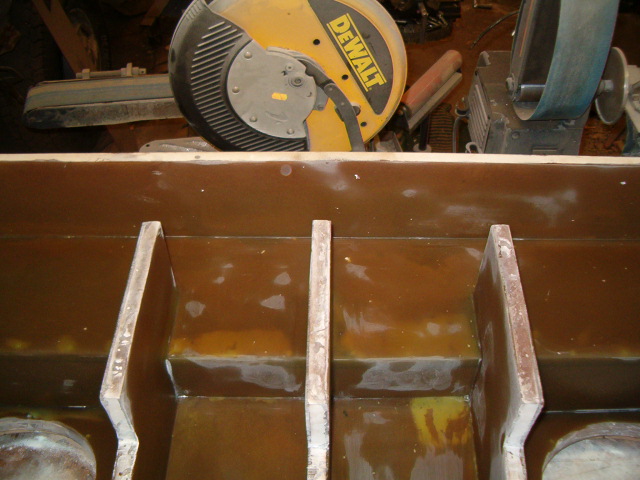
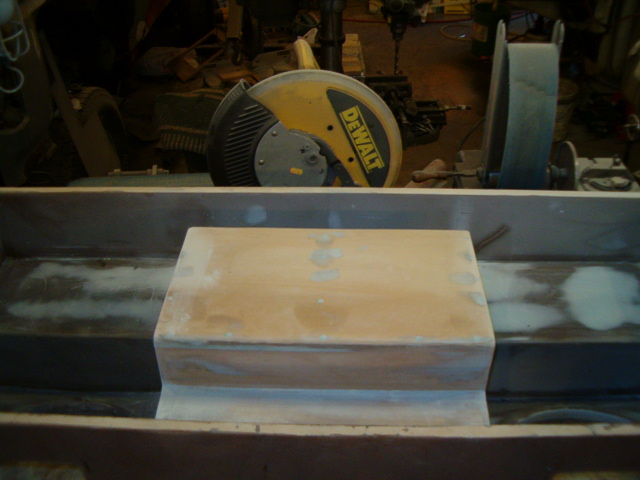
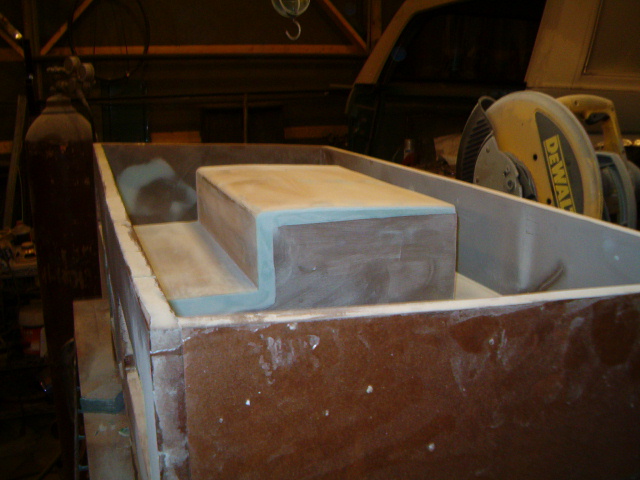
Almost done with it. Put the port together today and filled and sanded, x100. The back top of the port is tapered to just clear the box lid. With the lid on, the top will be screwed to the port to help stiffen it up.
Later,
Jason
Later,
Jason
M: M100, M44 for a custom amp project
Zx: Zx500, Zx450, Black Zx350
ZxTi: 4 Zx600Ti's, 1 Zx400Ti
Ti: 5 800.1's & 900.7 for a custom amp project. 1 1200.1, 1 1000.2
Tantrum: 2 1200.1's, 1 600.4, 1 500.2
XS: XS6600
Zx: Zx500, Zx450, Black Zx350
ZxTi: 4 Zx600Ti's, 1 Zx400Ti
Ti: 5 800.1's & 900.7 for a custom amp project. 1 1200.1, 1 1000.2
Tantrum: 2 1200.1's, 1 600.4, 1 500.2
XS: XS6600
-
fuzzysnuggleduck
- Soy Milquetoast
- Posts: 4423
- Joined: Wed Dec 06, 2006 1:08 pm
- Location: The best place on earth
- Contact:
Paint is down. Went with black hammered. It will be my next days off work before I get around to building an amp rack and installing it-- weather permitting.

Later,
Jason
Later,
Jason
M: M100, M44 for a custom amp project
Zx: Zx500, Zx450, Black Zx350
ZxTi: 4 Zx600Ti's, 1 Zx400Ti
Ti: 5 800.1's & 900.7 for a custom amp project. 1 1200.1, 1 1000.2
Tantrum: 2 1200.1's, 1 600.4, 1 500.2
XS: XS6600
Zx: Zx500, Zx450, Black Zx350
ZxTi: 4 Zx600Ti's, 1 Zx400Ti
Ti: 5 800.1's & 900.7 for a custom amp project. 1 1200.1, 1 1000.2
Tantrum: 2 1200.1's, 1 600.4, 1 500.2
XS: XS6600